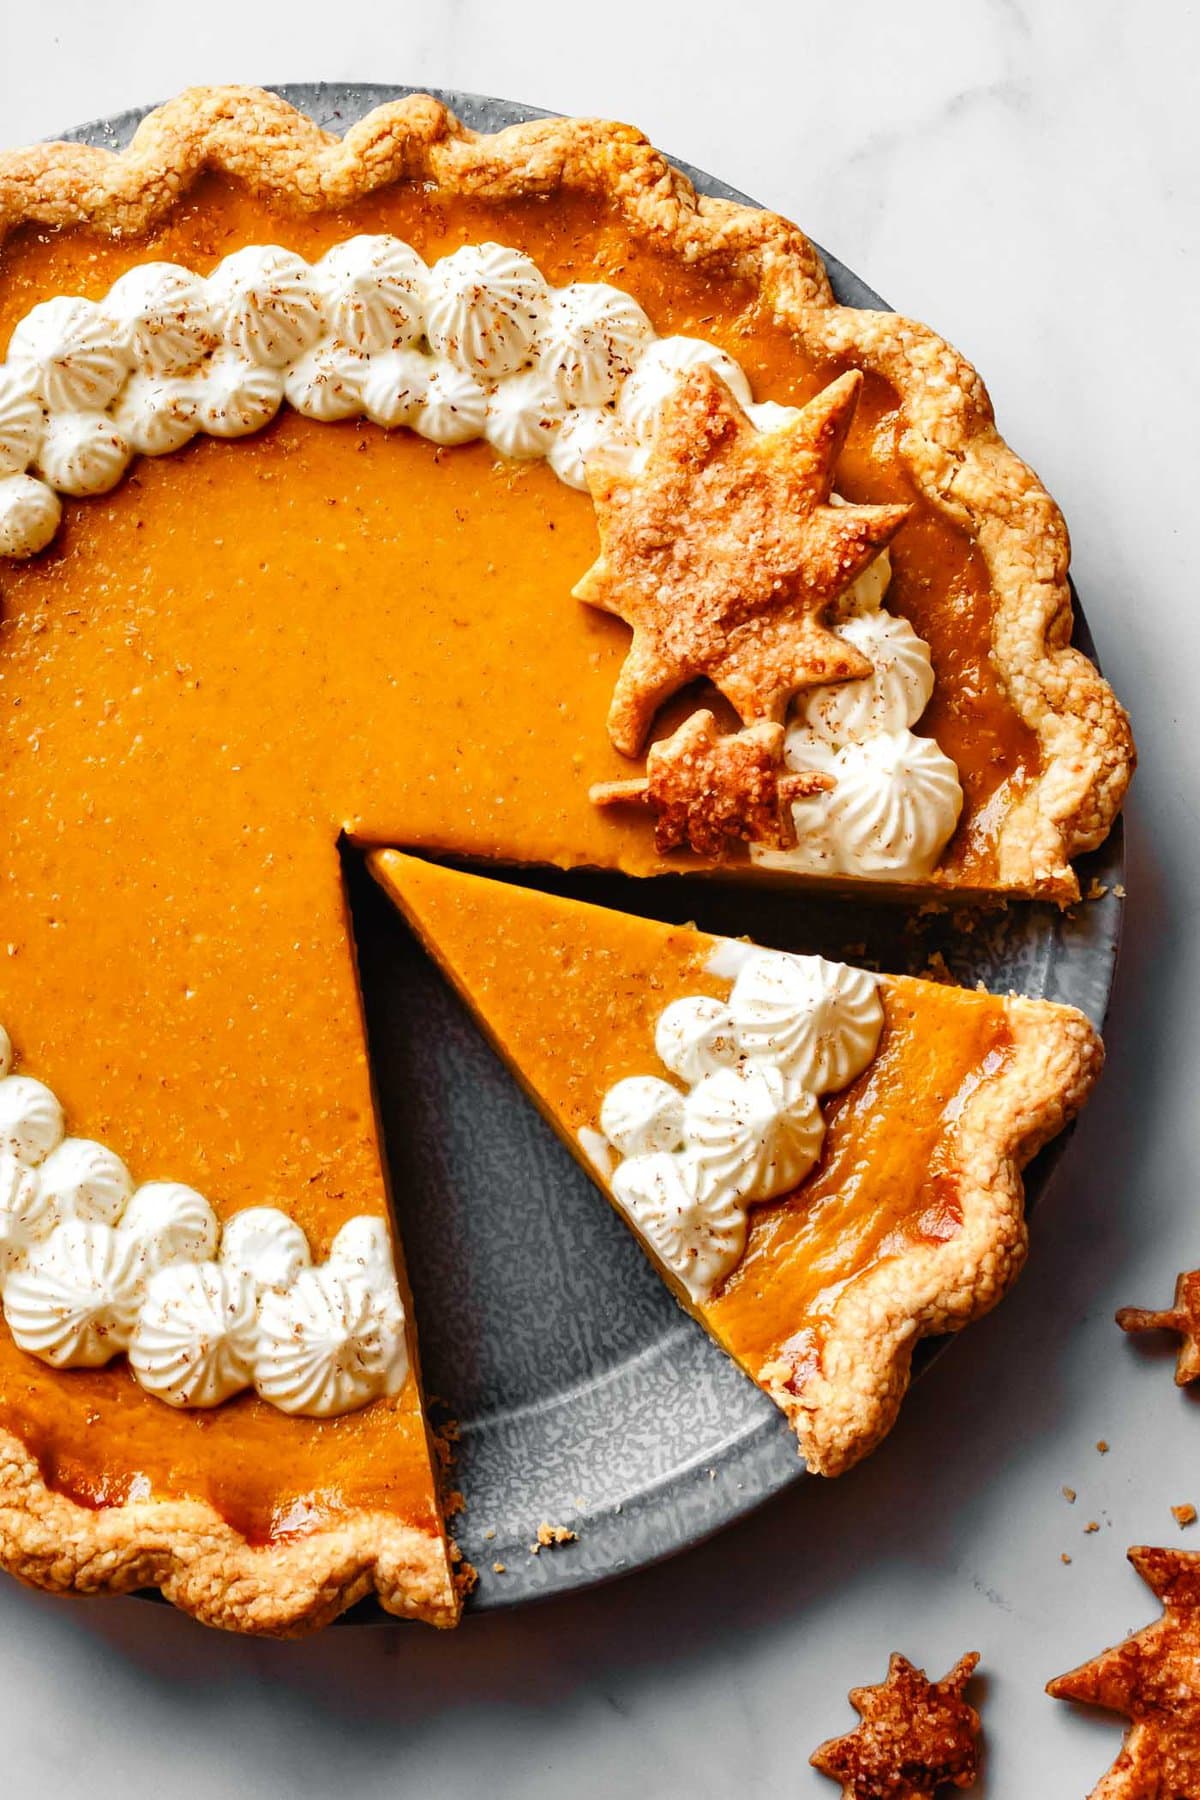
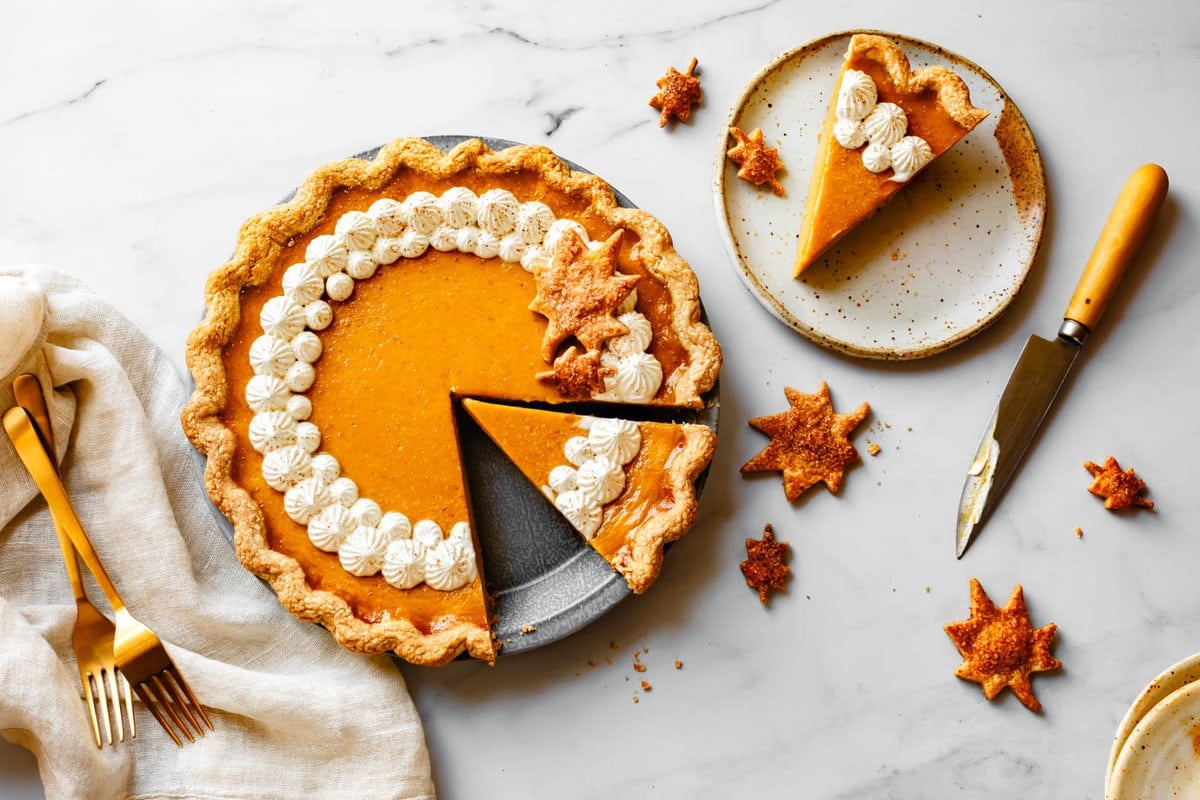
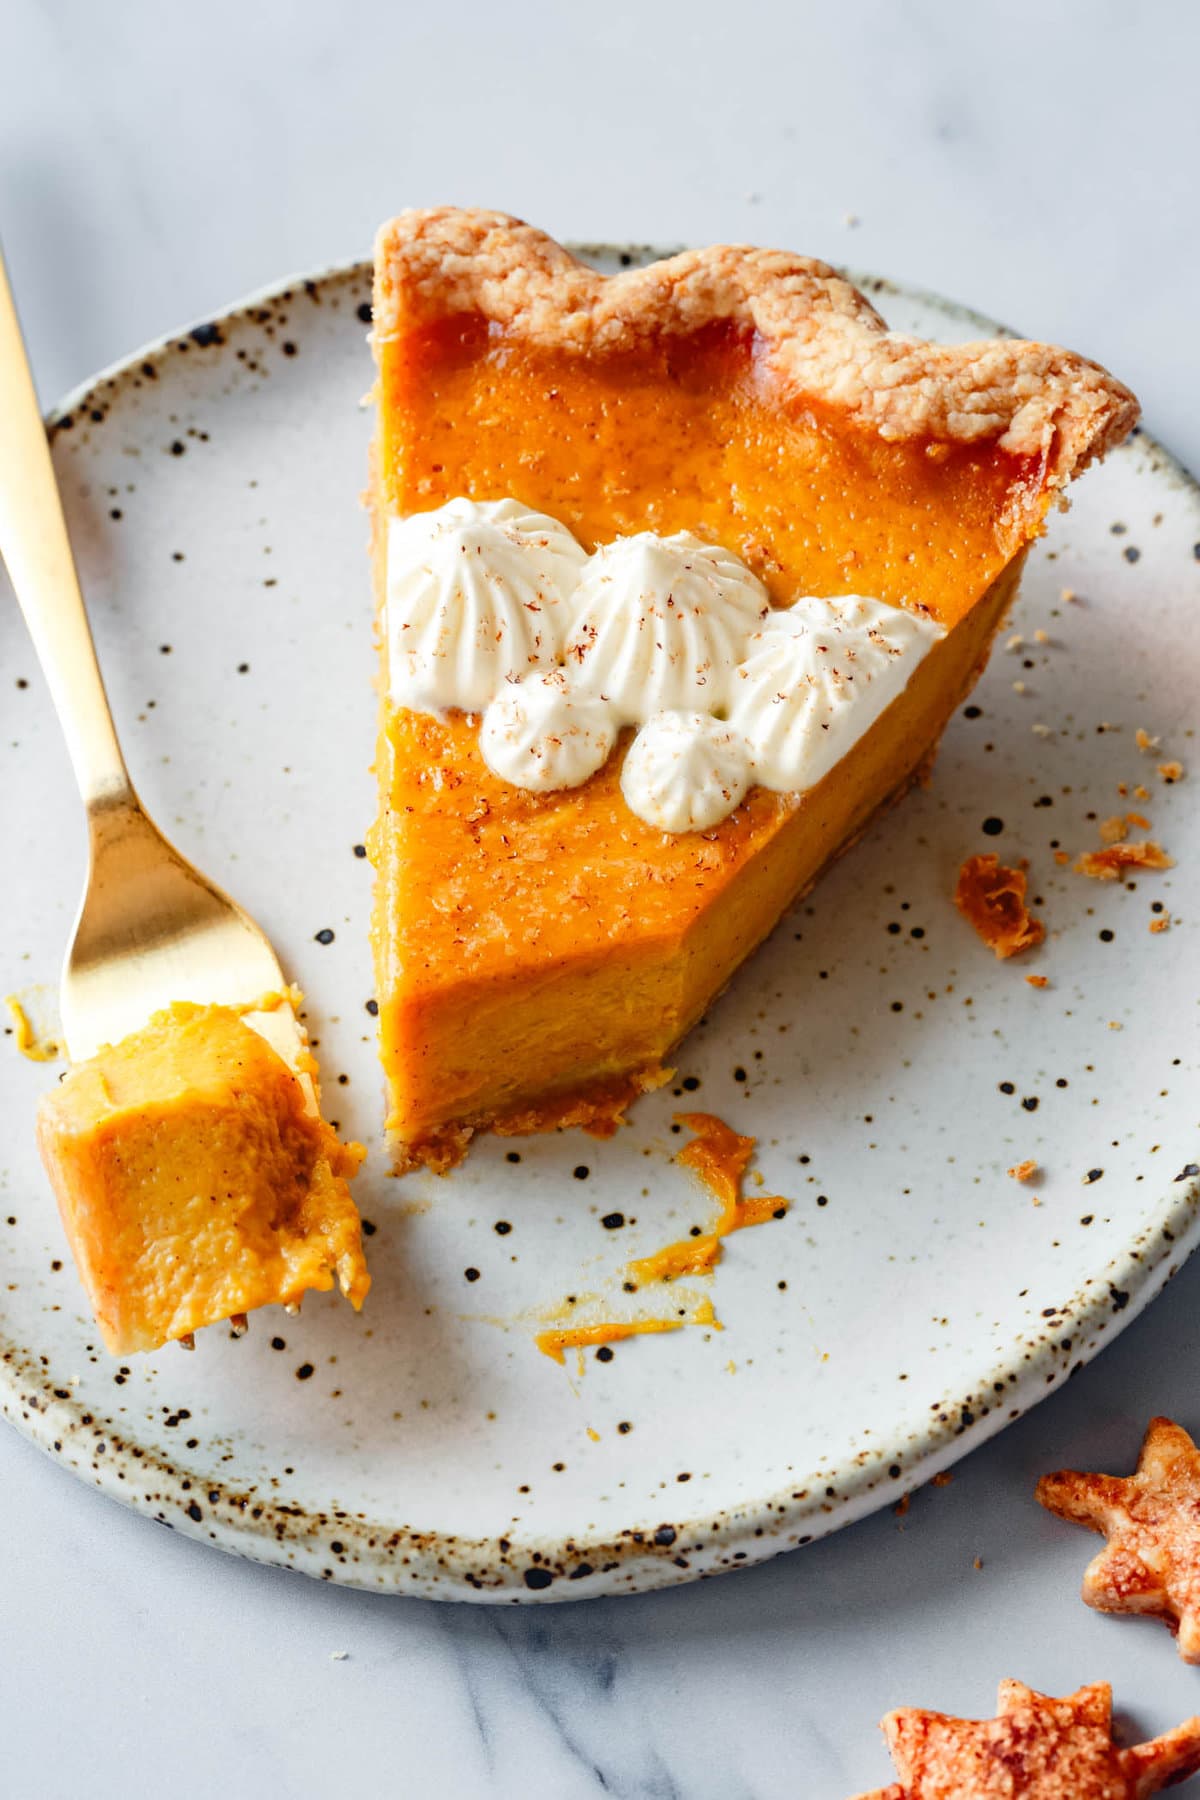
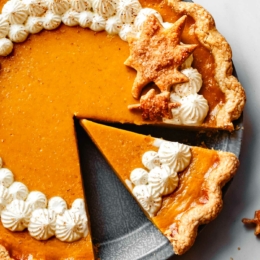
I have been testing and perfecting this gluten-free pumpkin pie recipe and filling since 2010, ensuring it is bright, fresh tasting, and as easy as possible to make at home. The pie filling itself is made without evaporated milk in just 10 minutes of active work time, and nestled into a flaky & tender gluten-free pie crust. Top it with whipped crème fraîche for a festive fall dessert!
Thanks to Vermont Creamery for sponsoring this post! All opinions are my own.
I've been making a version of this gluten-free pumpkin pie since 2010, when I first published a glutenous iteration of it here on TBG. I've spent years developing and streamlining this gluten-free version, and I'm so excited to share it with you today.
The Perfect Pie
In 2010, I adapted my original, glutenous pumpkin pie recipe from Cook's Illustrated and called it "Somewhat Fussy Pumpkin Tart." Like all their recipes, it used unusual methods and ingredients to get the best version of the dessert.
In this case, the recipe used a portion of mashed sweet potatoes in place of some of the pumpkin, a blend of maple syrup and white sugar to add sweetness and keep the color bright, and fresh ginger instead of powdered to add a bit of zip. It also called for cooking the pumpkin puree and spices for 7 minutes in a saucepan to evaporate some of the moisture, and straining the mixture through a sieve to make it silky smooth. It was baked at 400ºF for 10 minutes, then 300ºF for the remainder.
It was pretty epic, and a damn good pumpkin pie, though quite labor-intensive.
In 2016, I developed a slightly streamlined gluten-free pumpkin pie for my award-winning cookbook, and I'm excited to finally share this even simpler and equally delicious gluten-free pumpkin pie recipe here on TBG! If you're a fan of pie recipes and pumpkin desserts, you're going to love it.
Streamlining My Favorite Gluten-Free Pumpkin Pie Recipe
Since I'm already asking you to make the most ridiculously involved (but totally worth-it) gluten-free pie crust, I decided to streamline the filling ingredients and method.
This pumpkin pie filling is closer to a traditional (back-of-the-can) recipe, minus the evaporated milk, and it turns out a smooth, golden pumpkin pie with a not-too-sweet filling that smacks of maple syrup and just the right level of baking spices. It's made with 10 ingredients and about 10 minutes of active time.
I tested this version side-by-side with the more complex version I described above and I couldn't tell the difference, so the simpler method won. Read more about the method below!
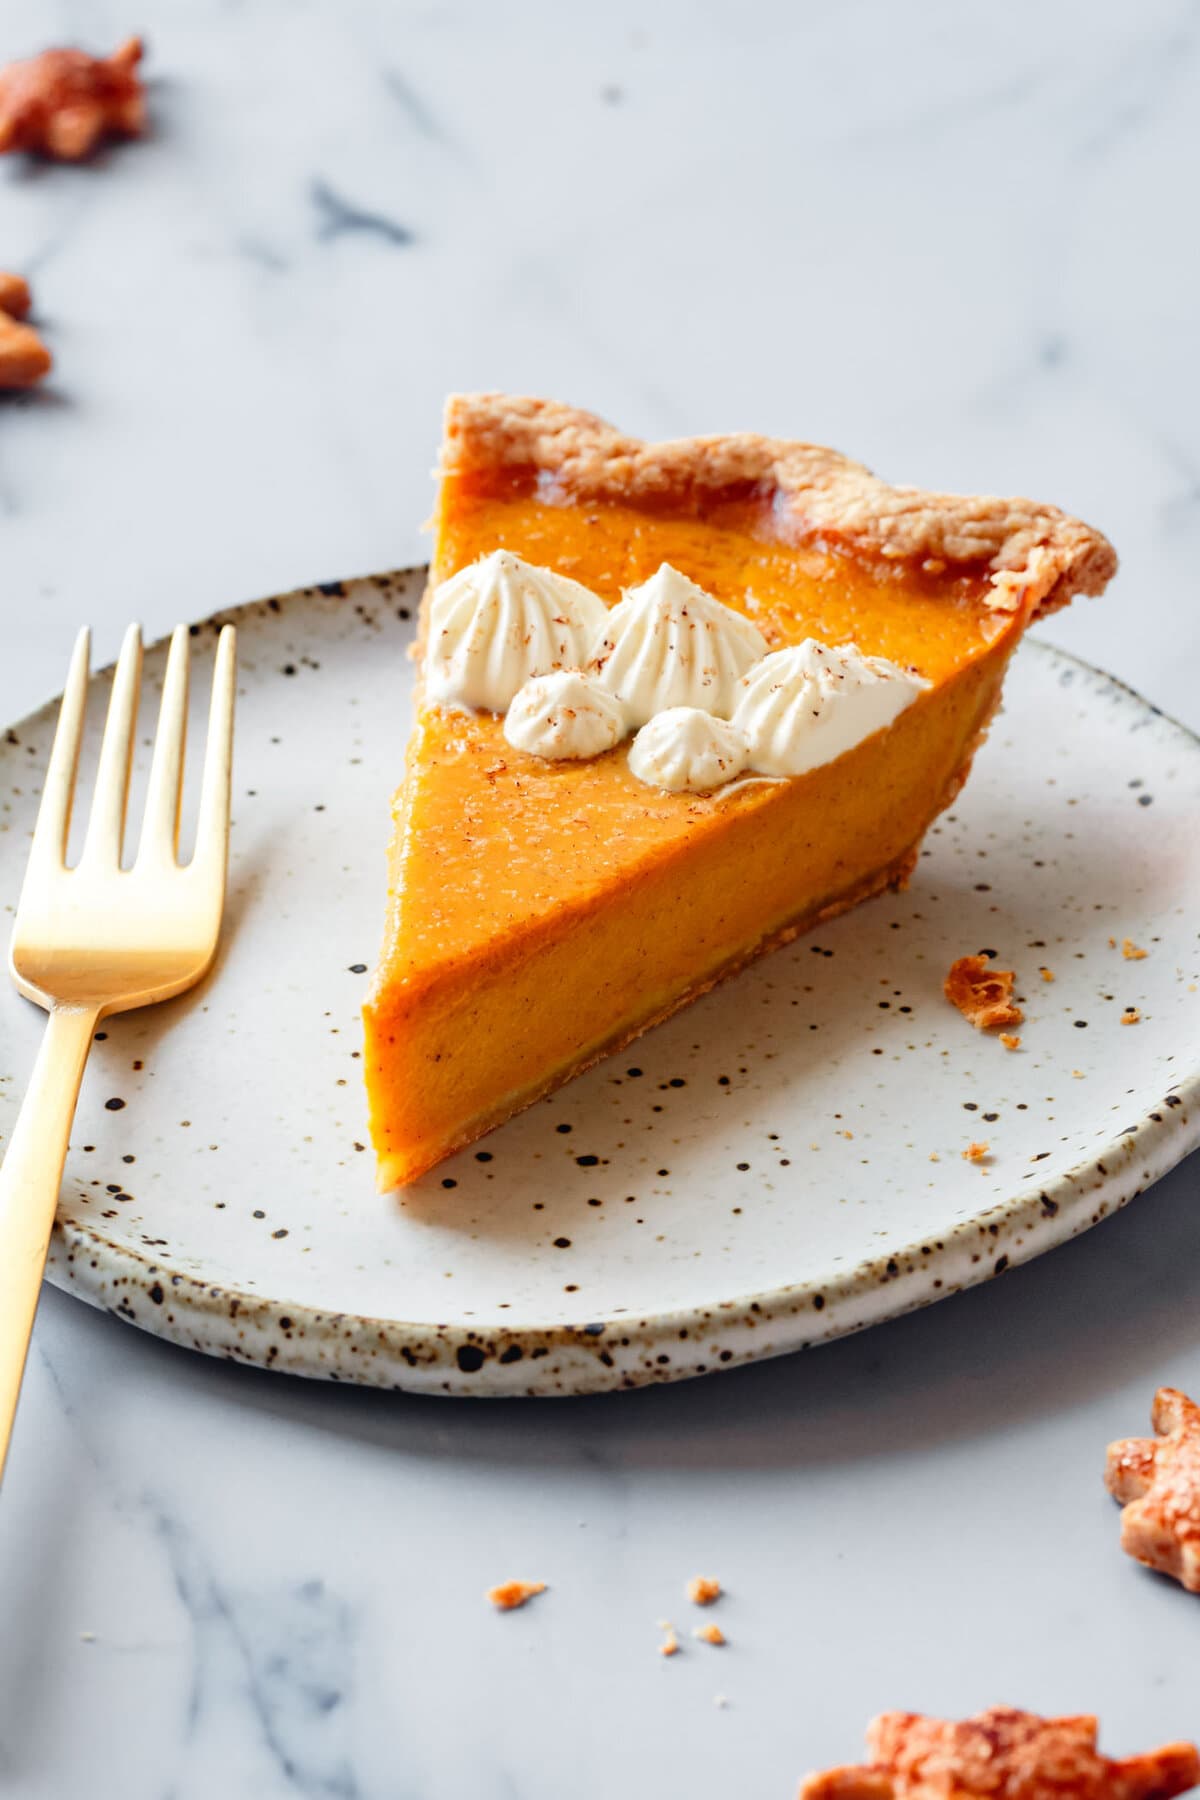
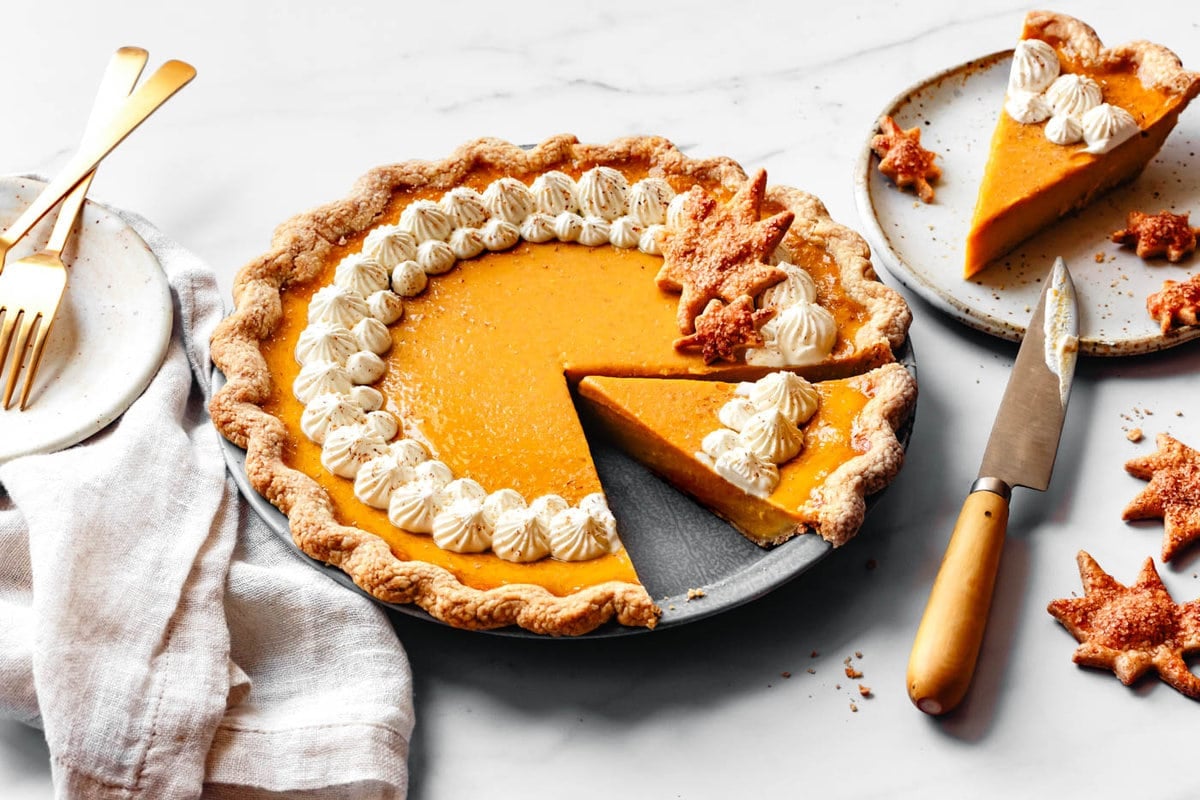
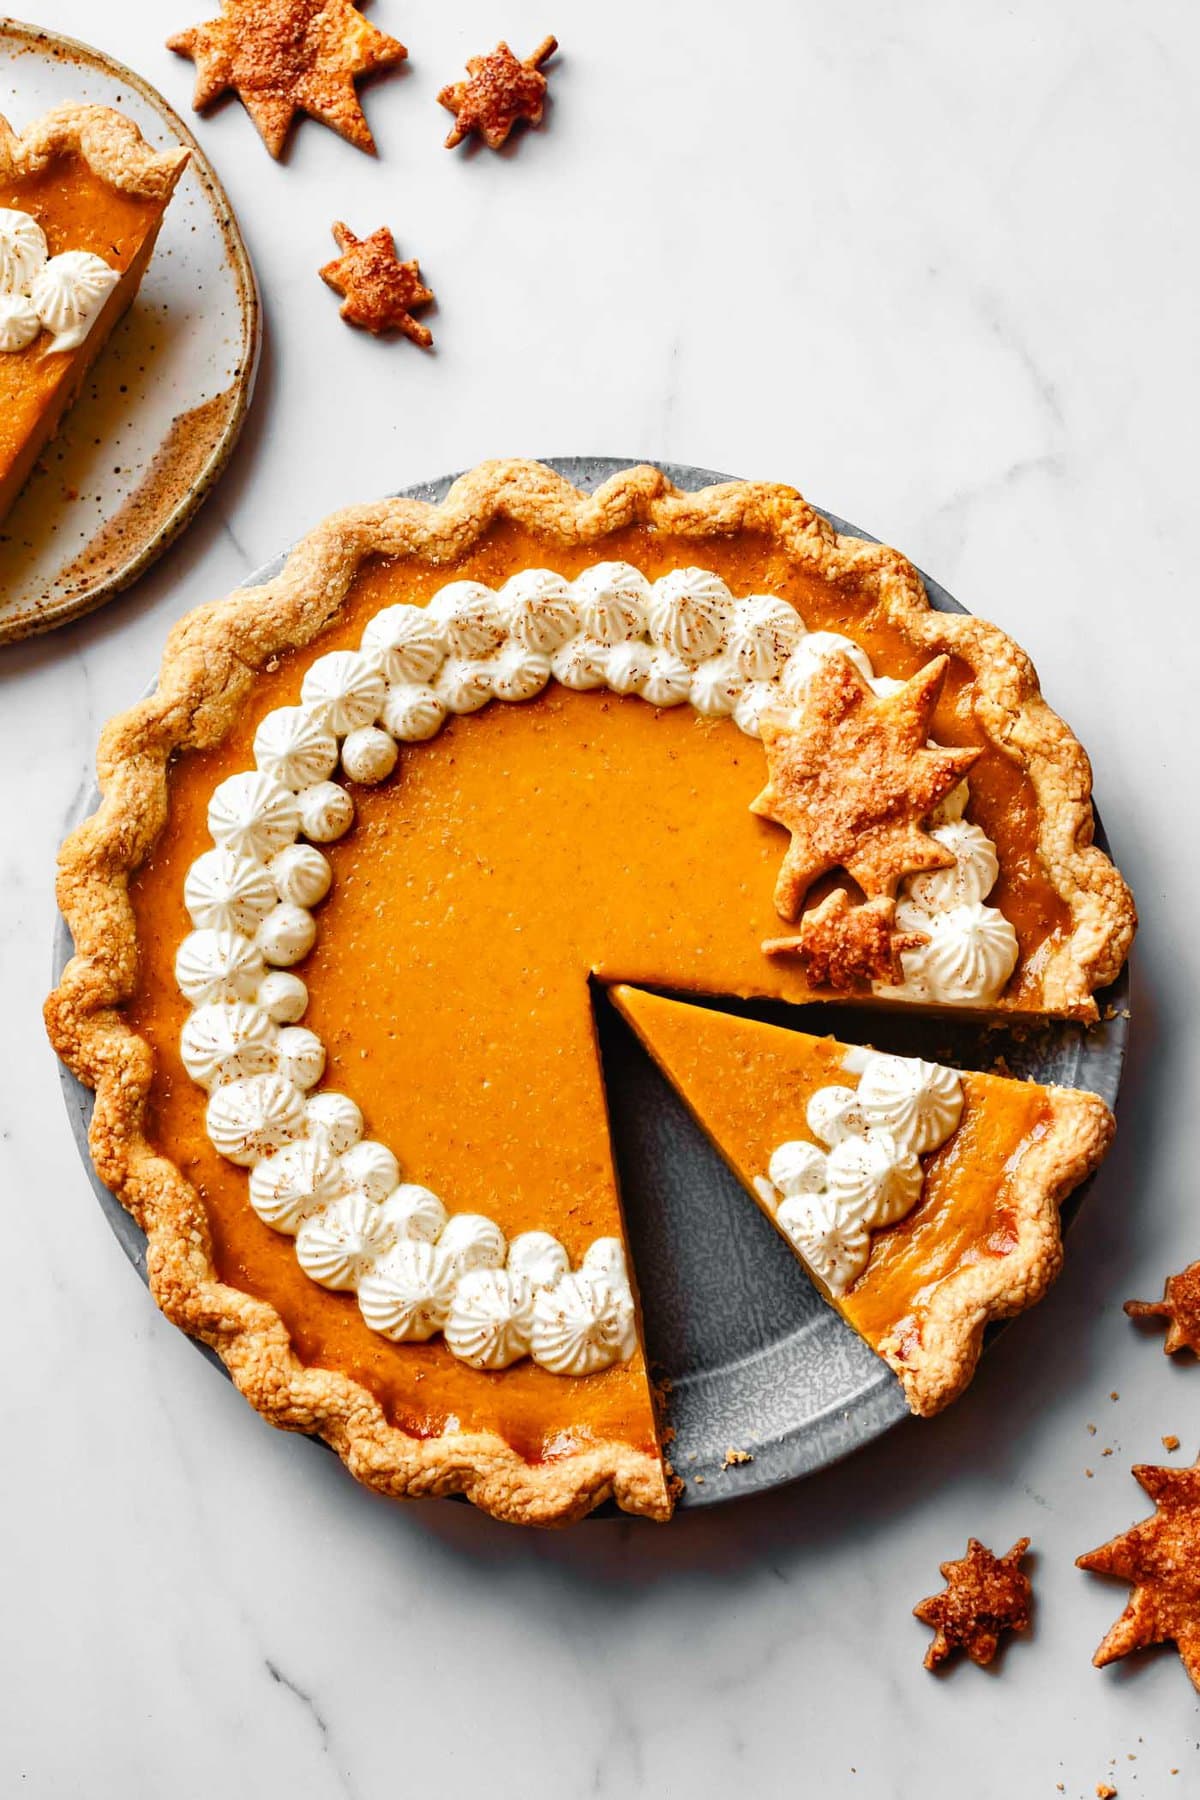
I finish slices with billows of crème fraîche whipped cream for a super-satisfying and entirely gluten-free pumpkin pie. Looking for a recipe that's free of grains, sugar, and dairy? Try my paleo pumpkin pie in an almond flour crust instead.
Why this Recipe Works
A few key ingredients and techniques set this gluten-free pumpkin pie apart:
- I use homemade pumpkin puree (made with butternut squash!) for brighter color and flavor (though canned pumpkin works great in a pinch!)
- Maple syrup adds earthy flavor while white sugar (instead of brown) keeps the color of the filling bright
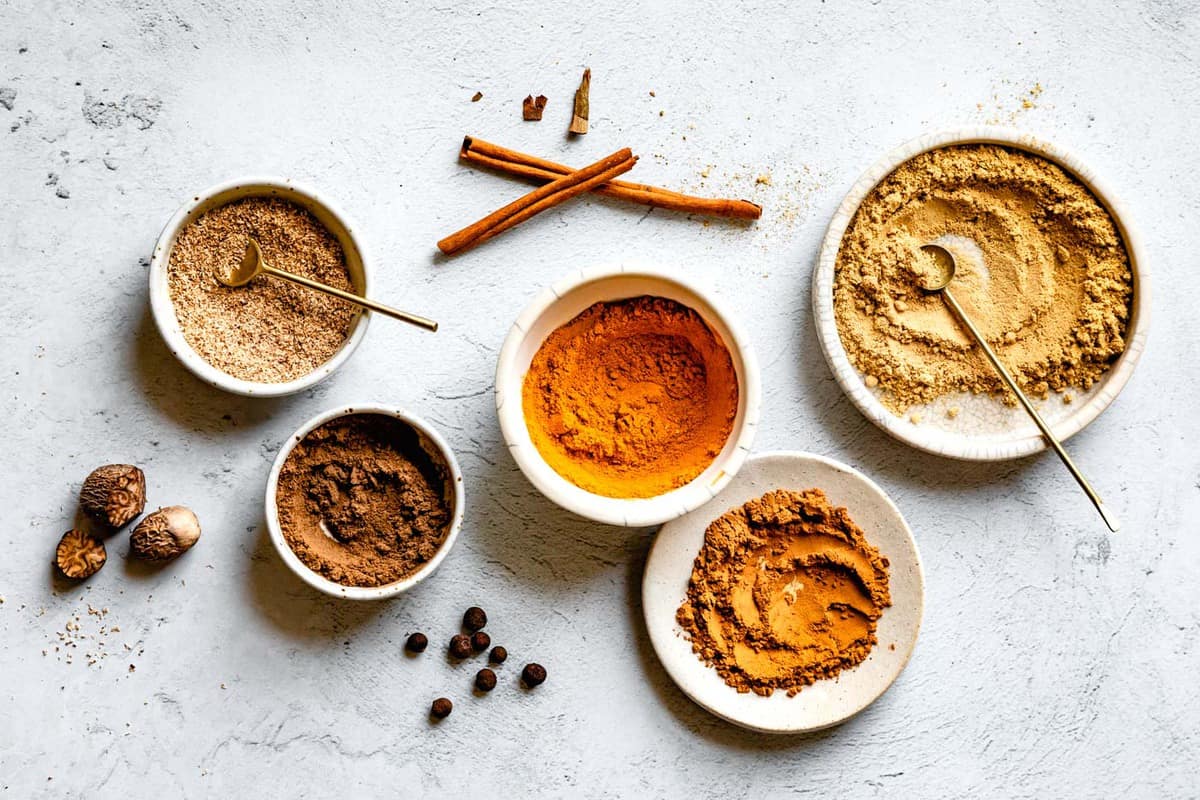
- Golden pumpkin pie spice adds bright color from turmeric, plus fresh fall flavor from ginger, cinnamon, fresh nutmeg, and allspice
- Fresh milk and cream (or crème fraîche) instead of evaporated milk keep the flavor fresh
- Eggs and a little flour set the filling, making it thick and creamy
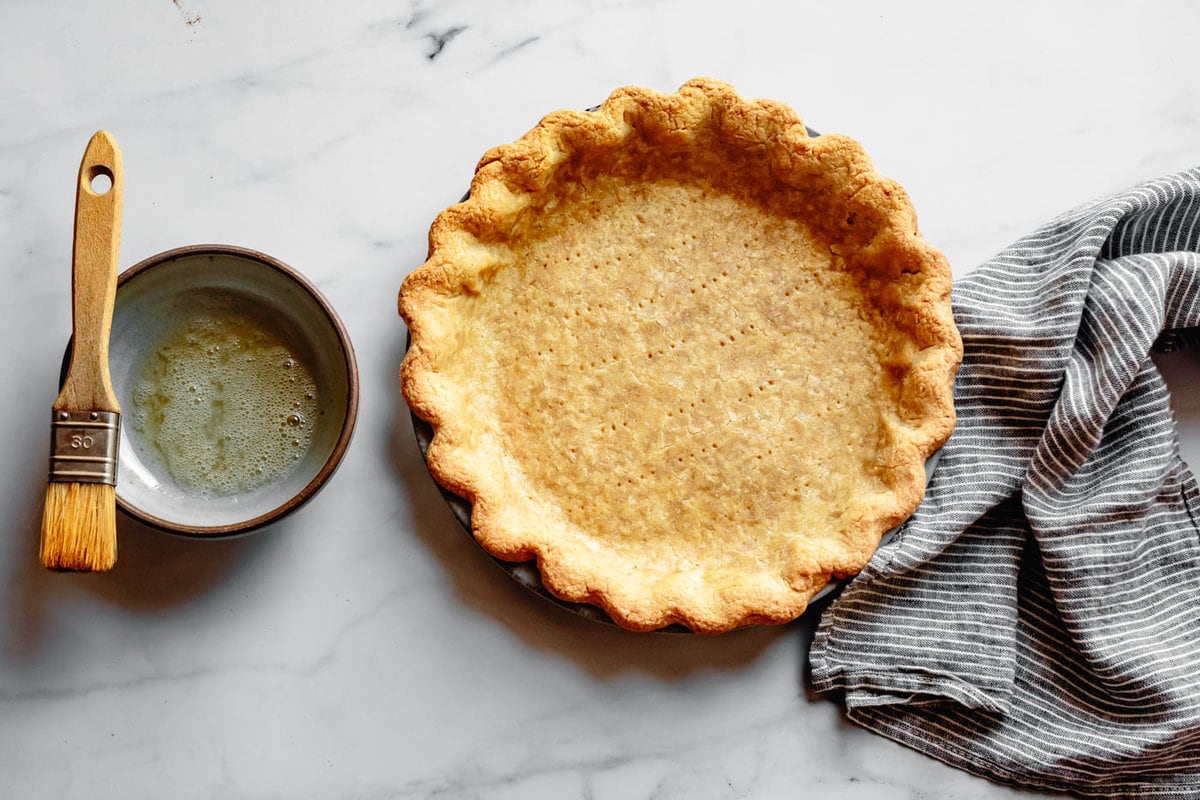
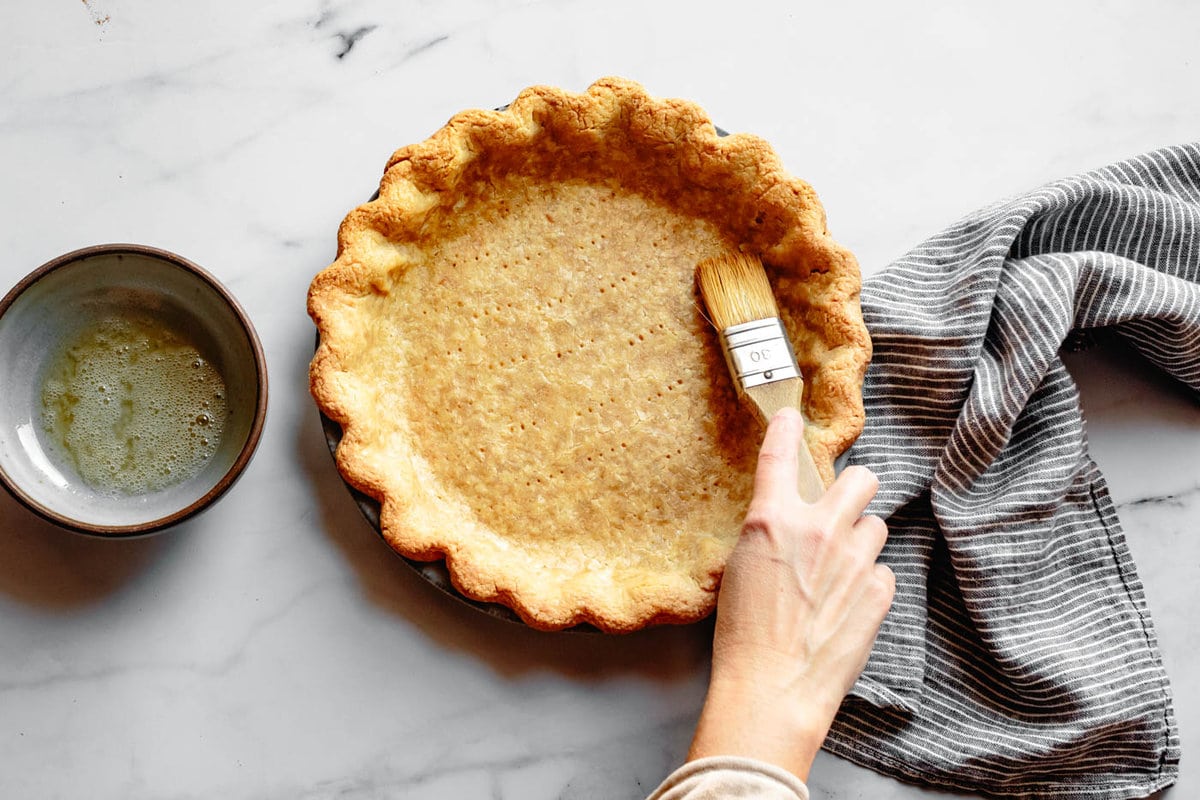
- Brushing the crust with egg white before adding the filling keeps it crisp longer (no soggy bottoms!)
- Removing the pie from the oven at the right time prevents the custard from overcooking and turning curdled and watery
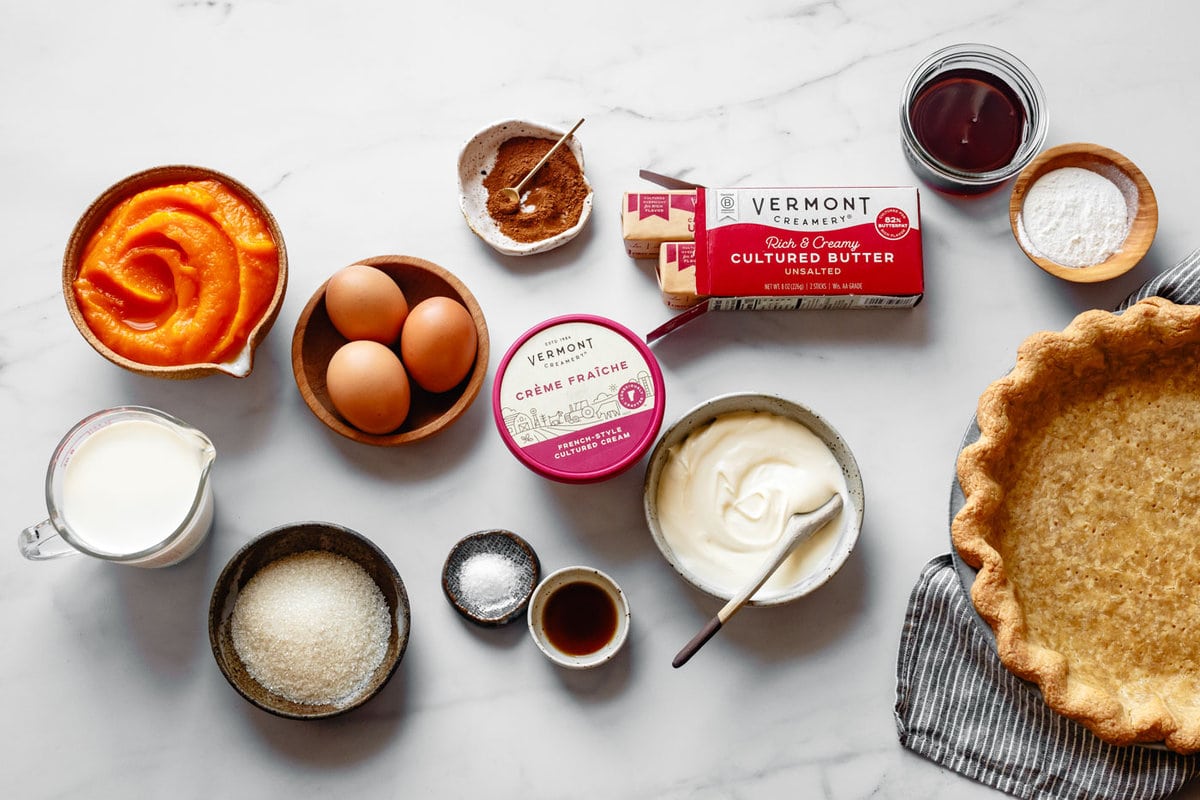
Ingredients & Substitution Suggestions
This pie recipe uses few ingredients, so it's important to choose high quality ones when possible.
I recommend baking with Vermont Creamery dairy because their products, including the cultured butter and crème fraîche used here, taste luxuriously rich and full of flavor. These products are crafted with care from fresh milk and cream produced by small, local farms, and they make this pie taste especially decadent!
Gluten-Free Pie Crust
- This recipe starts with my favorite gluten-free pie crust, which is made with sweet rice, oat, and millet flours, and no xanthan gum. For best results, use Vermont Creamery cultured butter, which has a fresh, nutty flavor and high fat content. This makes the crust especially flaky and flavorful. I also like to use 2 tablespoons of Vermont Creamery crème fraîche in the crust. The acidity in the cultured cream makes the crust extra-tender and protects it from shrinking in the oven.
- In need of a quicker crust? Make this gluten-free almond flour tart crust in under an hour. Or for a grain-free version, make this paleo pumpkin pie in a cassava & almond flour pie crust instead.
- Brushing the interior of the crust with beaten egg white creates a barrier between crust and filling to keep the crust crisp.
Creamy Pumpkin Pie Filling
This filling uses 10 ingredients. It's just sweet enough, gently spiced, and it gets a creamy, rich texture from fresh dairy instead of evaporated milk.
- Sugar and maple syrup sweeten the filling and keep the color bright.
- For refined sugar-free, use maple sugar in place of sugar. Or use coconut sugar, and the filling will have a slightly darker color.
- Sweet rice flour thickens the filling, absorbing some of the moisture and creating a luscious texture.
- Sub by weight gluten-free all-purpose flour.
- Golden pumpkin pie spice adds fall flavor and brightens the color.
- Eggs set the filling.
- For egg-free, make this vegan pumpkin pie bar recipe and bake it in a pie pan.
- Homemade pumpkin puree (which I actually make with butternut squash!) makes the filling taste extra bright and fresh.
- Other winter squash, such as kabocha, work too. Or use canned pumpkin puree.
- Milk makes a creamy base along with Vermont Creamery Crème Fraîche. The crème fraîche adds a bit of tangy flavor which is lovely.
- Sub heavy cream for crème fraîche. For dairy-free, make this paleo pumpkin pie filling instead.
- Vanilla and salt sharpen the flavors.
How to Make Gluten-Free Pumpkin Pie
Here are some step-by-step photos to help make this recipe foolproof for your baking enjoyment!
This recipe makes 1 (9-inch) gluten-free pumpkin pie, serving 8-10 people. Feel free to double the recipe to feed a crowd!
Crust
Filling
This creamy pumpkin pie filling takes just 10 minutes of active time once you've made the crust. Be sure to leave a few hours for cooling and chilling the pie before you plan to serve it!

What to Serve with Pumpkin Pie?
Some favorite fall holiday serving suggestions.
Make it a festive holiday meal:
- Gluten-Free Stuffing (Dressing) with Leeks & Goat Cheese - classic stuffing, elevated with gluten-free bread and creamy goat cheese
- Roasted Delicata Squash with Brown Butter - so tender and flavorful
- Green Goddess Crème Fraîche Mashed Potatoes - creamy, bright green, and herbaceous!
- Gluten-Free Mushroom Gravy - umami goodness to spoon over mashers
Have a pie party:
- Sweet Potato Pie - also adapted from Cook's Illustrated and topped with crispy pecans
- Maple Bourbon Pecan Pie - no corn syrup here!
- Paleo Apple Pie - maple sweetened and cinnamon-kissed
- Almond Flour Apple Crisp - everybody's favorite apple recipe!
On the side:
- Mascarpone Cream - tastes like whipped cheesecake!
- Crème Fraîche Whipped Cream - silky and tangy whipped goodness
Pumpkin Pie All Year 'Round
Jay and I are both pretty much obsessed with pumpkin pie. We believe that it shouldn't be relegated to a particular holiday, but that it's appropriate to eat any and every month of the year.
Thankfully with this streamlined recipe, it's easier than ever to have gluten-free pumpkin pie at the ready. I hope you love it too!
Bojon appétit! For more Bojon Gourmet in your life, follow along on Instagram, Facebook, or Pinterest, purchase my award-winning gluten-free baking cookbook Alternative Baker, or subscribe to receive new posts via email. And if you make this gluten-free pumpkin pie recipe, I’d love to know. Leave a comment and rating below, and tag your Instagram snaps @The_Bojon_Gourmet and #bojongourmet.
Gluten-Free Pumpkin Pie Filling & Flaky Homemade Crust
Print Recipe Pin RecipeIngredients
Crust
Filling
- ¼ cup (50 g) organic granulated sugar*
- 2 tablespoons (17 g) sweet white rice flour*
- 2 teaspoons golden pumpkin pie spice
- ½ teaspoon fine sea salt
- 3 large eggs, plus remaining egg yolk from crust
- 1⅞ cups (425 g) homemade pumpkin puree or 1 (15-ounce) can pumpkin puree
- ¼ cup plus 2 tablespoons (90 ml) maple syrup
- ¾ cup (177 ml) whole milk*
- ½ cup (120 ml) heavy cream or Vermont Creamery Crème Fraîche*
- 1 teaspoon vanilla extract
For Serving
Instructions
Crust:
- Make the crust and parbake as directed.
- Brush the interior of the crust all over with the beaten egg white (reserve the egg yolk for the filling) and return to the oven until set, 2 minutes. This will keep the crust crisp.
- Place the crust on a rimmed baking sheet lined with parchment for easy cleanup. If your crust has cooled, place it in the oven until hot just before pouring in the custard, 3-5 minutes.
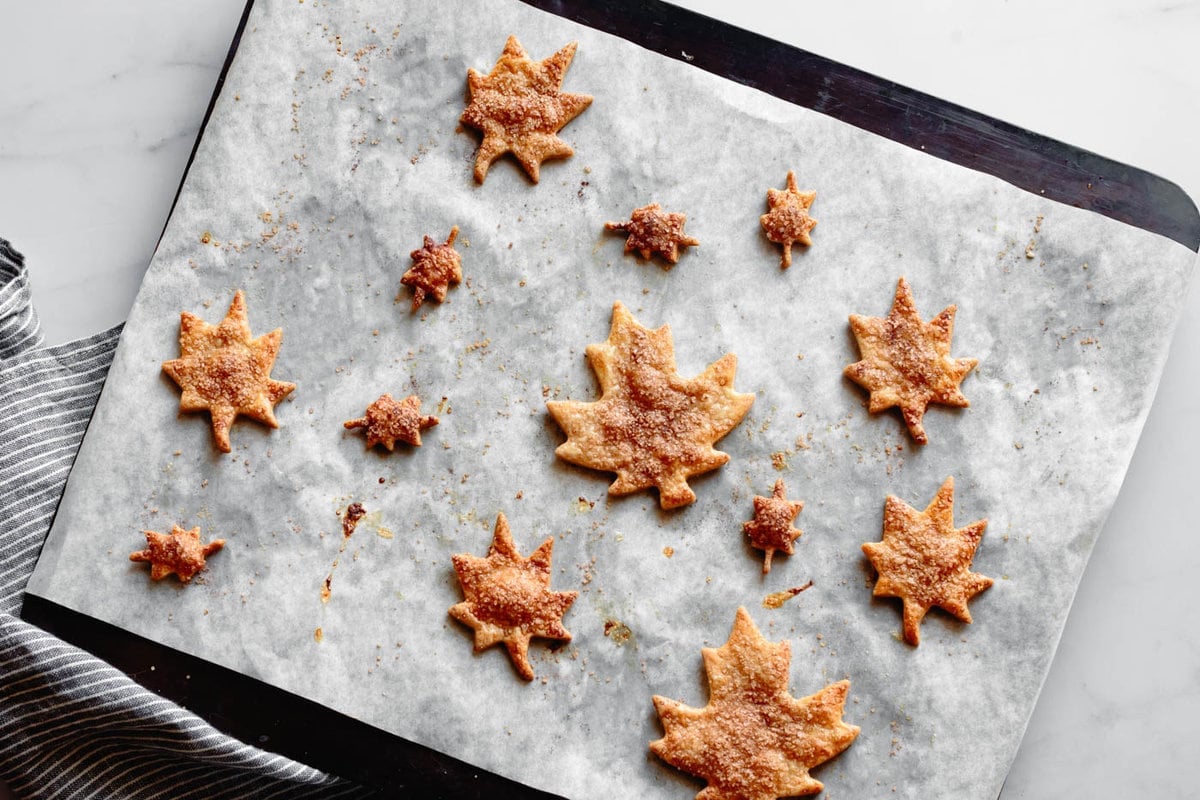
- If you like, roll out any pie crust scraps and cut them into leaf shapes with cookie cutters. Brush with egg white, sprinkle with cinnamon sugar, and bake alongside the pie until golden and crisp.
Filling:
- Position a rack in the lower third of the oven and preheat to 325ºF.
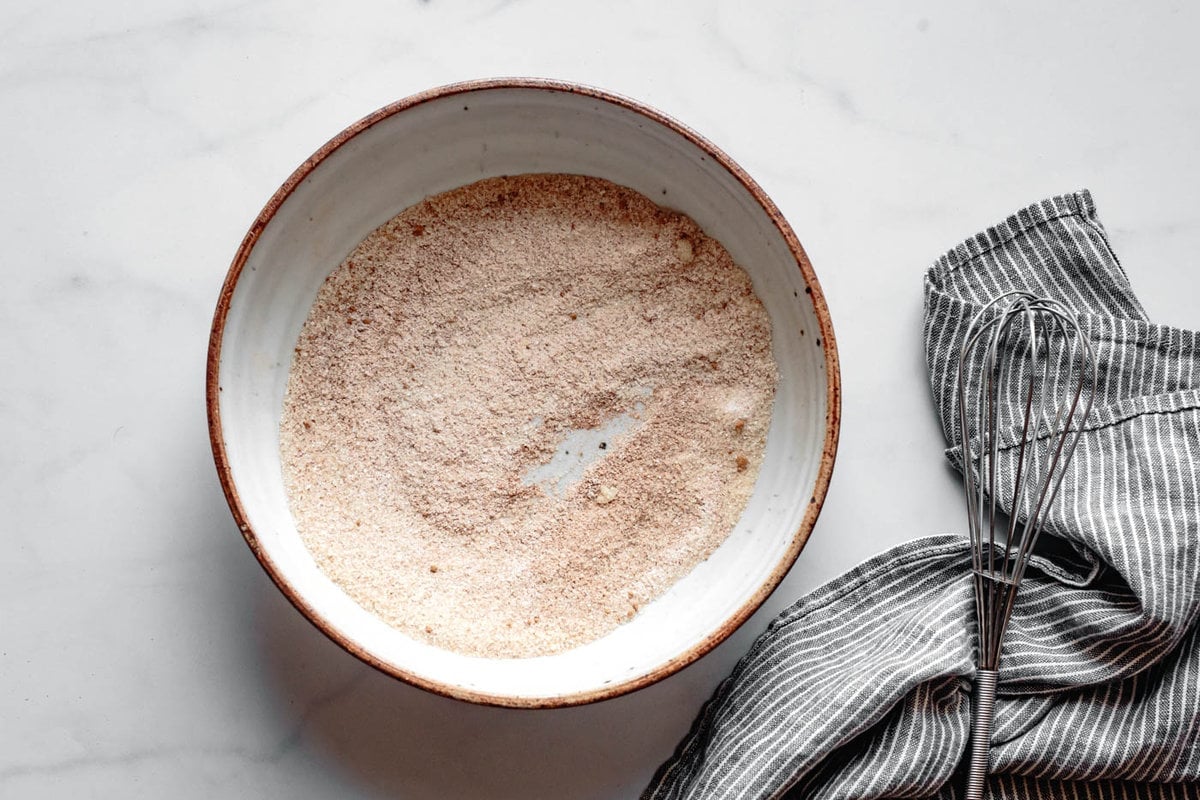
- In a large bowl, whisk together the sugar, sweet rice flour, pumpkin spice, and salt.
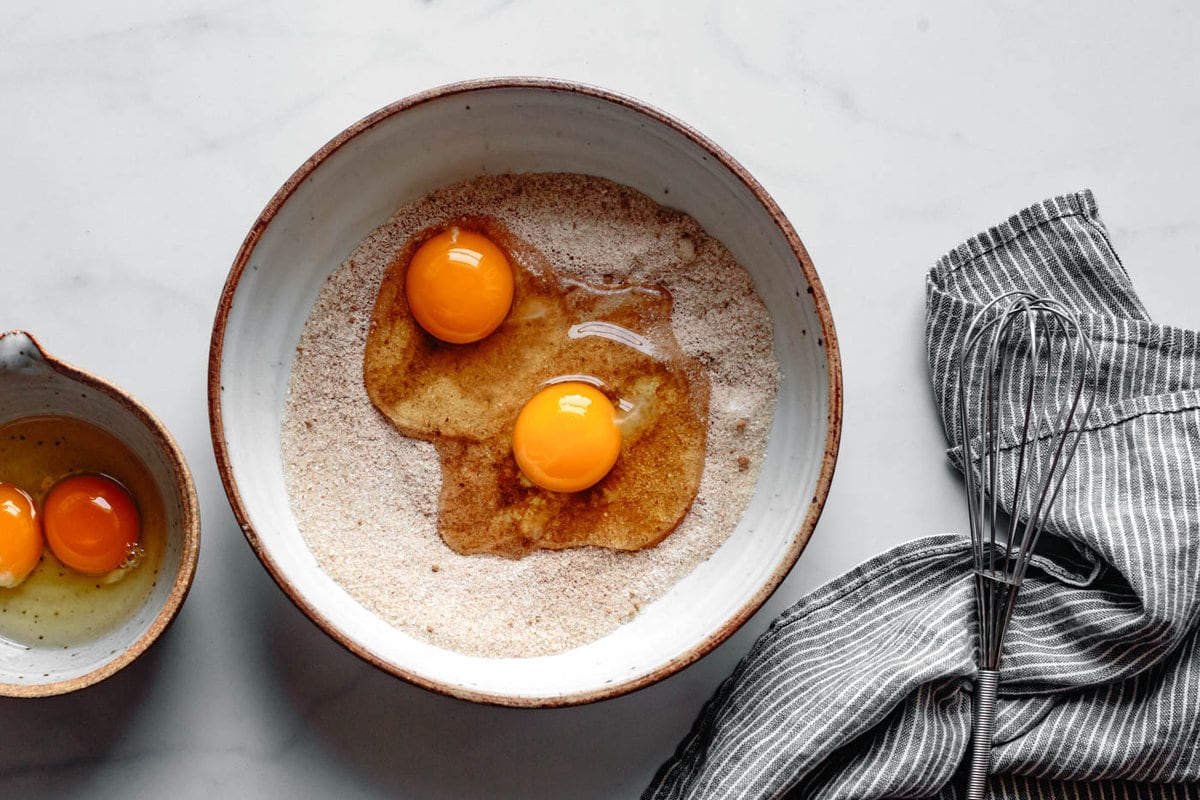
- Add two of the eggs, gently whisk smooth, then add the remaining egg and egg yolk and whisk to combine. Whisk slowly so that you don’t incorporate too much air into the filling.
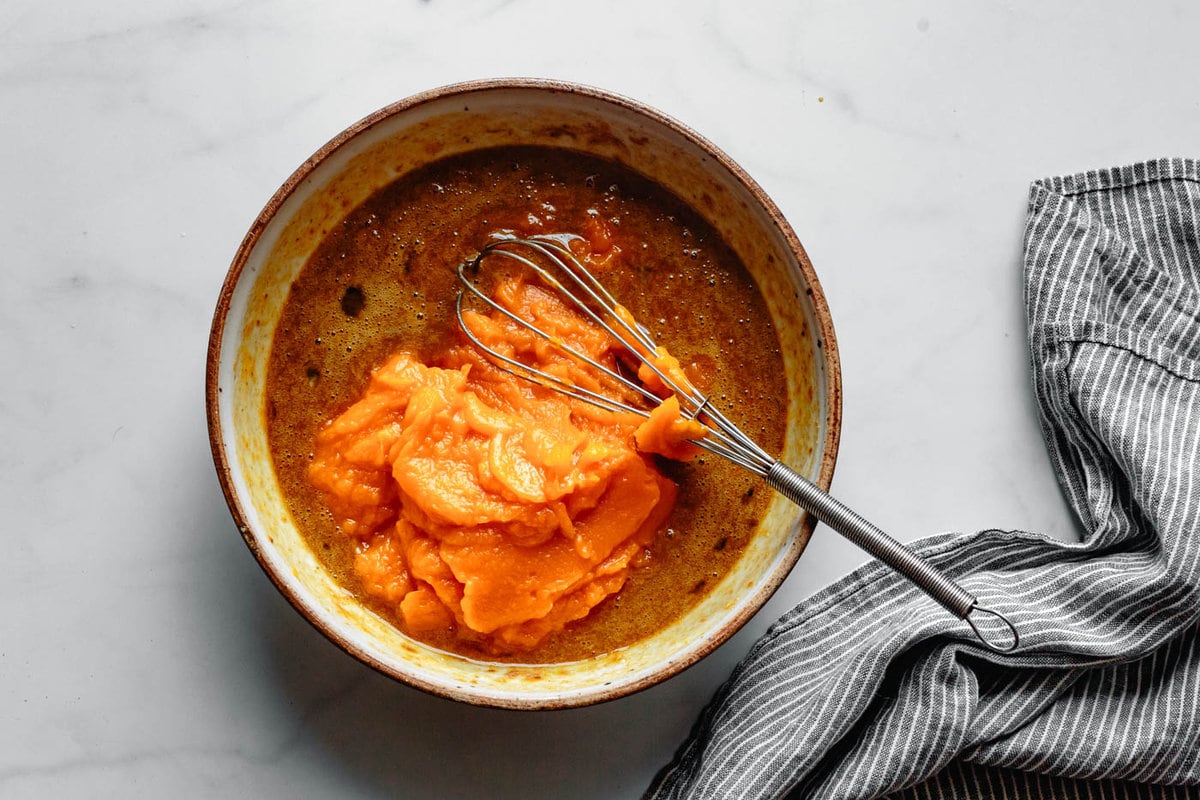
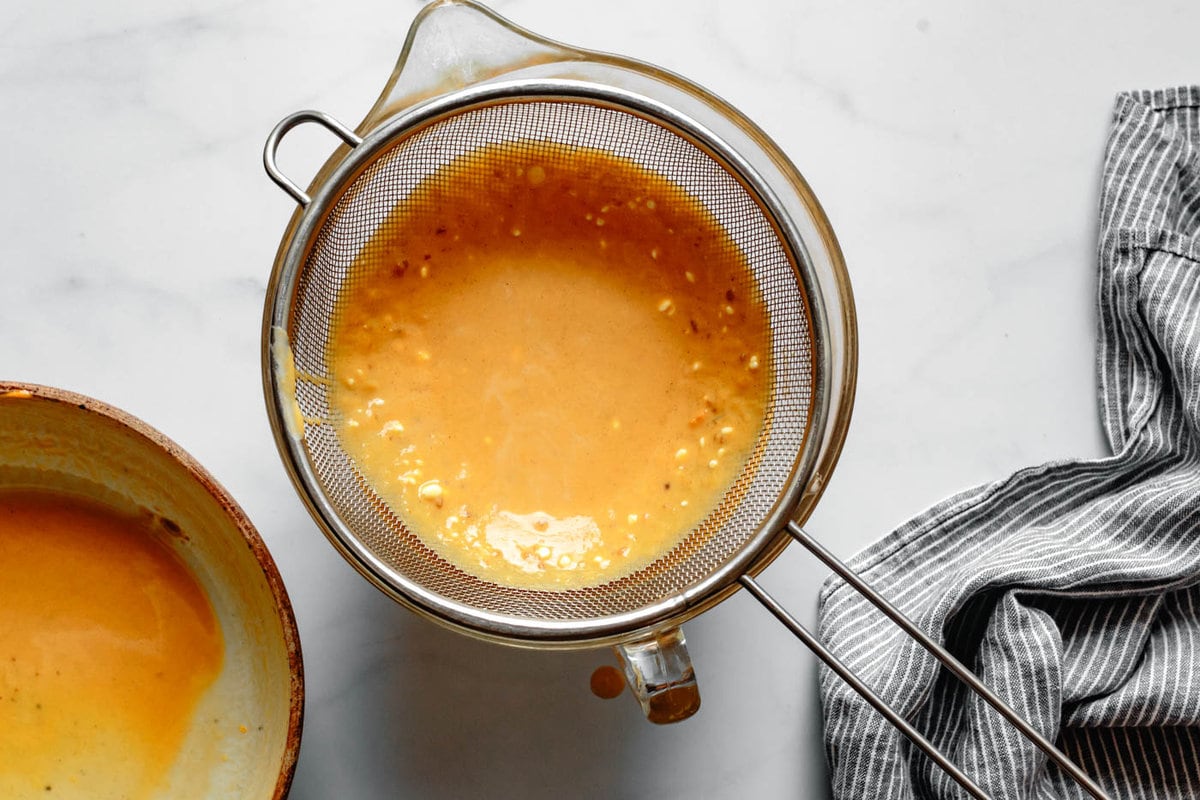
- Slowly whisk in the pumpkin puree, then the maple syrup, cream or crème fraiche, and milk.
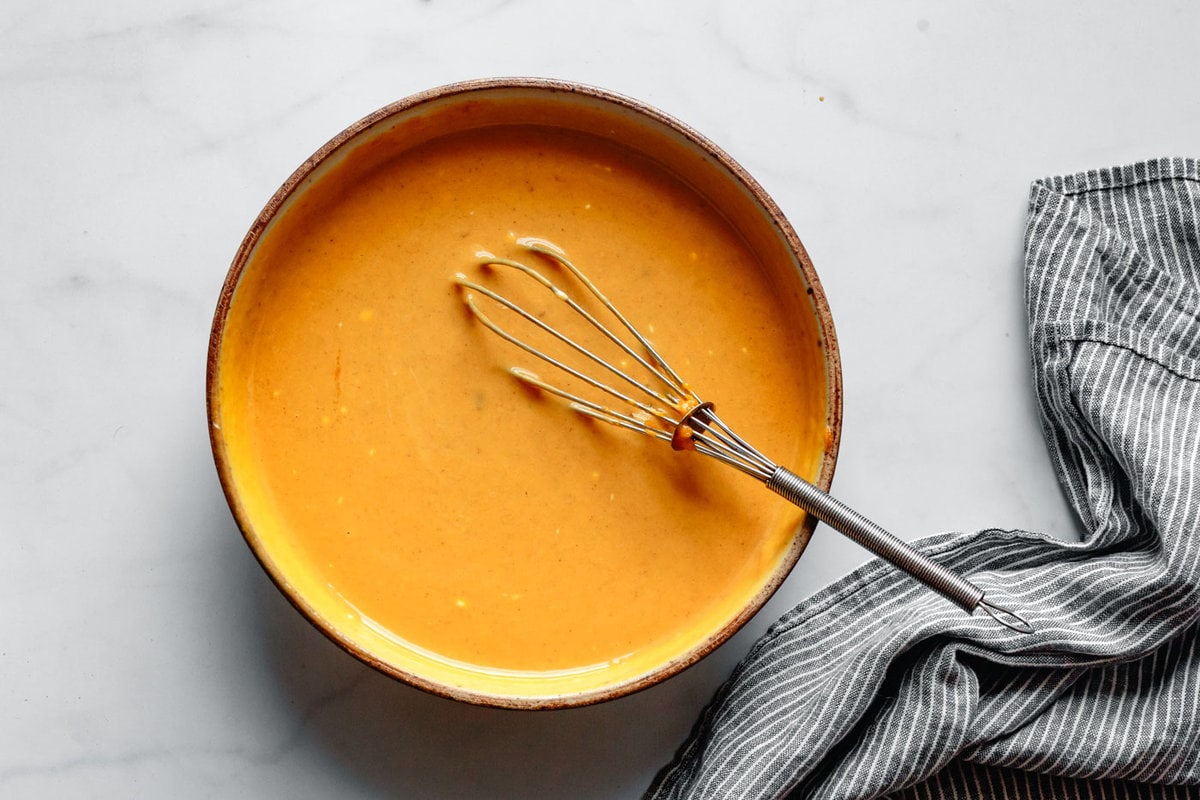
- Strain the custard through a medium-mesh strainer to remove any eggy bits.
Baking:
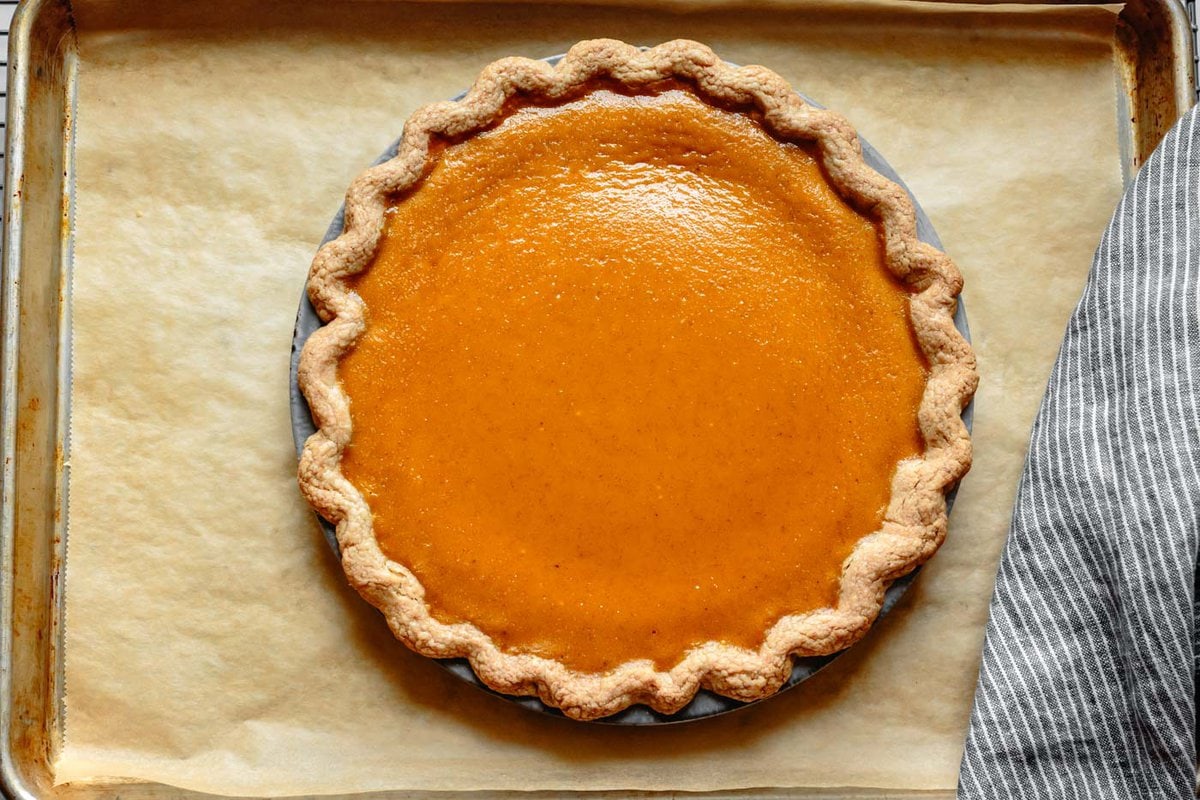
- Pour the custard into the hot pie crust and very carefully transfer to the oven. Alternatively, place the pie on the rack in the oven and carefully pour in the filling. Any leftover filling can be baked in a ramekin alongside the pie.
- Bake the pie at 325ºF until the outer edges are set and slightly puffed and the center wobbles like Jell-O, 45-65 minutes. Take care not to overbake the pie in order to keep the texture smooth and creamy.
- Let the pie cool completely at room temperature, 2–3 hours.
- For the cleanest slices, chill until firm, 1–2 hours. Cut into wedges and serve cool or at room temperature with whipped crème fraîche.
- The pie is best the day of baking but will keep, refrigerated airtight, for up to 3 days, or frozen for up to 2 months.
Notes
- In place of sugar, sub by weight maple sugar or coconut sugar
- In place of sweet rice flour, use a gluten-free all-purpose flour blend such as Bob’s Red Mill 1 to 1
- For dairy-free, use use 1¼ cups canned full-fat coconut milk in place of the milk and cream, and serve with whipped coconut cream
- In place of golden pumpkin pie spice, use a store-bought blend or use the following:
- ¾ teaspoon ground ginger
- ¾ teaspoon ground cinnamon
- ¼ teaspoon freshly grated nutmeg
- ⅛ teaspoon ground turmeric (optional, mostly for color)
- ⅛ teaspoon ground allspice
- The prep and cook time here reflect making the filling only.
- Give yourself at least 4 hours to make the crust, and 4 hours to cool and chill the pie, much of which is inactive.
- In need of a quicker pie crust? Use this almond flour press-in crust, which can be made in under an hour, start to finish.
- The pie crust dough can be wrapped and refrigerated for up to 2 days or frozen for up to 2 months.
- The homemade pumpkin puree can be made and refrigerated for up to 2 days or frozen for up to 2 months.
- The pumpkin pie filling can be made and refrigerated for up to 2 days.
- The pie is best the day of baking when the crust is crisp, but it can be made ahead and refrigerated for up to 1 day.
- The baked pie can be frozen, but it can make the filling a bit curdled and watery. Defrost completely before serving.
- The whipped crème fraîche can be refrigerated for up to 1 day; re-whip before serving to recombine any liquid that has separated out.


Emily R says
I’ve been making this recipe out of the cookbook for years. I was thinking about taking a break this year for Canadian Thanksgiving because it’s quite involved. Then my nephew told me that it was the best pie in the world, so how could I say no to that! I appreciated the streamlined filling component. I tried subbing a less involved pie crust last time but had to come back to your crust recipe because it’s so much better. Everyone commented on how this was the perfect sweetness. Thanks for making my family think I am a star baker!
Alanna Taylor-Tobin says
Awwww I'm so glad you and your family love the pie! Your nephew has impeccable taste. :D I'm so happy to hear the the newer streamlined version held its own to the original and that the fussy crust is worth the effort. Thanks so much for the sweet note!
Amber says
Hi! I have making your recipe for years now. The recipe had called for a jeweled sweet potato along with the butternut squash. Is this that a different recipe than this one? Thank you. Your recipes are always so yummy.
Alanna Taylor-Tobin says
Hi Amber,
So glad you're liking the recipes, that means a lot to me!
I streamlined the pumpkin pie recipe a bit, but not to worry - I'll email you the original one with the sweet potatoes. Check your inbox!
xo,
A
Connie says
I had to make the crust twice to get it right. The first time, I did something boneheaded--- I put the crust back in the oven to warm it before adding the filling and put it directly on the hot pizza stone, forgetting to put the rimmed baking sheet under it, so the bottom got browner than I would prefer. Still, the filling was done, so I added it anyway and then used 2 stacked rimmed sheets so I had a double cushion (an idea I got from another of your recipes) and baked it anyway. I then made a new pie but since I did not have enough butternut squash and creme fraiche for another pie, so I used canned pumpkin and condensed milk. The traditionalists in my family preferred pie number 2 and my gluten-free daughter preferred pie number 1 and said the crust was fine (I thought it was too dark although it did not taste burnt). I noted, while making the second pie, that your recipe calls for a glass pie dish; I had not noticed that before and I had used my metal one for the first pie (the pictures seem to show a metal pan). So, that was another factor that improved the crust on the second one.
Alanna Taylor-Tobin says
Aw man, I'm sorry you ended up having to make 2 pies (although "too much pie" said no one ever!) I'm glad they were both enjoyed!
Oh yes thanks for the feedback about the metal vs. glass pan - both work, but the metal pan bakes a bit more quickly. My class pie has higher sides so I prefer using it, but the metal pan looks nice for photos so I used it here.
Thanks a bunch for the note!