This paleo pie crust recipe rivals a wheat crust! Made with 8 ingredients including almond flour, cassava flour, and tapioca flour, this recipe makes a smooth, pliant pie crust dough that you can roll, fold, flute, and weave. It's gluten-free, grain-free, dairy-free, egg-free, with vegan with a nut-free option too.
Use this grain-free pie crust in any pie recipe, from paleo pumpkin pie to maple-sweetened apple pie - the pie's the limit. Thanks to Bob's Red Mill for sponsoring this post!
As a former pastry chef, I have strong opinions about pie crust: it needs to be buttery, flavorful, tender, and flaky or it isn't worth the effort.
Most paleo pie crust recipes use a single flour and they tend to turn out pale, crumbly crusts that don't feel or taste like the real deal. I set out to see whether I could make a paleo pie crust that rivaled my favorite gluten-free pie crust which I developed for my gluten-free cookbook Alternative Baker.
Using that recipe as a starting point, I tested three versions with different blends of gluten-free flours. One used only cassava flour, one used cassava plus almond flour and tapioca flour, and one used cassava and tiger nut flours for nut-free.
While all versions were good, the version made with cassava, almond, and tapioca flours was the clear winner. This crust tastes every bit as buttery and delicious as its wheaty counterpart, you won't believe it's free of grains and gluten.
Cassava & Almond Flour Pie Crust
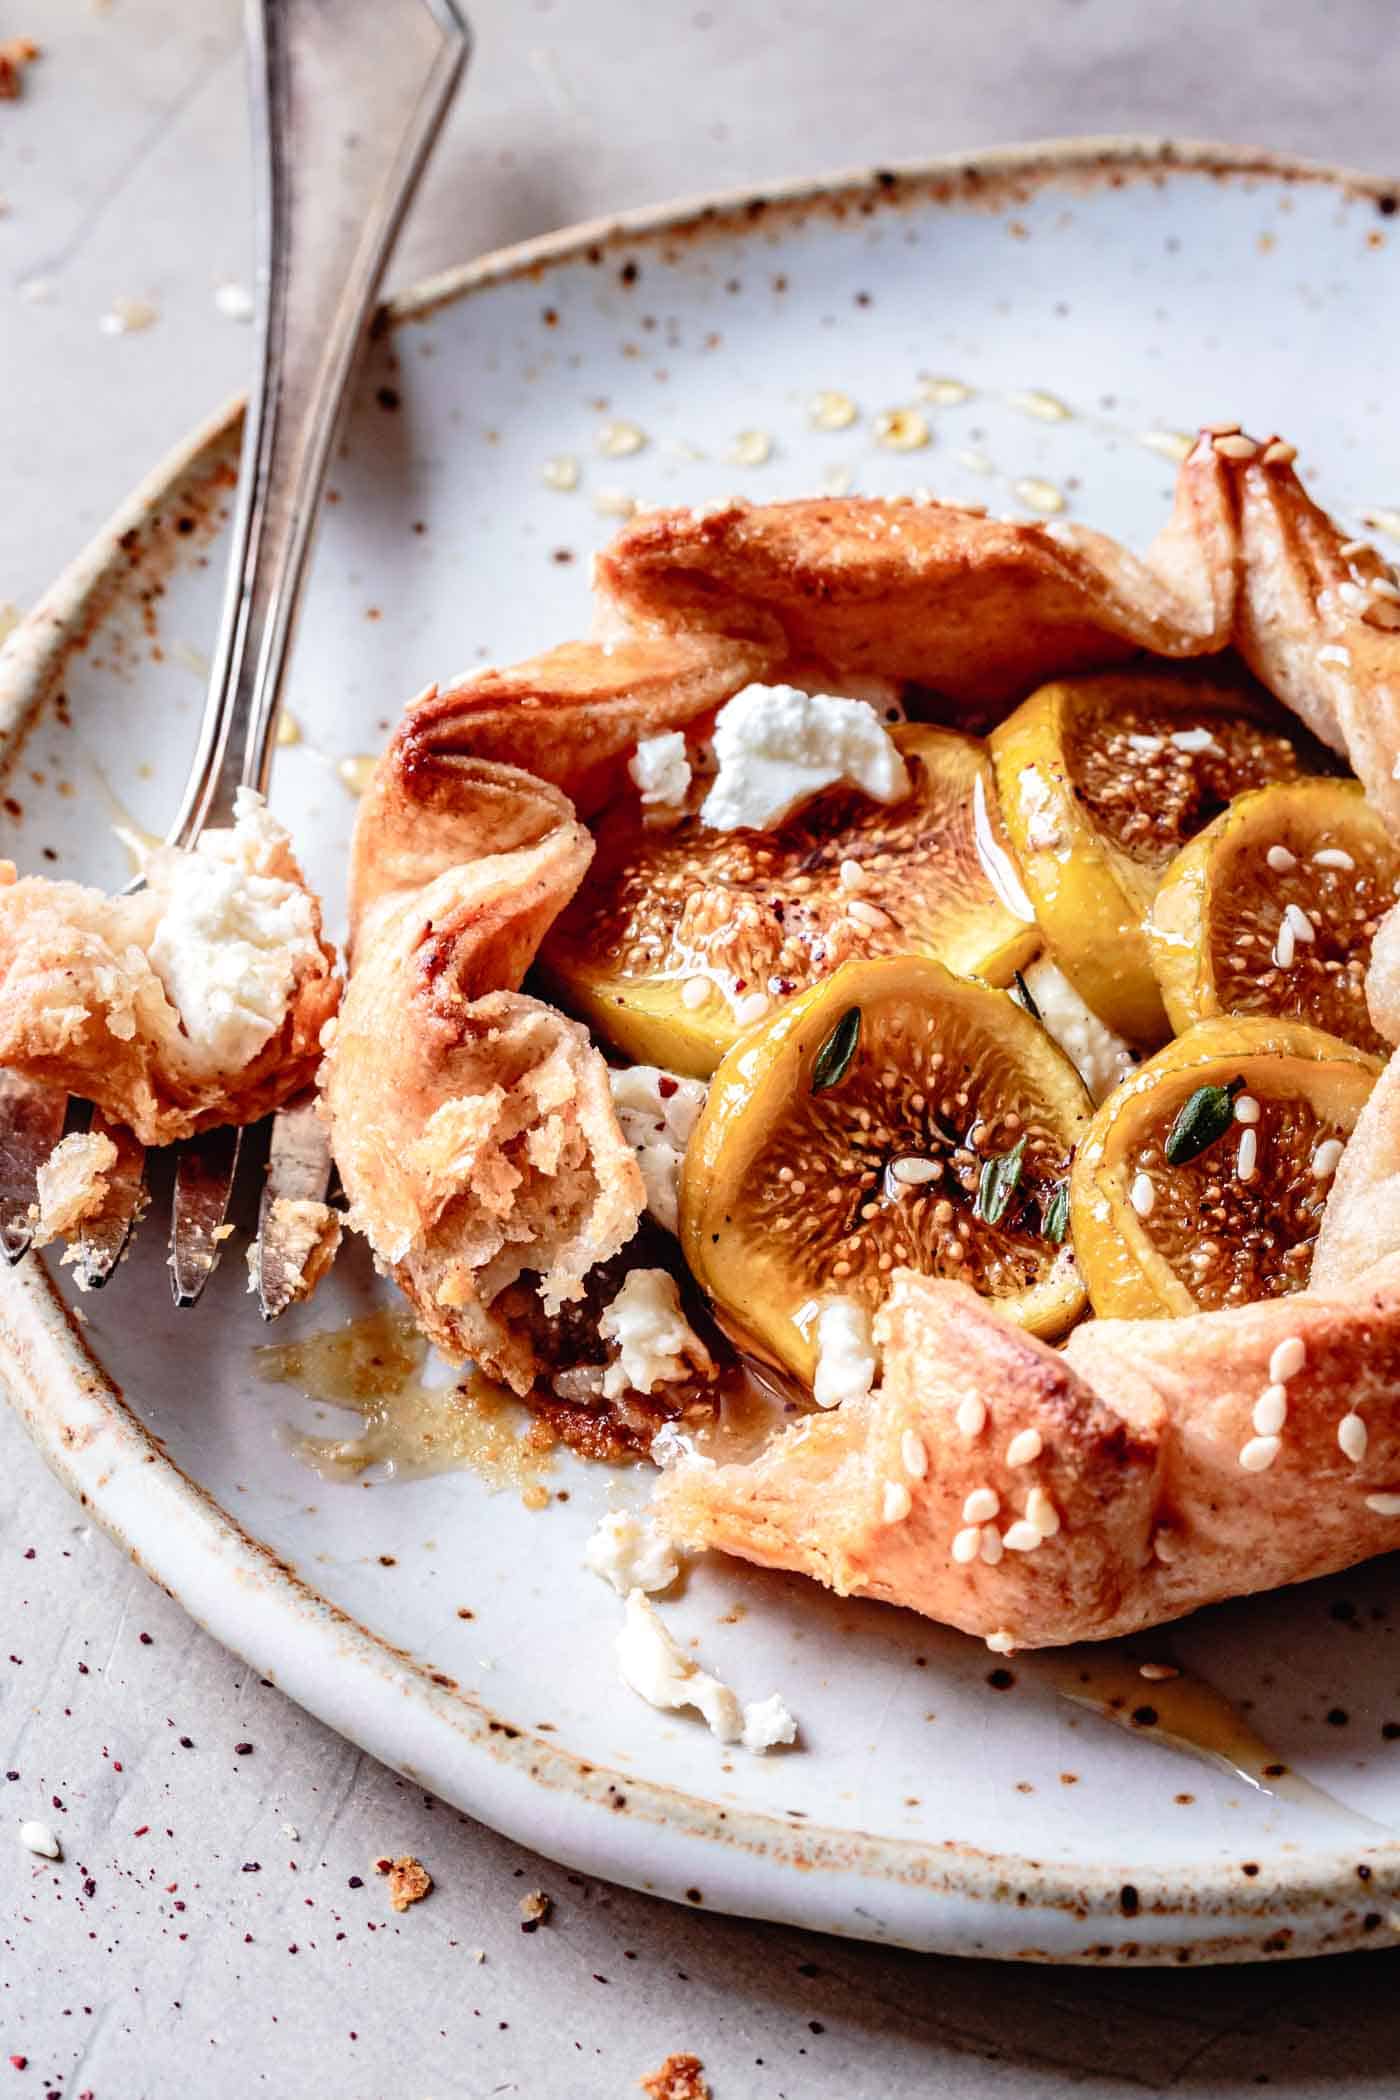
This paleo pie crust recipe tastes and feels shockingly like a wheat flour dough. A few techniques borrowed from classical pastry create a smooth, pliable dough. The crust bakes up tender and flaky, just the thing to encase your favorite galette, quiche, pie, or tart.
PLUS! Sarah and I made a stop-motion video to show you exactly how to do it.
Grain-Free Pie Crust Ingredients and Substitution Suggestions
Flours
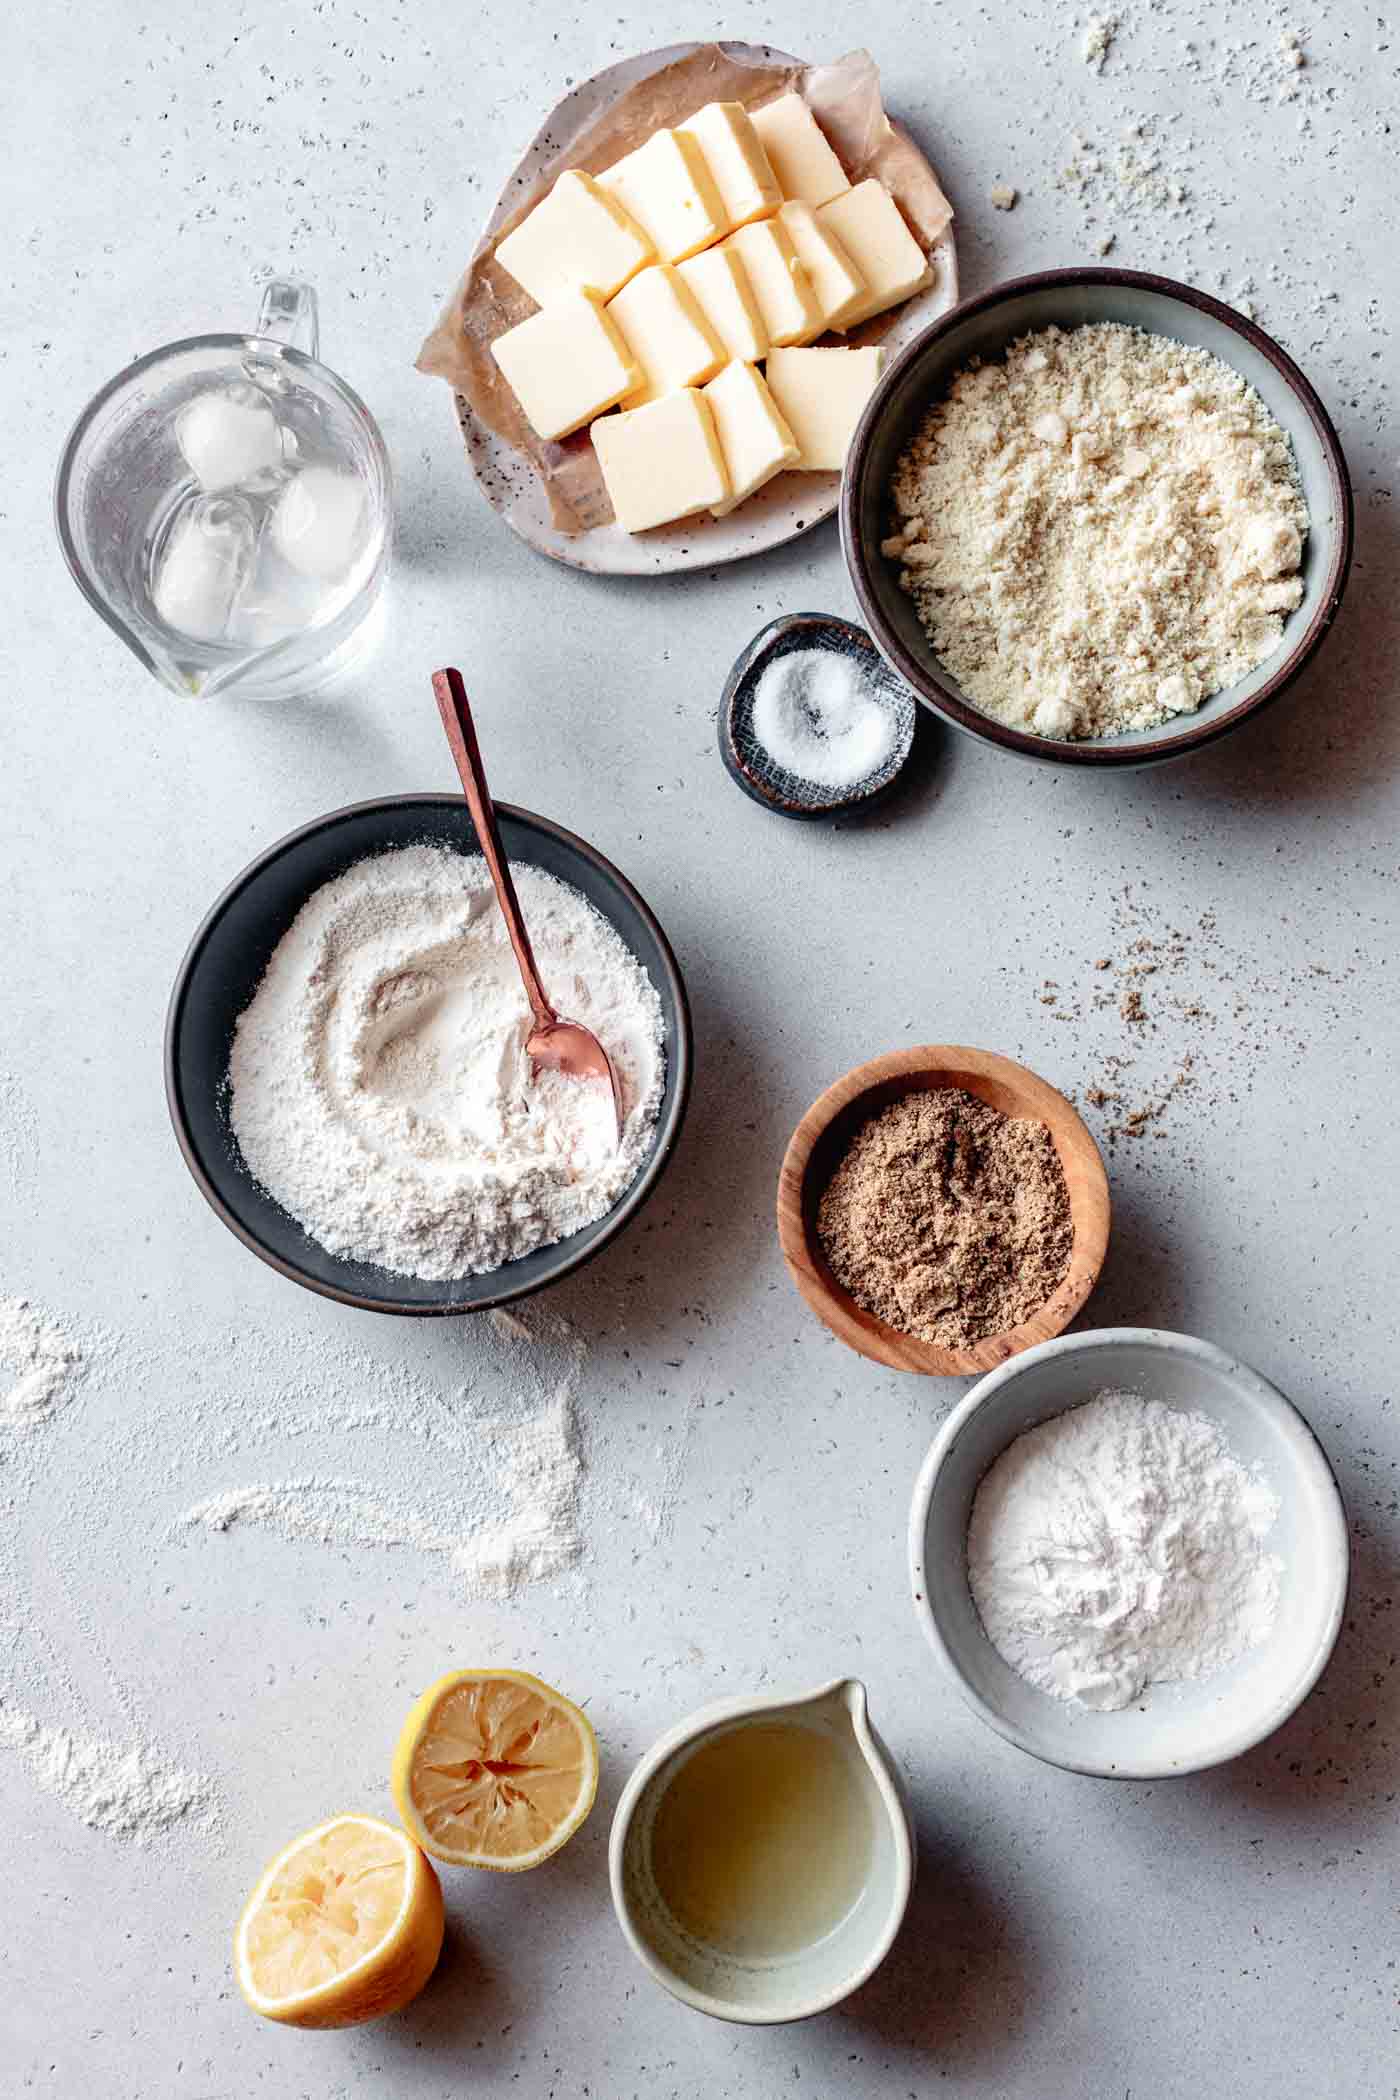
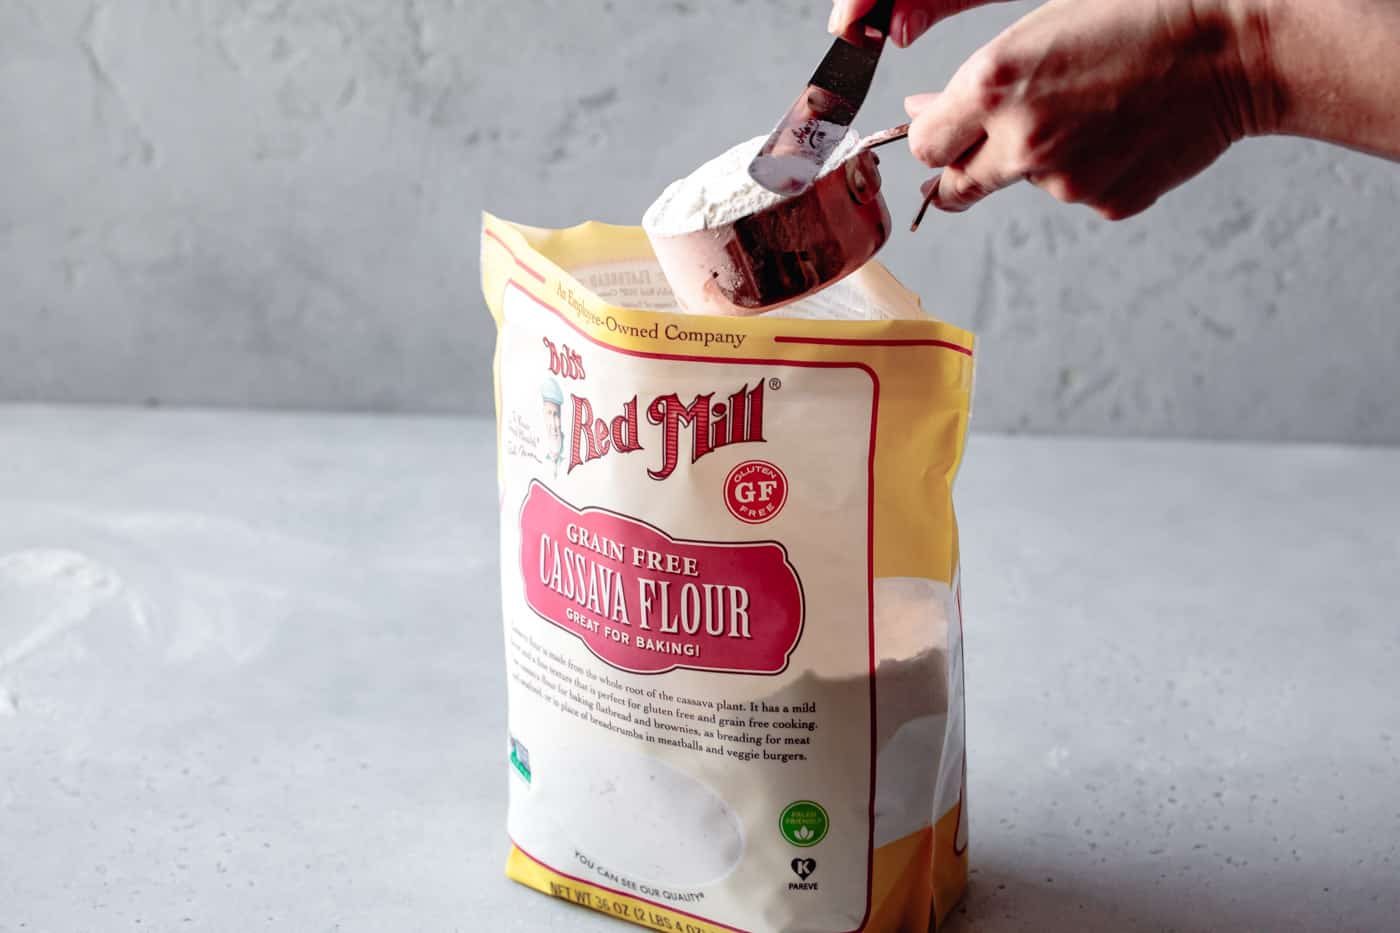
- A blend of cassava flour, almond flour, and tapioca flour create a pie crust that feels and tastes surprisingly like a wheat crust. Bob's Red Mill flours are milled in certified gluten-free facilities. Their fine grinds join forces here: cassava flour's sticky quality replaces the need for gluten, tapioca flour makes the dough extensible (stretchy), and blanched almond flour adds richness, tenderness, and browning. These mild-flavored flours make a neutral dough that pairs well with any recipe, sweet or savory.
- You can swap in almond meal, hazelnut flour, tiger nut flour, or more cassava flour in place of the almond flour. You could also try using Bob's Paleo Baking Flour in place of all of the flours; it has a similar blend of ingredients.
Other Ingredients
- Ground chia seed or flaxseed adds more sticky goodness to the dough, helping to make it pliable and flaky. I use white chia seed or golden flax, which I grind in a coffee grinder, as the color blends in with the dough. But any chia seed will work. Alternatively, omit the seeds and use 1/2 teaspoon xanthan gum instead.
- Butter adds richness and flaky layers. Some paleo-dieters include butter in their meals, preferring grass-fed butter, while others stick to ghee or plant-based butters. Butter seems to be ok for me in moderation, so I use it here. If ghee is your preference, follow the method in my ghee pie crust recipe to chill and incorporate the ghee. For a vegan almond flour pie crust, use vegan butter, coconut oil, or palm oil instead.
- Salt sharpens the flavors.
- Ice water brings the dough together while keeping the butter cold.
- Lemon juice or apple cider vinegar help tenderize the dough.
Method
The key to this gorgeous grain-free pie crust lies not only in the blend of ingredients, but also in the method.
Hydration
First, we make sure to hydrate the dough properly. Proper hydration helps activate the sticky qualities of the tapioca flour and chia seed to mimic gluten. This dough needs to feel slightly more moist than a wheat flour dough. When squeezed, it should easily come together, but it shouldn't feel wet or sticky.
Butter Size and Temperature
Next we start with cold butter and we leave lots of nice butter chunks in the dough. There should be some chunks that are the size of large peas or small hazelnuts, with some butter worked into the dough.
Turning the Dough
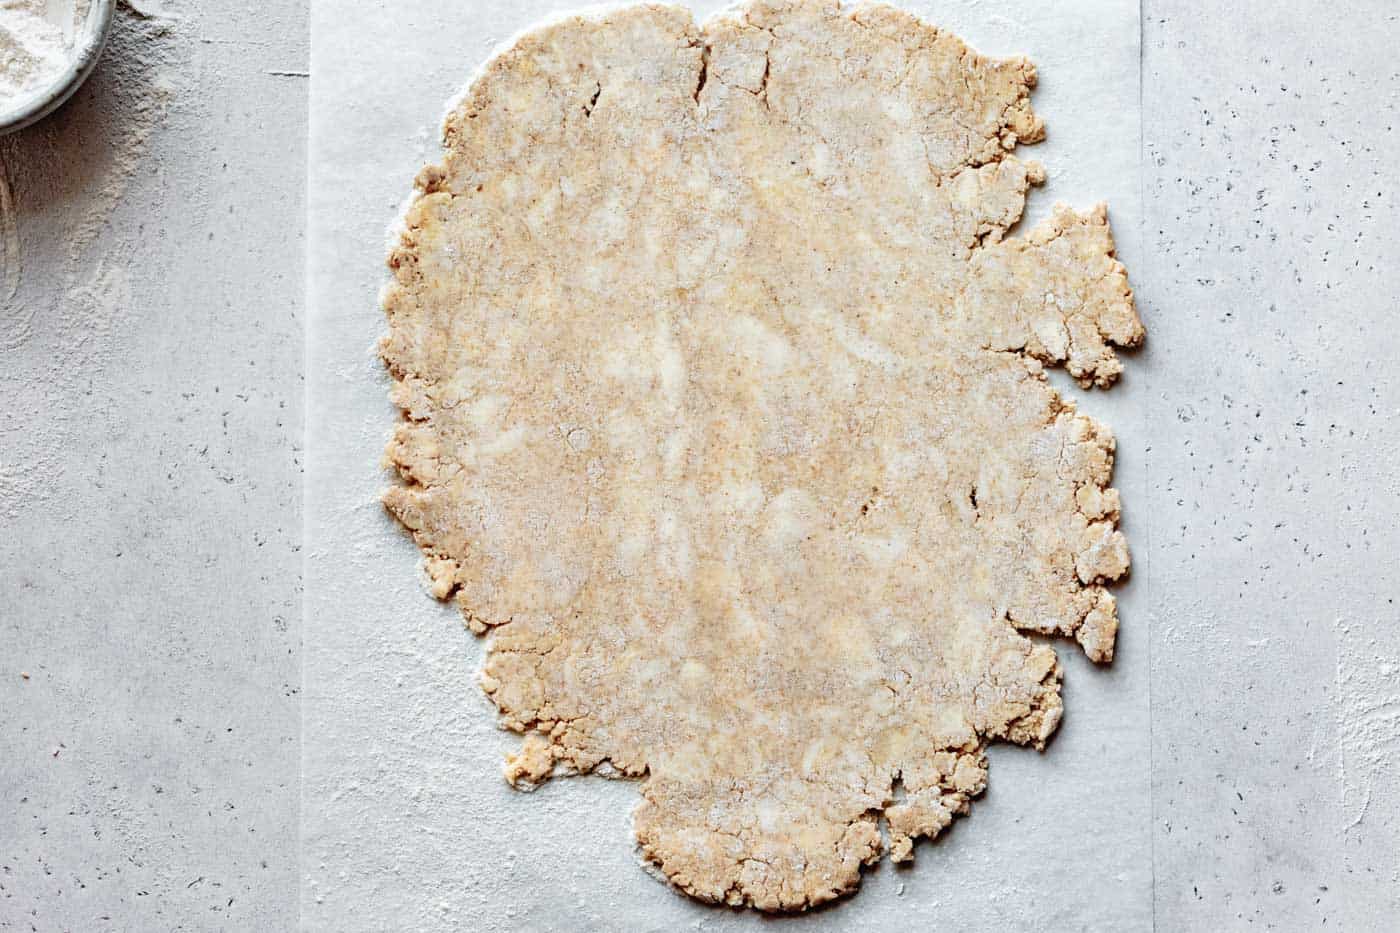
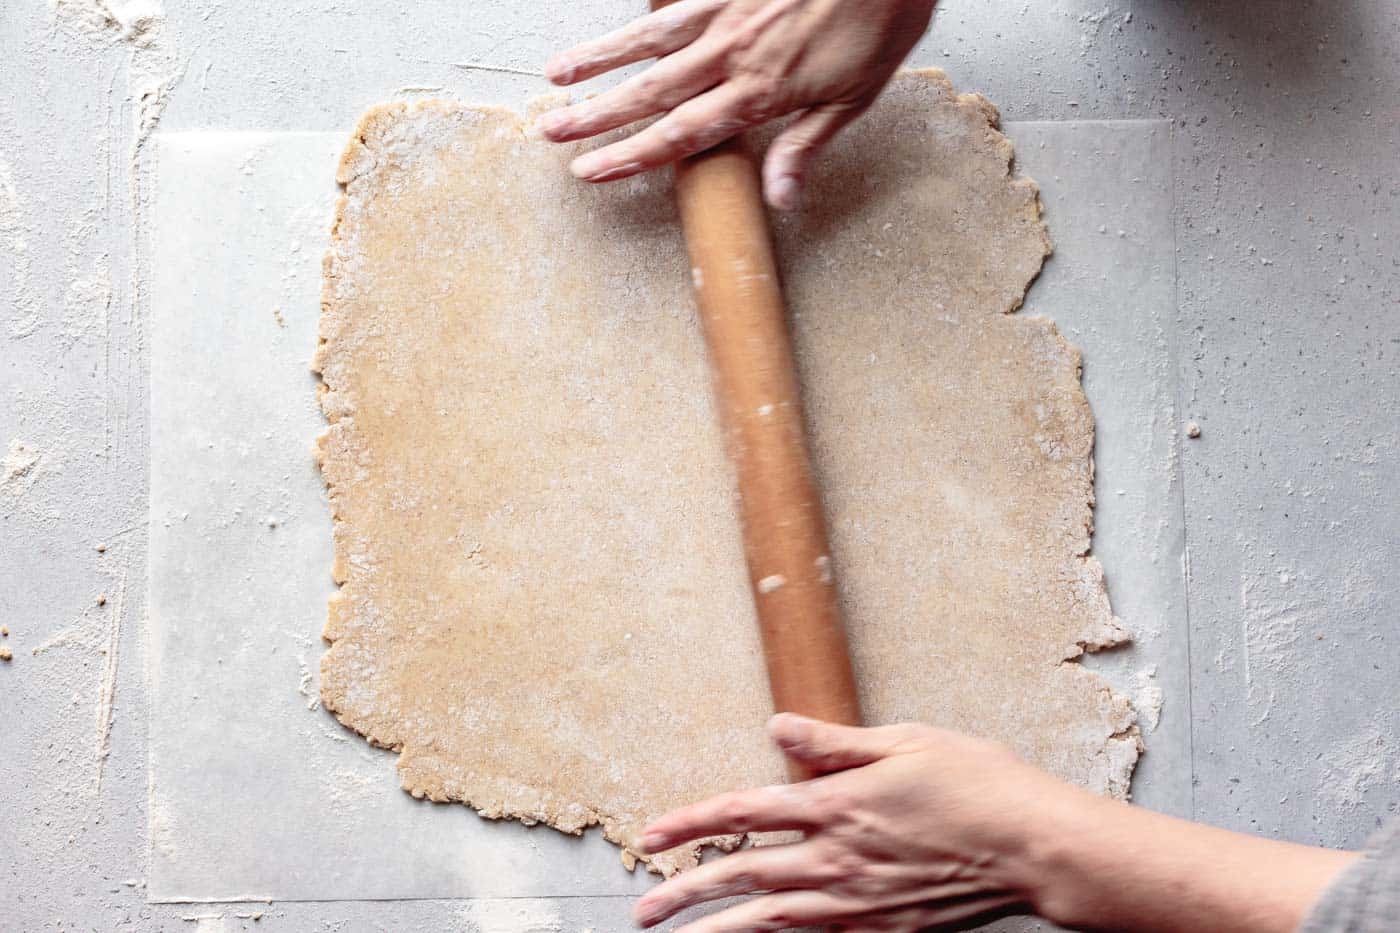
After the first chill, we give the dough a couple of "turns" meaning we roll it out and fold it up. This technique is traditionally used to make puff pastry and croissants. In fact, this paleo pie crust recipe is similar to a "rough puff pastry." As the dough is rolled out, the butter chunks elongate into sheets. When we fold up those sheets, we get many thin layers of butter and dough. When the cold dough hits the hot oven, the butter gives off steam which lifts the layer of dough above it.
If the butter gets worked into the dough more, the resulting crust will be more tender and soft, while more large chunks of butter make a crisper, flakier dough.
How to make paleo pie crust: step-by-step photos and instructions
Paleo Pie Crust Variations
Grain-Free Nut-Free Pie Crust
Omit the almond flour and use either all cassava flour, or tiger nut flour (also made from a tuber and not a nut) in its place. Sub by weight if you can, and add 1-2 more tablespoons of ice water as needed to bring the dough together. This version doesn't brown as nicely as the version with almond flour, but it gets the job done!
Vegan Almond Flour Pie Crust
For a paleo vegan pie crust, swap in a good plant-based butter for the dairy butter. Miyoko's butter is the closest I've found to dairy butter in terms of flavor, firmness, and workability. Alternatively you can try this with chilled coconut oil or palm oil. These oils are more solid when chilled, so you'll want to let the dough soften up more before rolling it out. Omnivores can try this with lard. You can also use 50/50 butter and lard or shortening.
Almond Flour Double Pie Crust
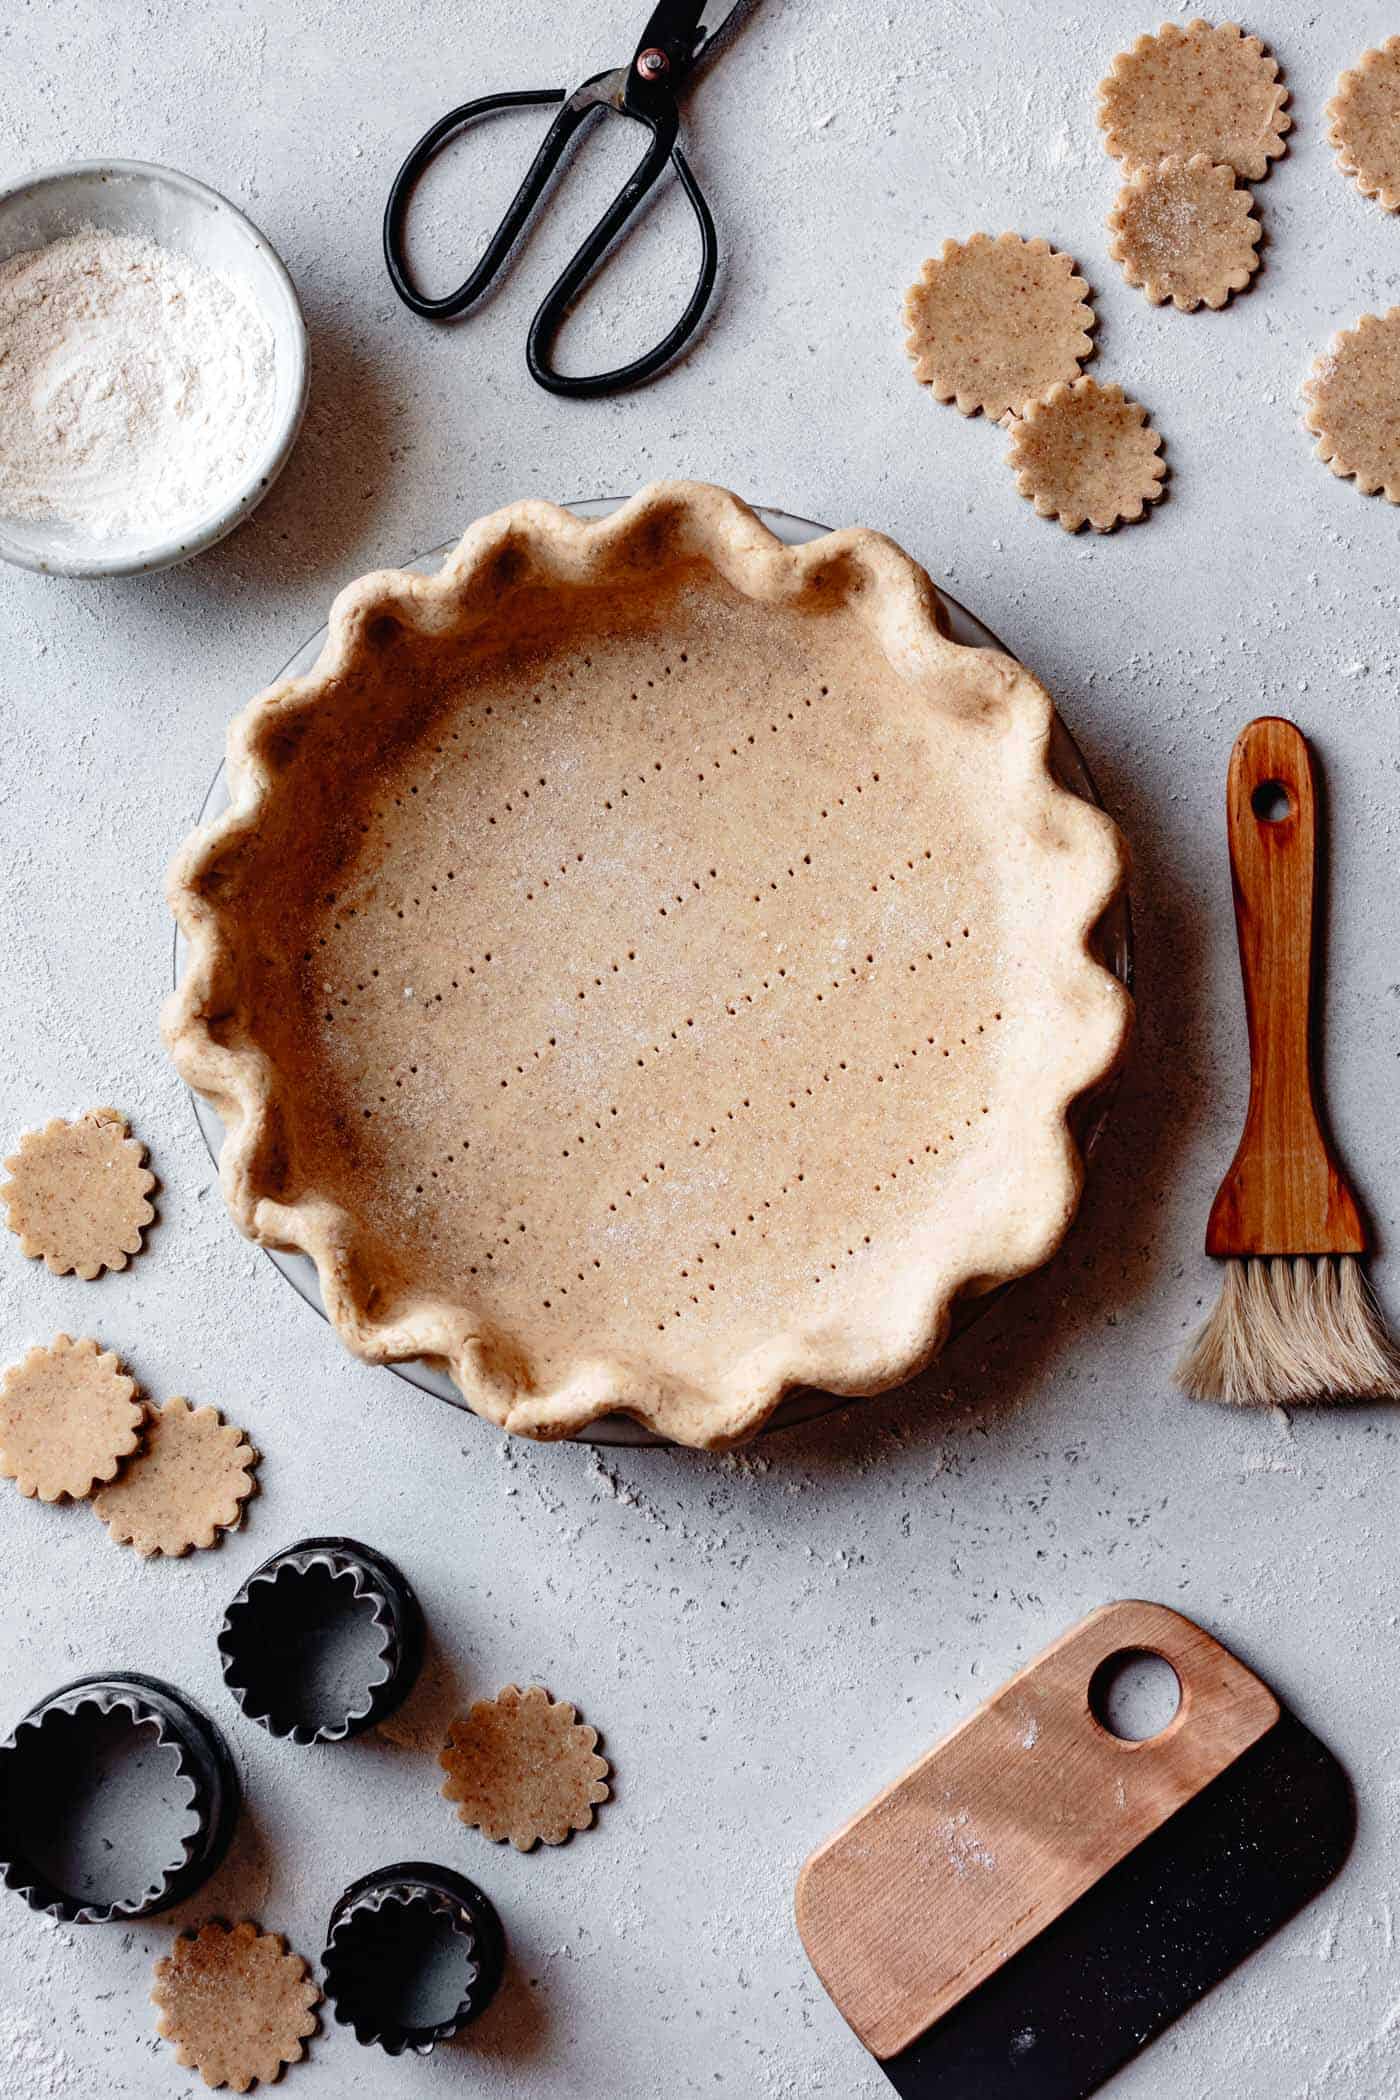
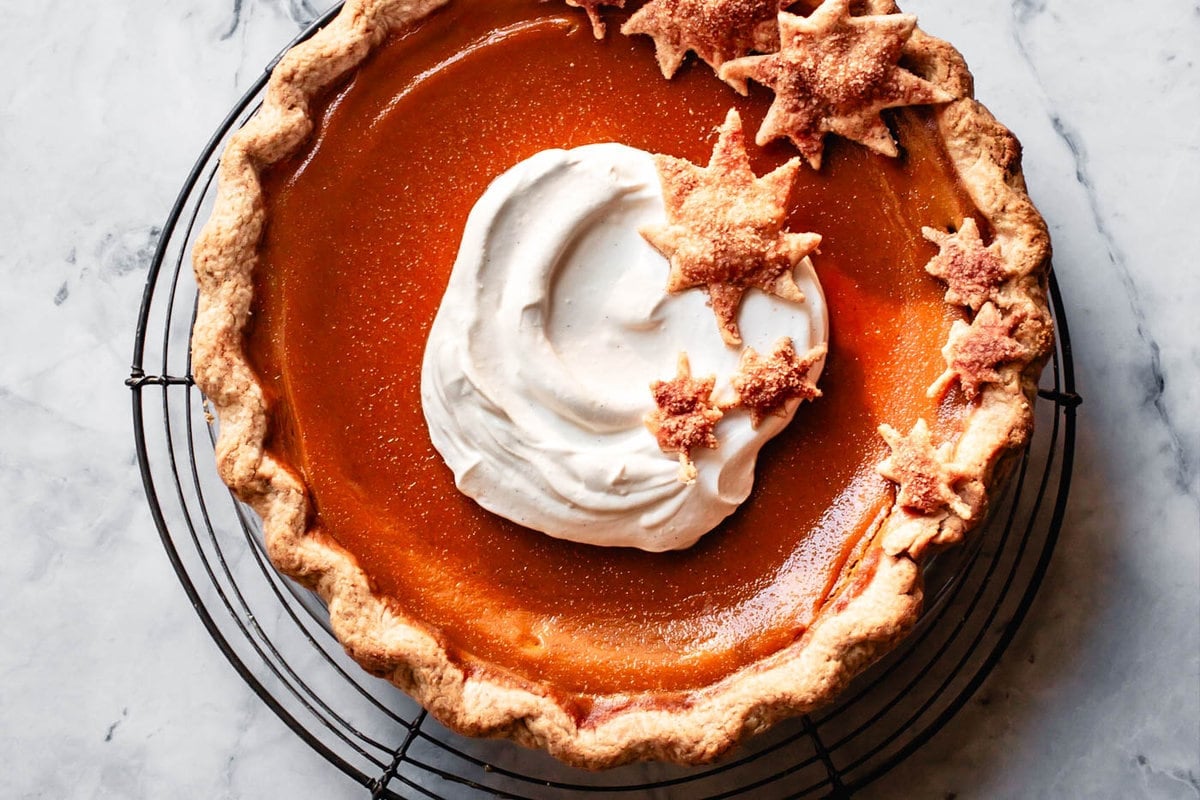
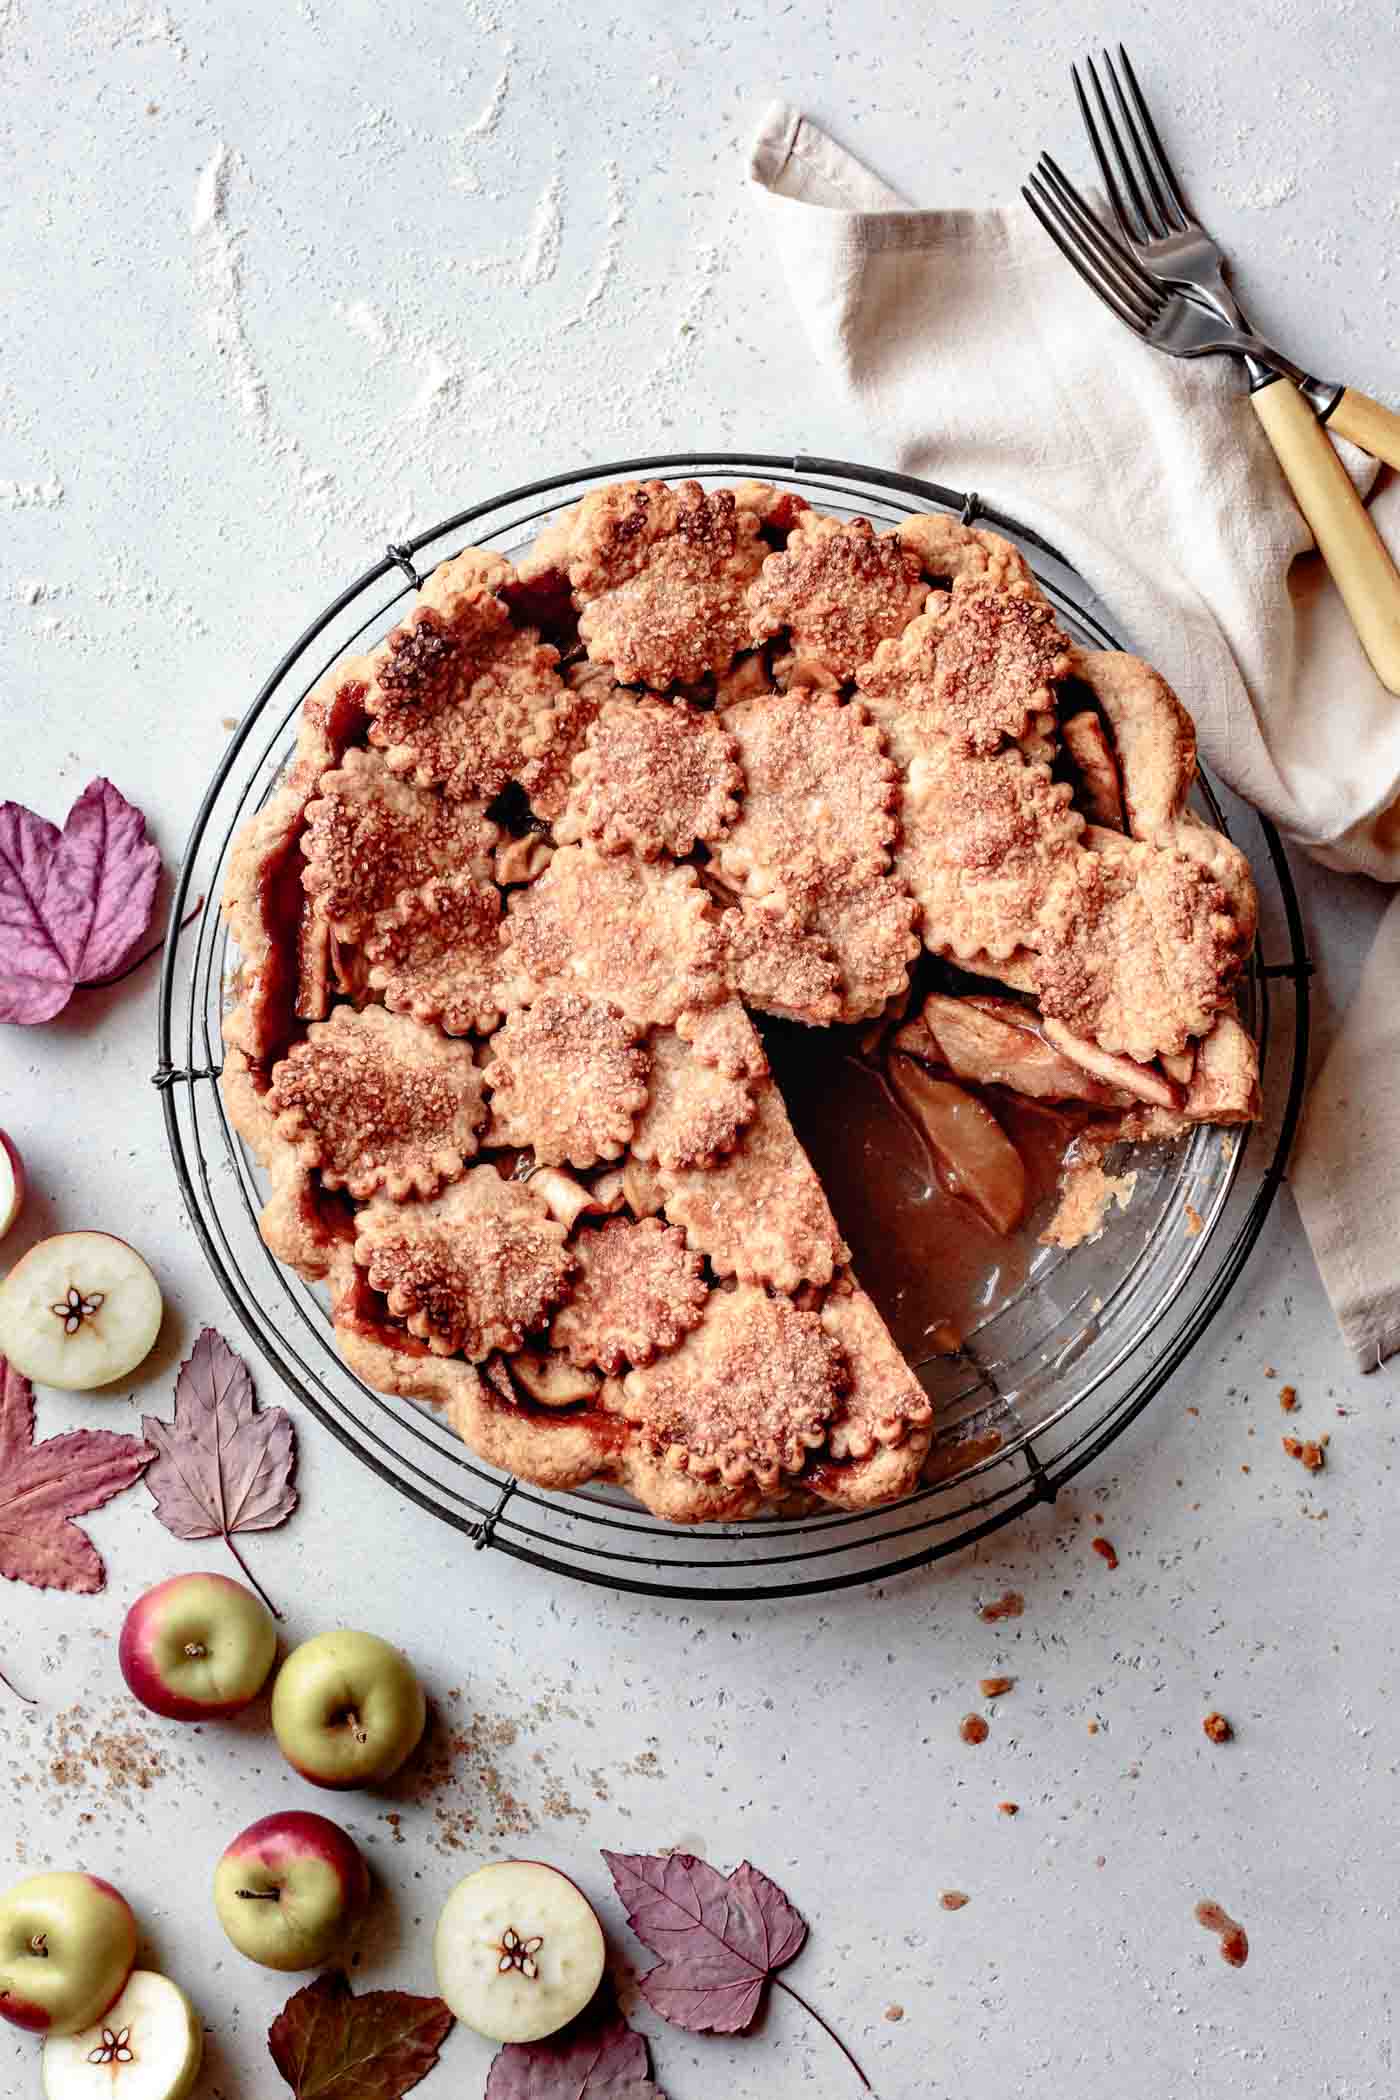
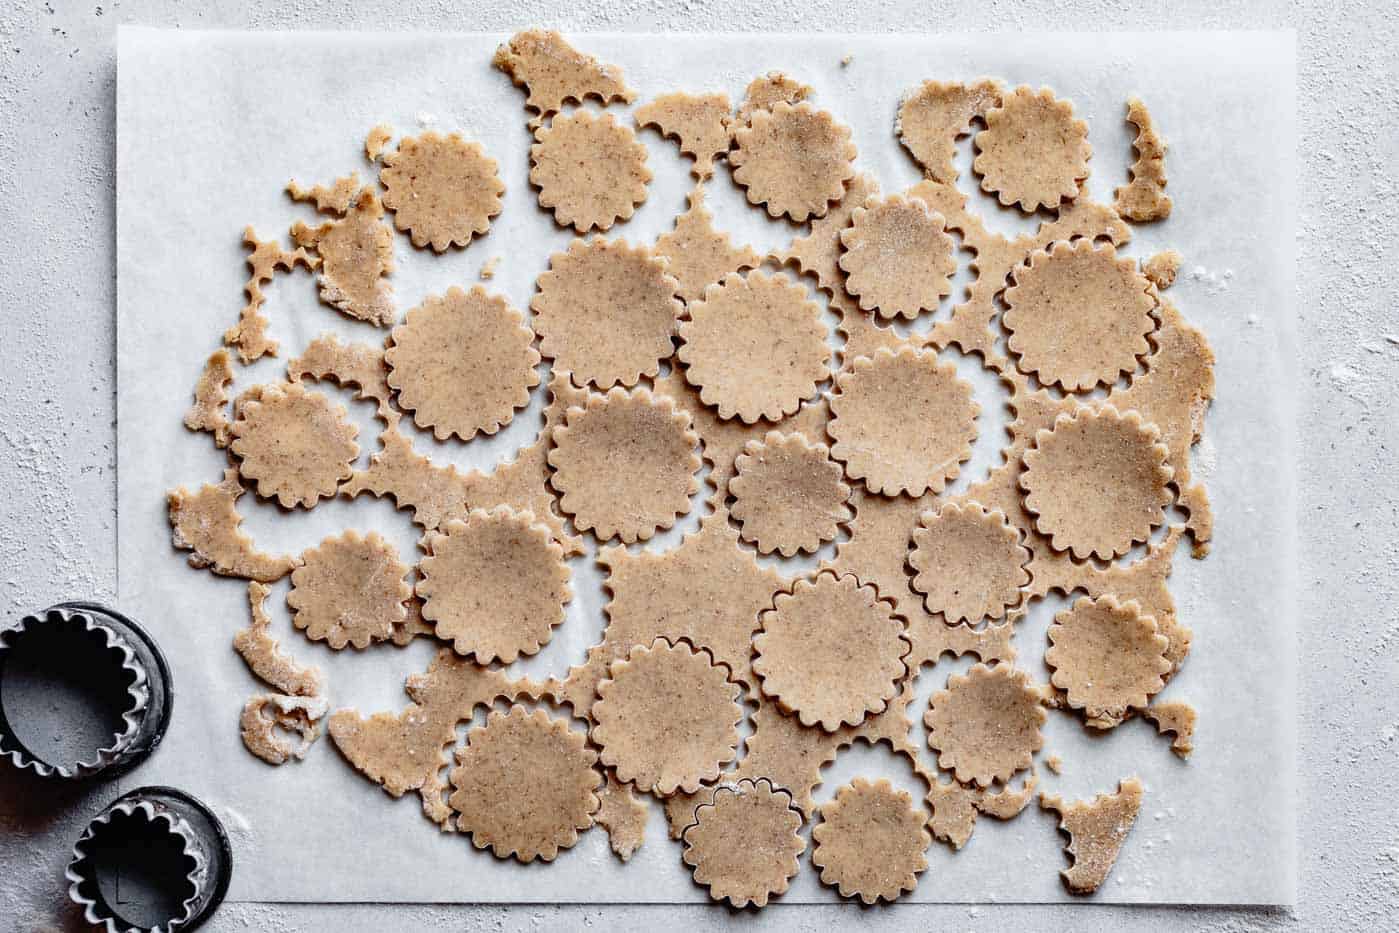
You can use a double batch of this paleo pie crust dough to make a double pie crust, lattice crust, or cut-out crust, as shown here. The cut-out version, which I learned from Laura of Tutti Dolci, is my favorite and the method that graces the cover of my cookbook. This easy paleo pie crust method uses rounds of cut dough to form a pretty tiled top. You can cut the rounds into any shape you like: rounds, fluted rounds, stars, hearts, leaves, squares – the options are limitless. Overlap the shapes atop the filled crust, leaving some windows for steam to escape. Gently brush and dab the top with plant milk and sprinkle with a little coarse sugar or maple sugar.
Paleo Apple Pie Crust / Paleo Pumpkin Pie Crust
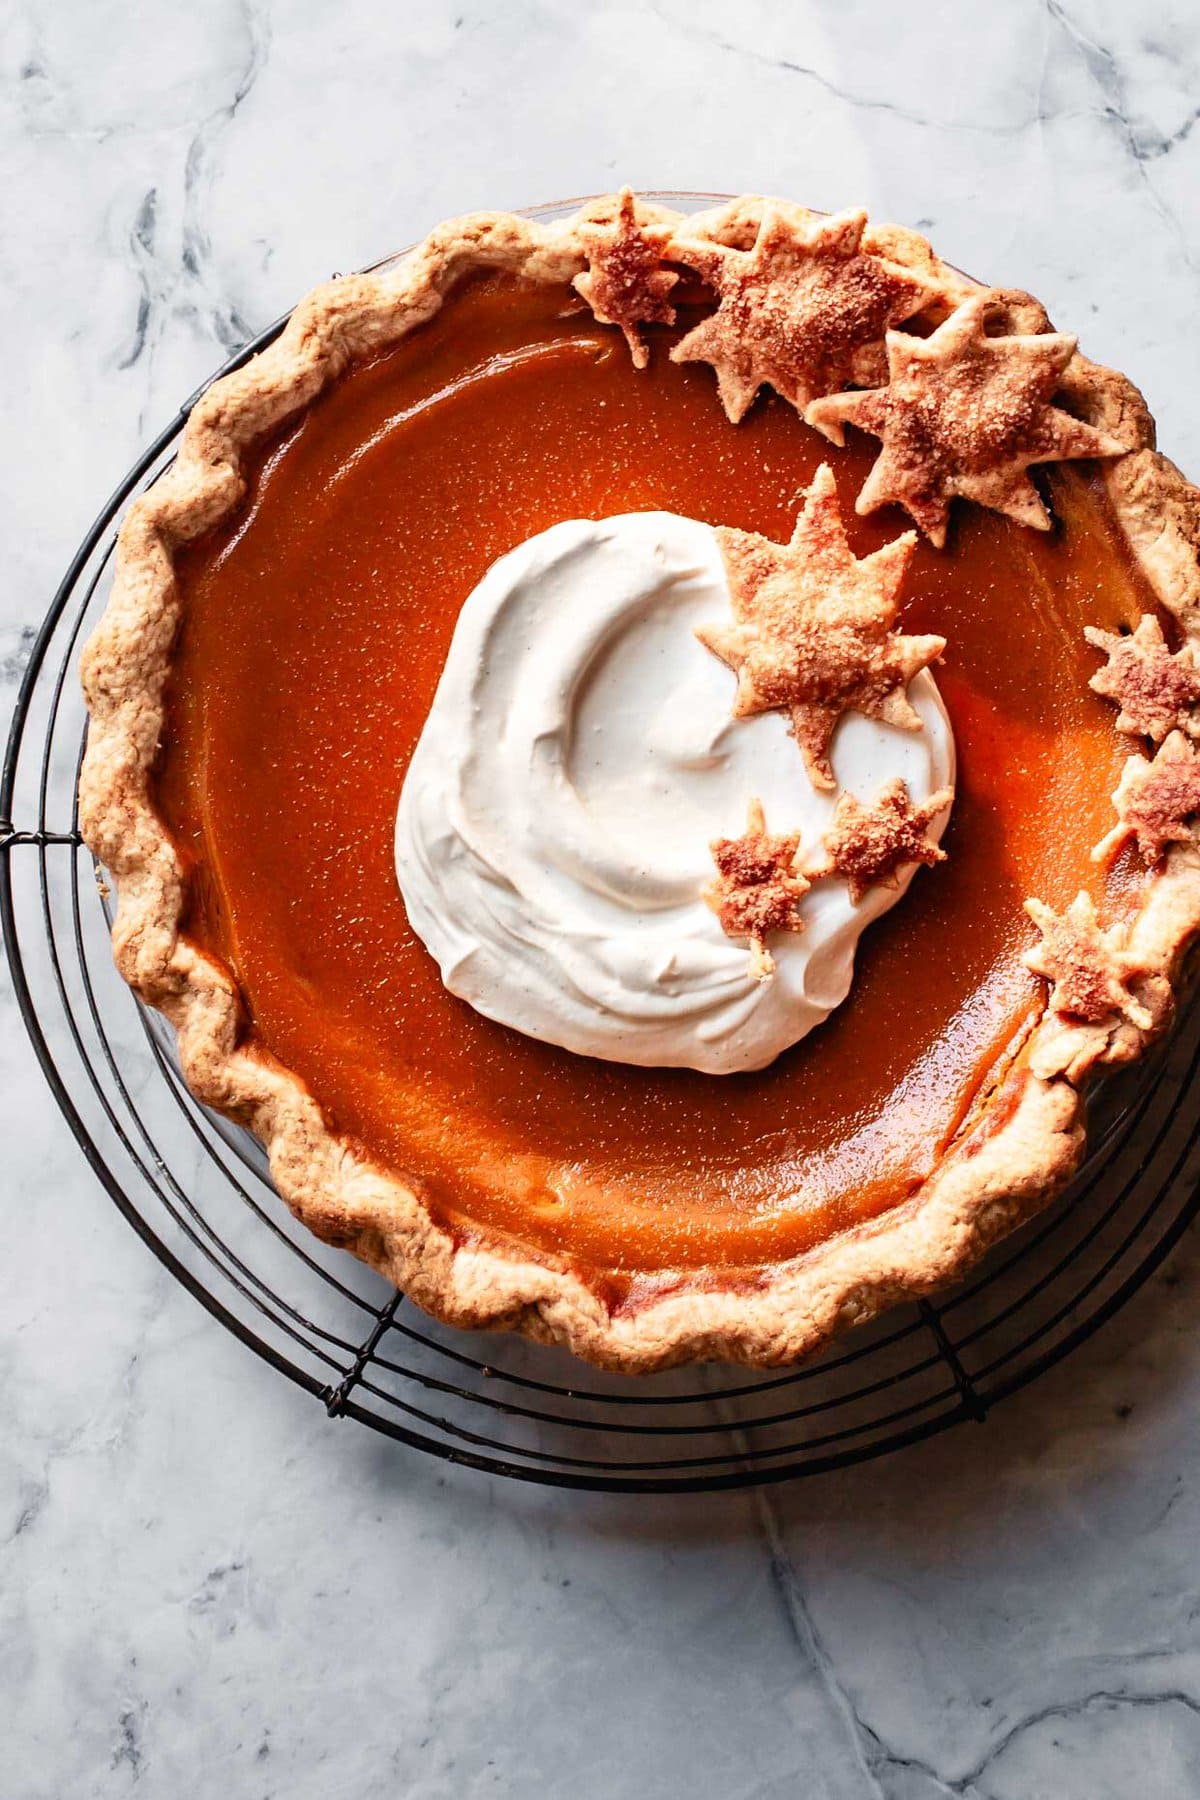
Use this almond flour pie crust with any pie, galette, or quiche recipes you like. Try my recipe for paleo apple pie, sweetened with maple syrup and kissed with cinnamon and lemon. Or make this paleo pumpkin pie recipe with a creamy, spiced filling.
Easy-Roll Paleo Pie Crust
If you're pressed for time and want to skip the extra folding steps, you can double the tapioca flour in the recipe and increase the ice water as needed (7-9 tablespoons). The pie crust will be easy to roll out without doing the turns. A reader found this out when she accidentally doubled the tapioca flour, and I tested it to make sure it worked. The only downside is that the crust will be slightly less buttery and tender, but it will still be the best paleo pie crust out there.
I hope this post was ins-PIE-ring! Please let me know what you make with it in the comments.
*Bojon appétit! For more Bojon Gourmet in your life, follow along on Instagram, Facebook, or Pinterest, purchase my gluten-free cookbook Alternative Baker, or subscribe to receive new posts via email. And if you make this paleo pie crust recipe, I’d love to know. Leave a comment and rating below, and tag your Instagram snaps @The_Bojon_Gourmet and #bojongourmet.*
Flaky Paleo Pie Crust with Cassava Flour
Print Recipe Pin RecipeIngredients
- 5-6 tablespoons (80 ml) ice water (from 1 cup ice cubes filled with cool water)
- 2 teaspoons strained fresh lemon juice (or 1 teaspoon apple cider vinegar)
- ½ cup (75 g) cassava flour
- ½ cup (60) blanched almond flour (or more cassava flour or tiger nut flour for nut-free)
- ¼ cup (28 g) tapioca flour (or arrowroot flour; double this amount for an easy-roll crust - see note below)
- 2 ½ tablespoons (15 g) finely ground chia seed or flax seed (I grind mine in a coffee grinder)
- 1/2 teaspoon fine sea salt (decrease if your butter is salted)
- 8 tablespoons (115 g) cold, unsalted butter or plant butter sliced ¼-inch thick (or chilled ghee, lard, or palm oil)
Instructions
Make the dough:
- In a 1-cup measuring pitcher, stir together 5 tablespoons of the ice water and the lemon juice.
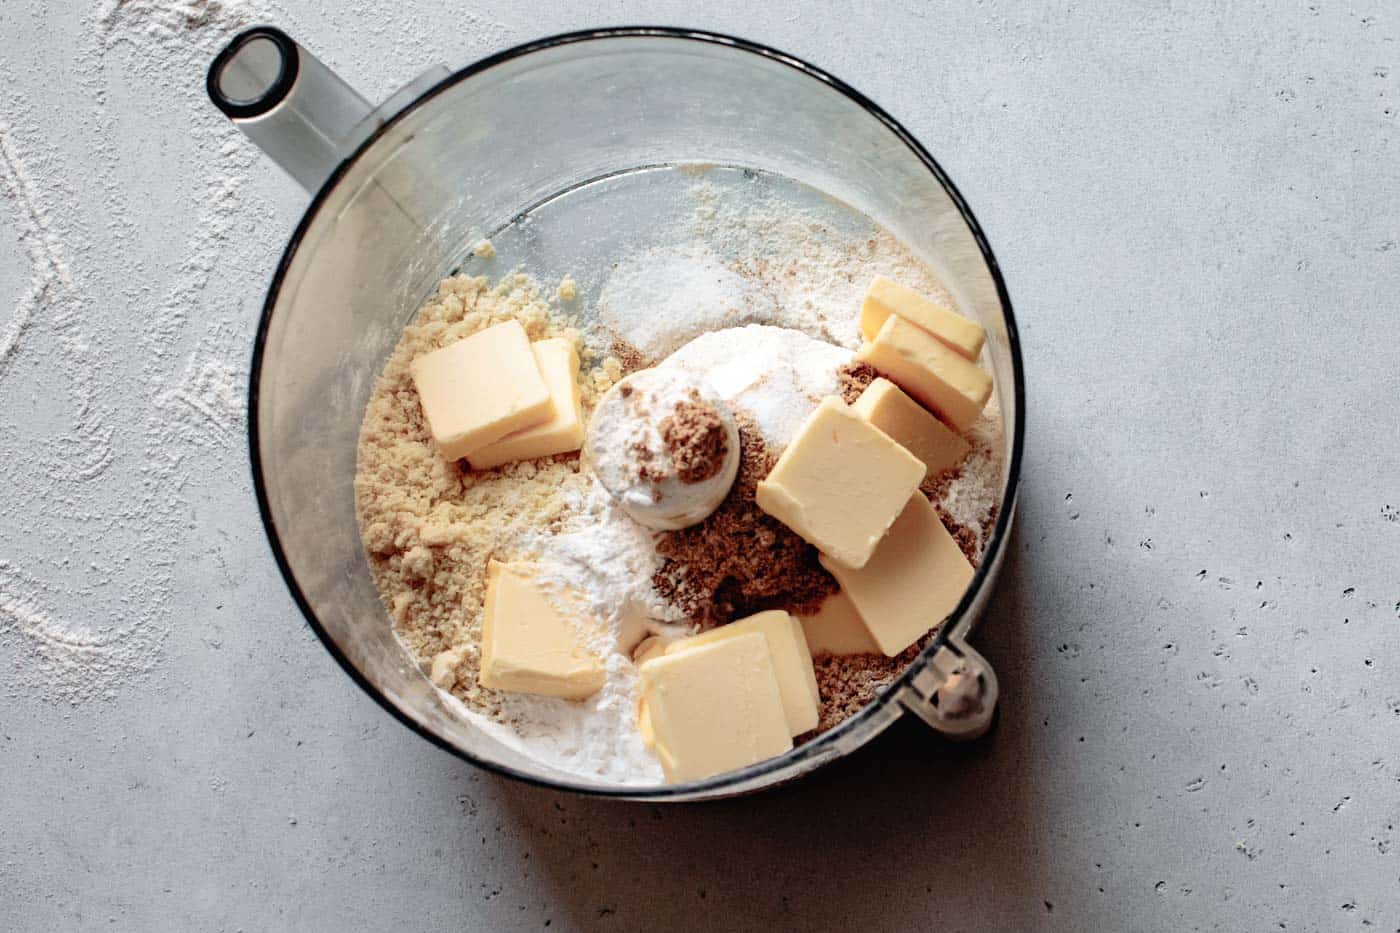
- In the bowl of a food processor, combine the cassava, almond, and tapioca flours with the ground chia seed and salt.
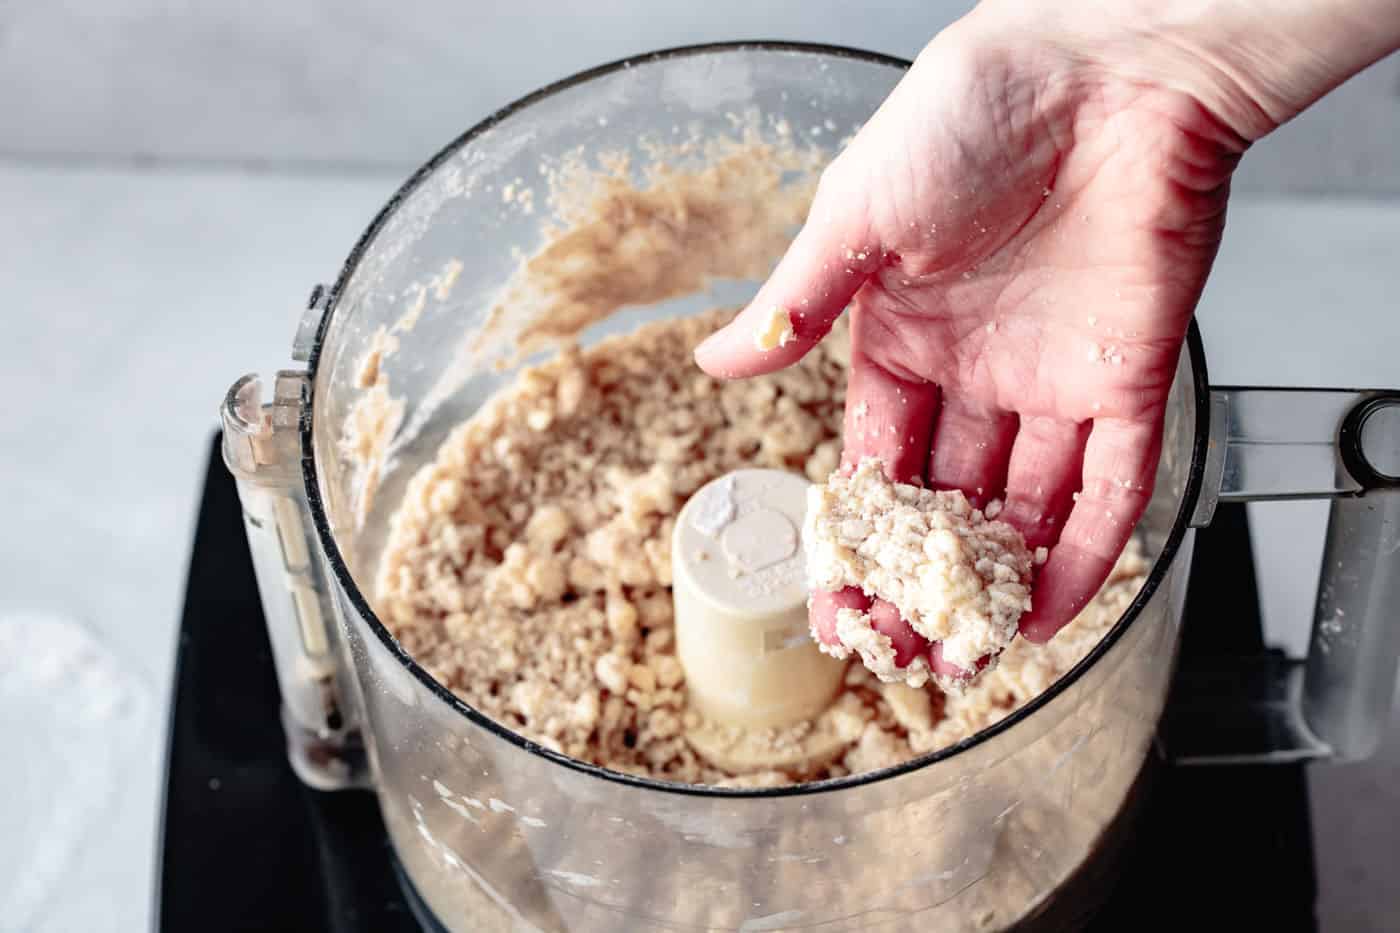
- Scatter the butter pieces over the top but don't run the mixer just yet! Open the feed tube and gradually pour in the ice water/lemon mixture as you pulse the mixer until all the liquid is incorporated. Open the lid and give the dough a squeeze; it should hold together easily, with lots of butter chunks the size of large peas. If the dough is dry, replace the lid and drizzle in more ice water by the teaspoon while pulsing the mixture until the dough is evenly moist but not sticky. Take care not to overmix the dough. Note that this dough prefers more moisture than a wheat flour pie dough.
- (If making by hand, combine the dry ingredients in a lage bowl and use a pastry blender or your fingers to work the butter into the size of peas. Drizzle in the water by the tablespoon as you toss the mixture with a silicone spatula to bring the dough together as described above.)
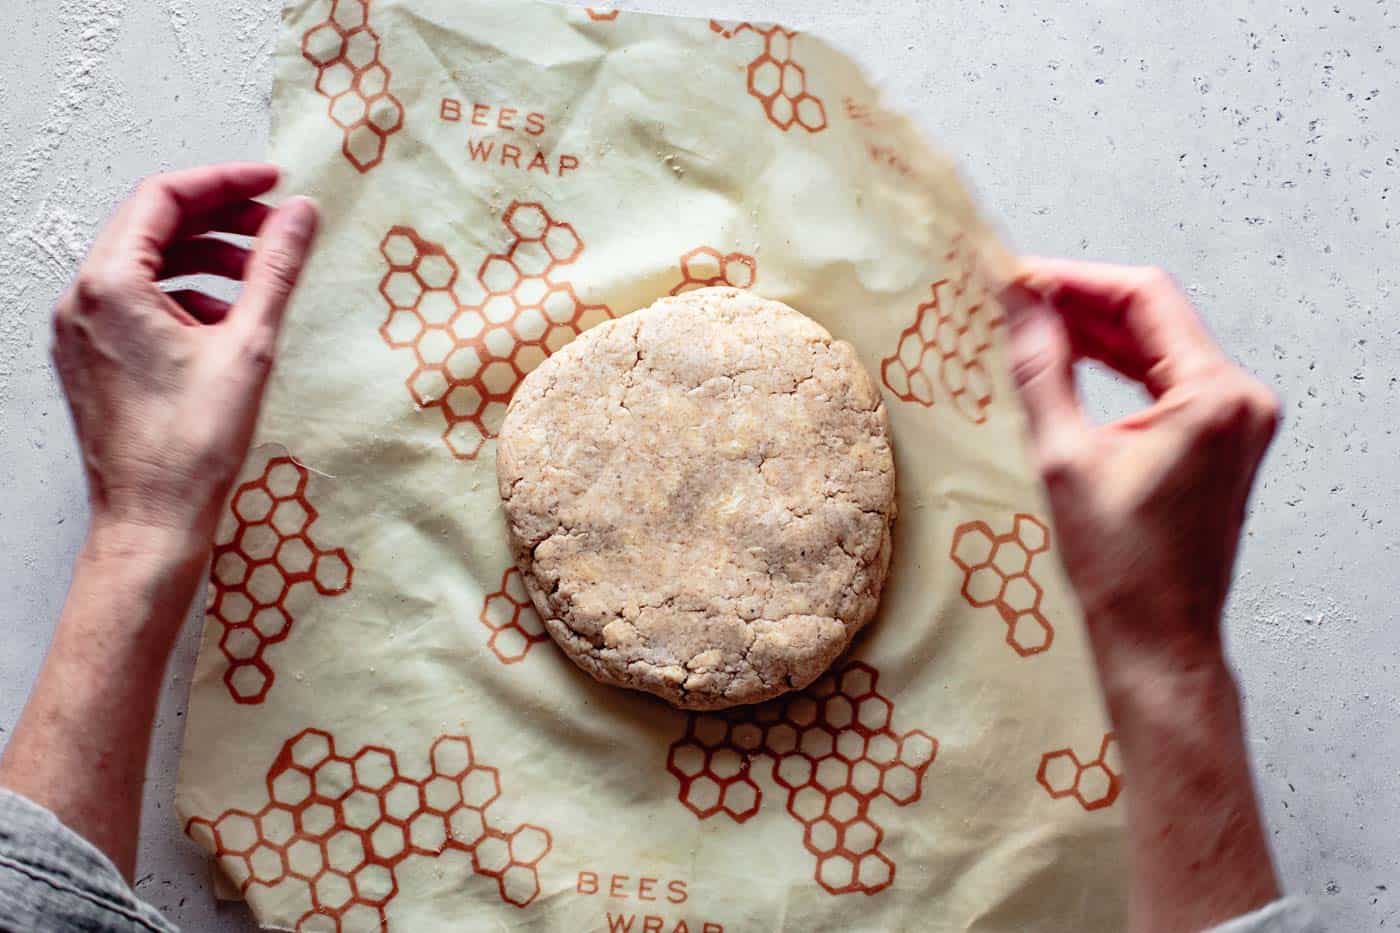
- Remove the food processor blade and gather the dough into a ball, flatten into a disc, and wrap in plastic wrap, a plastic bag, or (my favorite!) beeswax wrap. Chill until firm, 30 minutes or up to several days.
Turn the dough:
- This technique, traditionally used when making puff pastry and croissants, makes the dough more pliable and flaky. If you'd like to skip this step, see the easy-roll variation below using more tapioca flour and water!
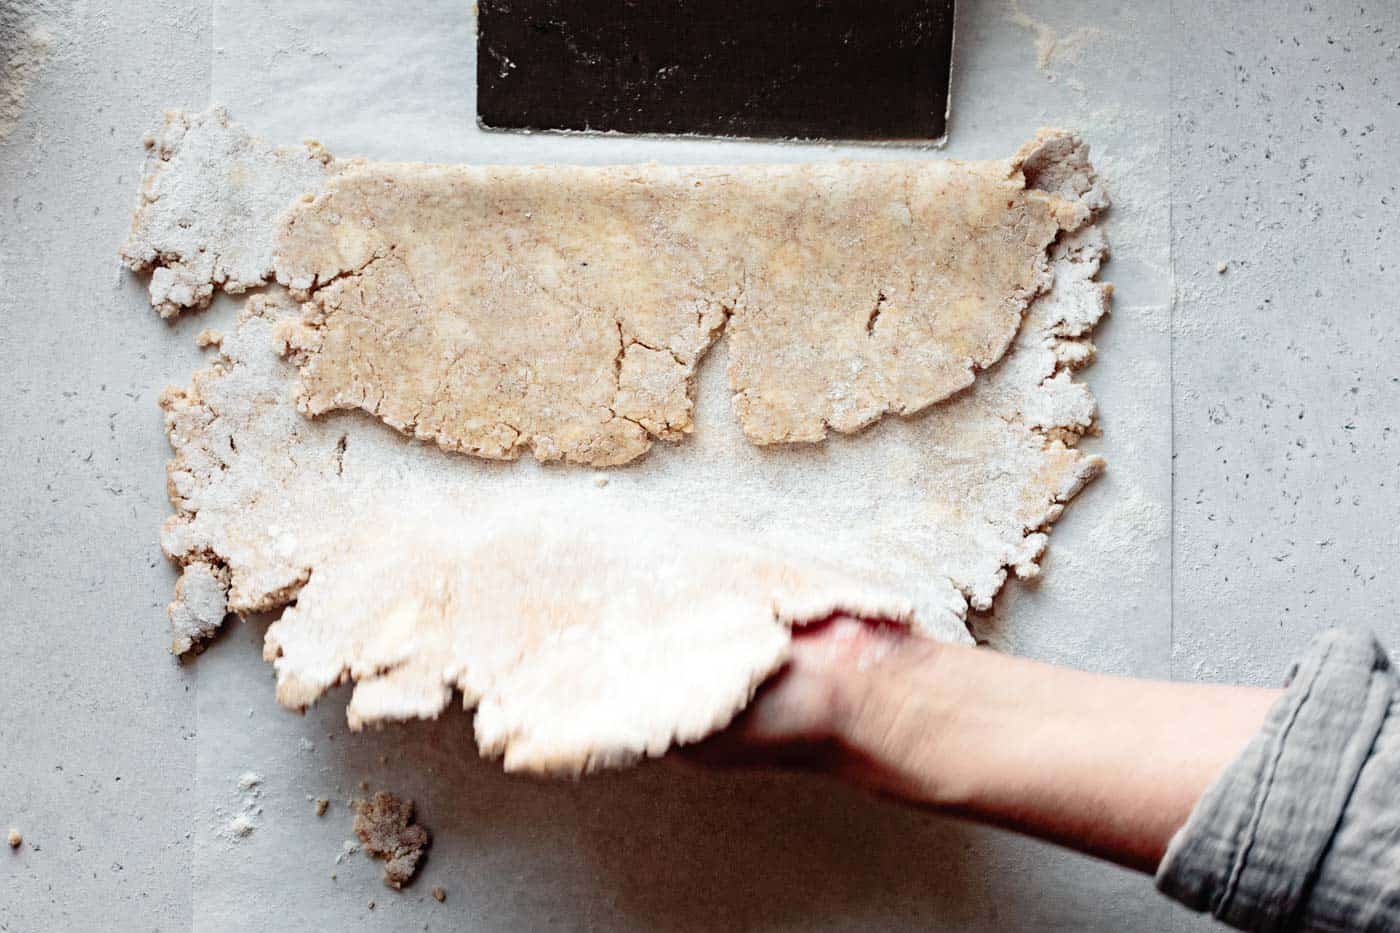
- Roll the dough on a piece of floured parchment into a large 1/4-inch thick rectangle. The dough will crack and tear at first and that's ok! Periodically dust the dough with cassava flour, sweeping excess flour away with a dry pastry brush. To flip the dough over, place a second piece of parchment on top of the dough, grasp everything with your hands, and bravely flip the whole thing over. Flour will fly everywhere so have your work surface clear!
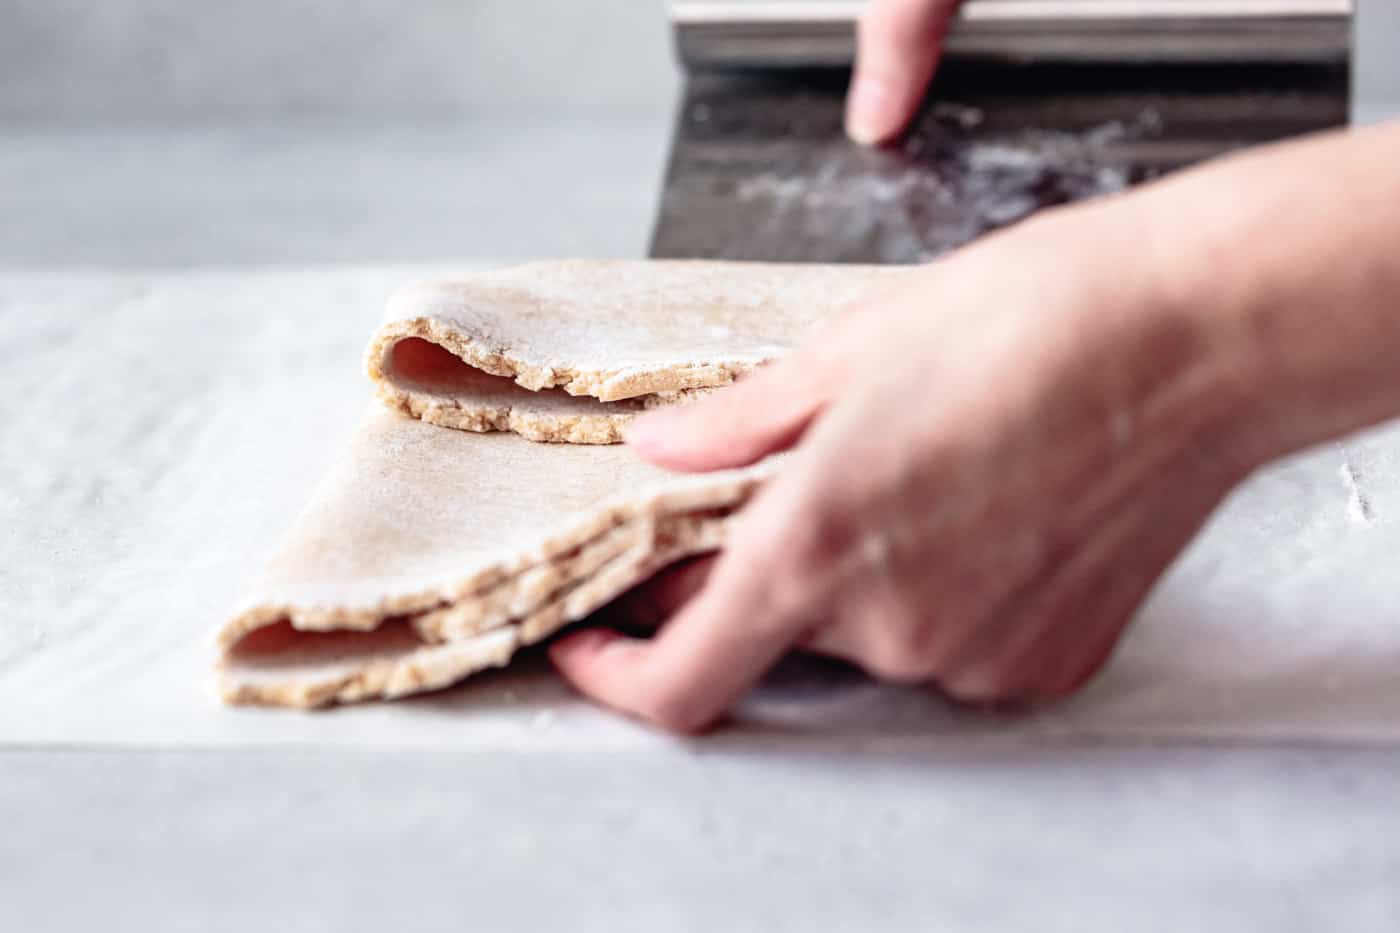
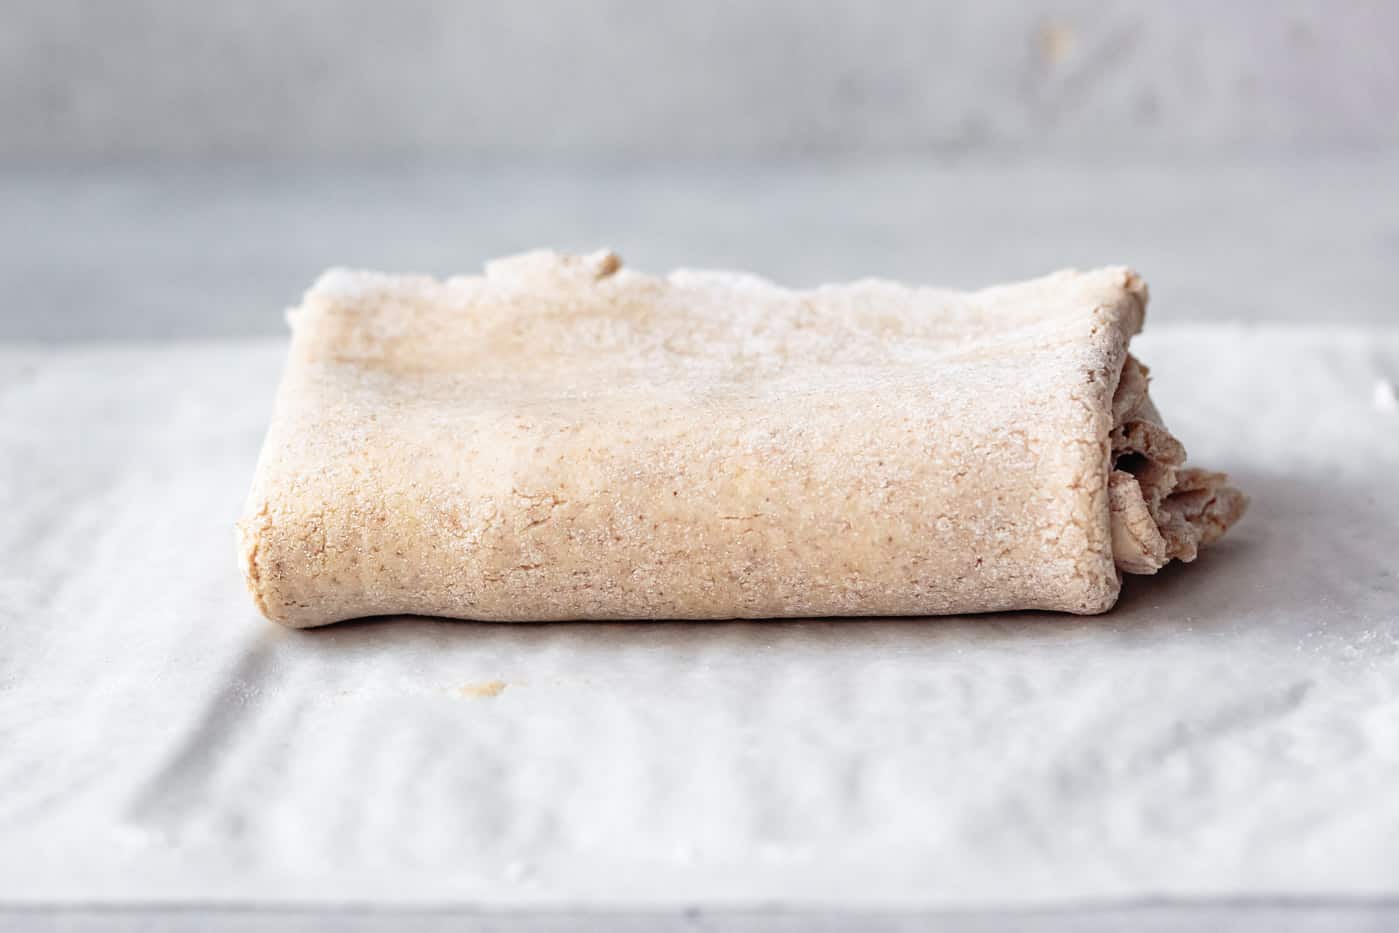
- Fold the dough in thirds like folding a letter, then fold in thirds the other way. Flatten the folded dough slightly, re-wrap, and chill until firm, 30 minutes.
- Repeat the rolling and folding process one more time. The dough will become more smooth and pliable the second time around.
Shape the crust:
- Remove the dough from the fridge, unwrap, and place on a lightly floured piece of parchment. Roll out the dough into a 12" circle, dusting the dough lightly with cassava flour as needed, rotating and flipping it to prevent it from sticking.
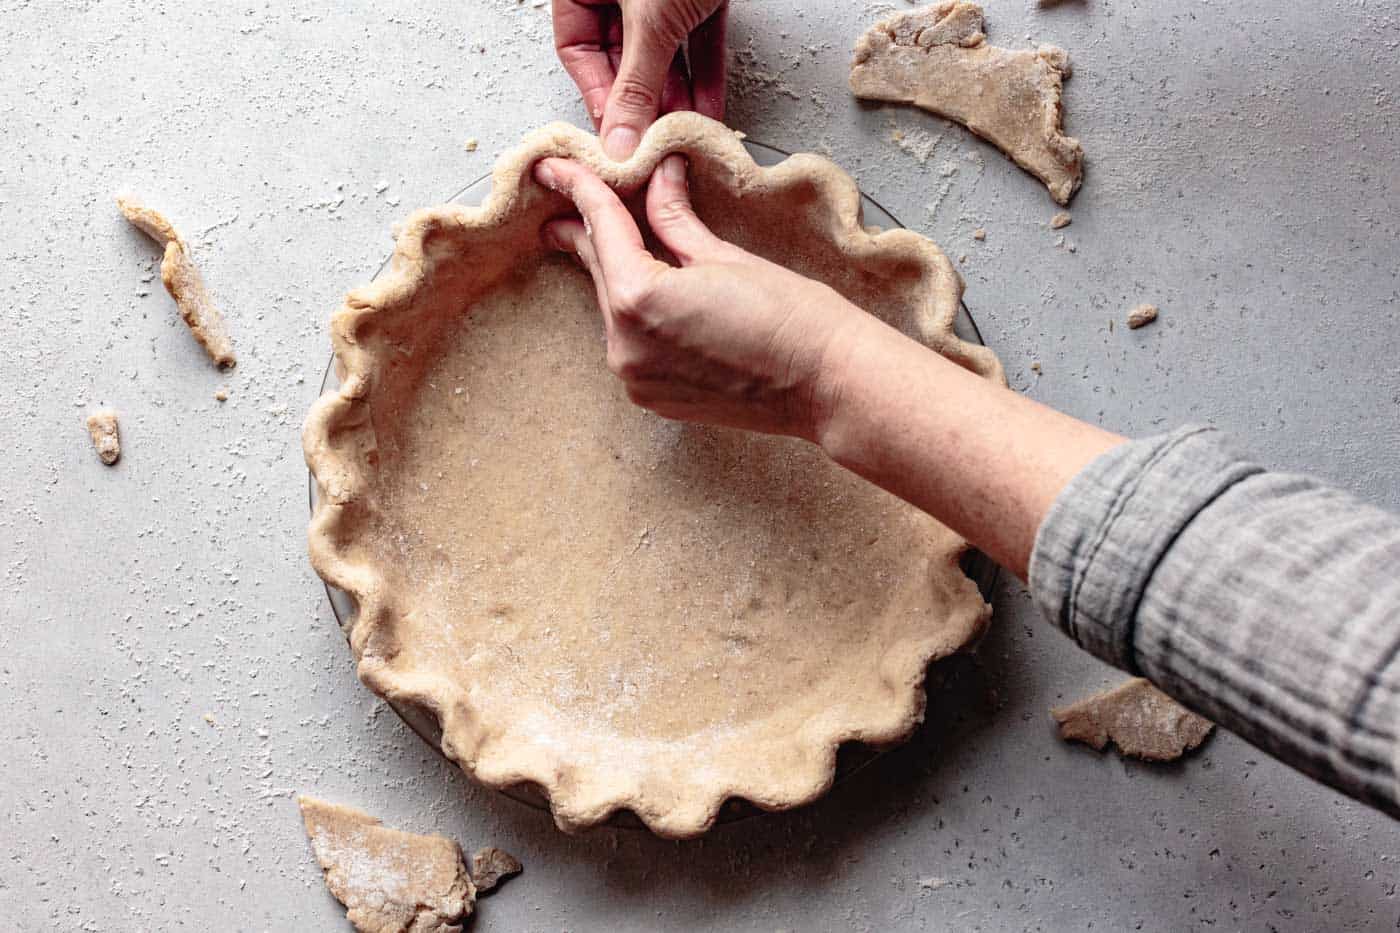
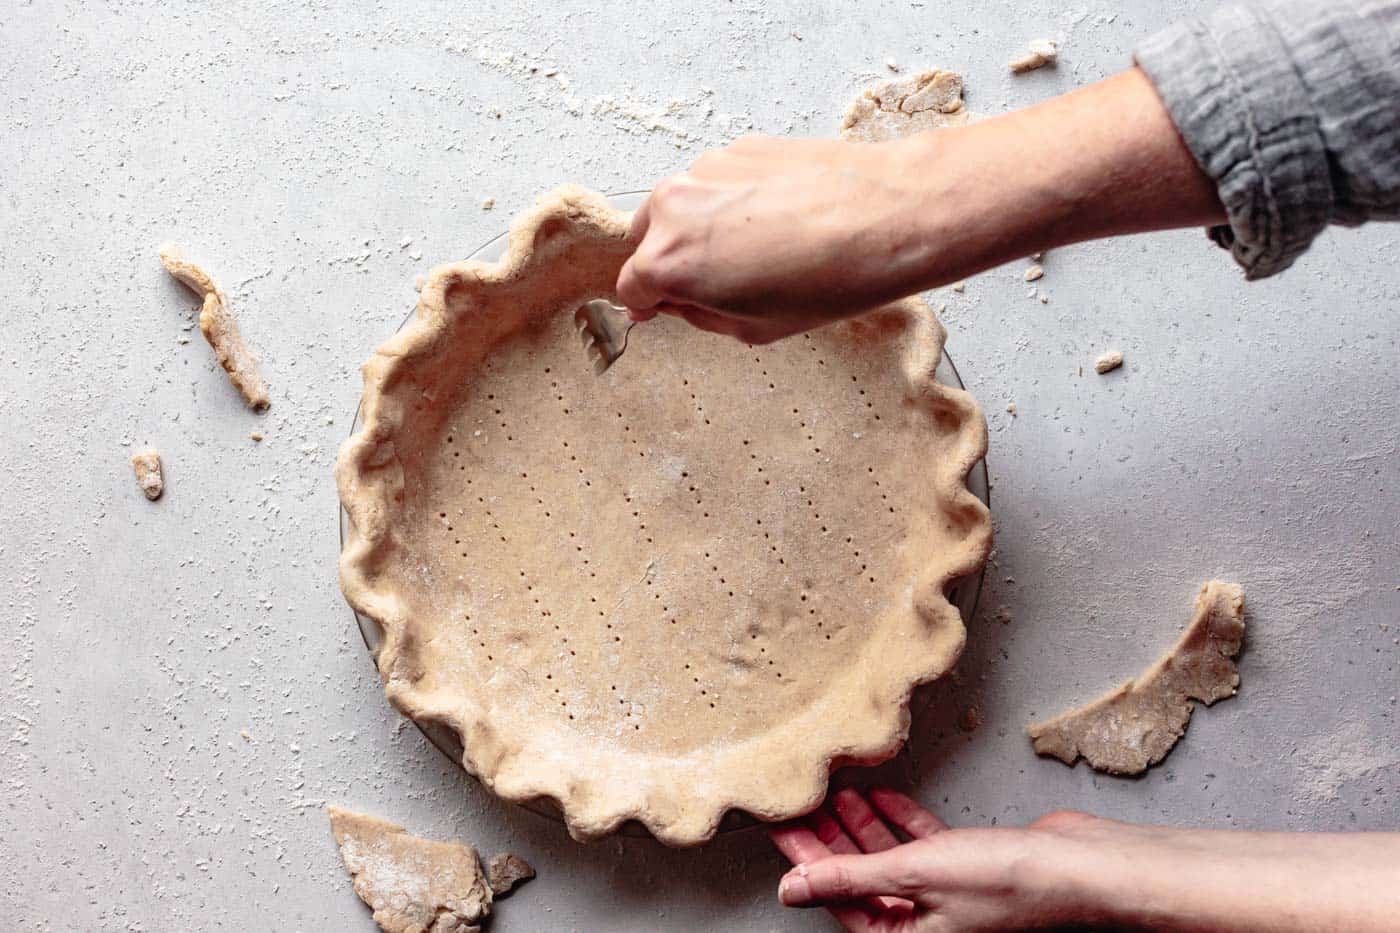
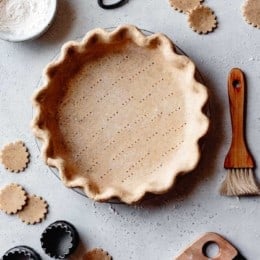
- Ease the dough into a 9" glass pie plate, fit it into the corners, and trim it to a 1" overhang. (Save the scraps to patch any tears in the dough post-parbaking.) Fold the overhang of the crust under, and flute the crust by pressing it between the thumb of one hand and the index finger and thumb of the other hand. Prick the bottom of the crust all over with the tines of a fork.
- Chill the crust until firm, at least 30 minutes. Once the crust it cold, you can wrap it and refrigerate it for up to a day, or freeze it for up to a month or two. (If using a glass pie plate, let the frozen crust stand at room temperature for 30 minutes before placing in a hot oven, otherwise the glass can shatter.)
Bake the crust:
- Position a rack in the lower third of the oven and preheat to 400º. If you have a baking stone, put it on the rack as this will help the bottom of the crust stay crisp. Place the cold crust on a rimmed baking sheet. Fill and bake as directed in your pie recipe, or...
- To blind bake the crust, line it with a piece of parchment paper, and fill to the top with pie weights, dry beans, raw rice, or clean pennies, pressing the weights into the sides and corners of the crust. Bake the crust for 15-30 minutes (shorter for a metal pan, longer for a glass pan), until the dough will hold its shape when you lift off the parchment. Carefully remove the weights and parchment and bake until the bottom is dry and lightly golden, about 5-8 minutes longer (for a parbaked crust) or until deeply golden, 8-12 minutes (for a fully baked crust). Use the saved scraps of dough to patch any holes, cracks, or tears in the dough, baking for a few more minutes post-patching. A par-baked crust can be made a day ahead, wrapped tightly, and stored at room temperature for up to a day or two, refrigerated for up to 1 week, or frozen for up to a few months.
Video
Notes
- 10 minutes to mix the dough
- 30 minutes to chill
- 10 minutes to roll and turn the dough
- 30 minutes to chill
- 10 minutes to roll and turn the dough a second time
- 30 minutes to chill
- 10 minutes to roll out the dough, get it in the pan, shape it, and dock it
- 30 minutes to chill
- 30-40 minutes to par-bake the crust
- Well-wrapped dough will keep refrigerated for up to 3 days and frozen for up to 2 months.
- A well-wrapped unbaked crust will keep refrigerated for up to 2 days and frozen for up to 2 months.
- A well-wrapped parbaked crust will keep at room temperature for up to 1 day, refrigerated for up to 3 days and frozen for up to 2 months.
- Once you've gotten a feel for making this dough, I recommend making a double batch at a time. Keep the extra dough in the freezer for the next time you're ready to bake.


Laurie says
THE BEST grain free crust!!! I used it for a pot pie and it was perfect. Cannot wait to try a fruit pie next. I also made crackers from the little piece I had left over (better than any cracker I have made; just added a little salt and herbs to the top)
Alanna says
Oh I LOVE that idea for crackers, and I'm thrilled that you loved the crust!
Chemena says
This is the best recipe!!! Thank you very much!!!
Alanna says
Aw I'm so glad you like it!! What did you make with it?
Teresa says
Brilliant, BRILLIANT! It held up to a moist blueberry pie (need more starch next time) and the upper edge was deliciously crisp and light. The 'laminated' dough was SO flexible and easy to work with and baked up crisp. Just brilliant, thank you!
Alanna says
I'm so glad you loved it Teresa! Now I'm craving blueberry pie big time. Feel free to give a star rating if you like as well!
Matthew Roadnight says
Wow. Fantastic. It really was perfect for the quiche pastry. This is the best paleo pastry recipe I've used.
Anastasia Dosov says
Question - can you use eggs instead of flaxseed meal or chia?
Alanna says
Hm, I'm not sure, but you could certainly try it! The flax/chia are sort of replacing xanthan gum and helping the dough hold together. If you experiment, you would want to decrease the water in the recipe since the egg will be adding about 3 tablespoons of liquid.
M says
I haven't made it yet. Giving 5 stars cuz it wouldn't let me type in comment box and the pictures look great. And your directions seem complete.
Wondering if your crust would work to wrap as a vegan wellington?
TIA
Alanna says
Aw thank you! Yes I think it would work beautifully as a vegan wellington. I would recommend giving the dough the turns/folds so it will be pliable and easy to work with. Please let me know how it comes out!
M says
Thank you! Will do.
Jennifer says
Beautiful crust used for SK's cranberry carmel almond tart. I would add some sugar next time because the crust read more savory for the tart & didn't match the cranberry carmel almond ingredients. Perfect recipe, beautiful results none the less. 10/10.
Alanna says
I'm so glad you liked it. You can absolutely add a little sugar next time. Love Smitten Kitchen and that recipe sounds luscious!
Siv-A says
Hi! This sounds amazing, I want to try it for a vegan gf wellington, but I cant get cassava where I live (and dont have time before the holidays to order it online.) What can I sub it with do you think? Thank you.
Jeannie says
What a find!
Used this recipe to make sausage rolls — which is, oddly, one of the things I miss having gone grain free. They were a hit. So good! And I thought the whole turning thing would be a challenge. It’s not. Not even a bit and I could definitely see how it made the dough easier to work with. Thank you so much for an awesome recipe.
Alanna says
Hi Jeannie,
I'm so glad you loved this recipe and that it worked well for making sausage rolls. Those sound utterly delicious. Now I'm craving them myself!
Shelly says
Sensitive to flax and chia. What could I use as a replacement?
Thx
Shelly
Alanna says
If you can tolerate xanthan gum, you could try using 1/4 - 1/2 teaspoon instead. Psyllium husk (whole or ground) could also work, you would need to play with the amount depending on which form you tried. Or you could try using more tapioca flour and less cassava flour; you may need less liquid since the chia/flax are very absorbent. Please let me know if you experiment!
Cyd Rosen-Herrmann says
can you cool down this crust, add raw avocado key lime pie and then refrigerate? Will this raw pie taste okay in the cooked pie crust?
Alanna Taylor-Tobin says
Yes, I think that would work! The only consideration is that this crust firms up when chilled since it's made with butter, so it's a little less tender than when at room temperature. Just in case you didn't see it, I do have a paleo vegan key lime pie recipe as well! It uses a nut-based crust that's really nice when chilled.
Charity says
Hi! I made this pie crust recipe to use along side your apple pie recipe! I wish I could give this 10 stars! I never thought I could ever make something this delicious! Your instructions were so detailed and easy to follow! Thank you for sharing this!! My 3 and 6 yr old devoured this pie! Better than any regular apple pie I’ve had!!
Alanna Taylor-Tobin says
I'm so glad you all loved the crust and pie - that makes me very happy to hear! Thanks very much for the sweet note!
Ange says
So I made this crust today to make some hand apple pies and first of all, it was a hit with my family. They normally stay away from my baked goods since they don’t like the taste/texture of grain free flours. But I didn’t watch the video demonstration. 😅 so here’s what happened, I ended up putting all the water and lemon juice it called for and my dough was incredibly wet and sticky and i took it out and left the excess liquid in the bowl. I had to add a bunch of cassava flour to be able to handle it without making a sticky mess. It worked! I turned the dough and let it chill. The crust turned out SO good. It was so buttery and crispy. I can’t wait to use this dough to make savory pies! Thank you so much for the recipe you’re amazing.
Alanna Taylor-Tobin says
Woohoo, I'm so glad it worked despite having some extra liquid and cassava flour! I've found that these GF crusts can take more hydration than wheat flour crusts since there are no glutens to toughen up. I'm thrilled that it was a hit! I'm so hungry for savory pie now – yum!
Justine says
The best and easiest GF pie crust I've ever made. As others have noted, the folding, laminating step was so easy. Cassava flour is an amazing find too. Thanks!
Alanna Taylor-Tobin says
That makes me so happy to hear! Thanks a bunch for trying out my recipe and for the sweet note! What kind of pie did you make with it?
Tasha says
I'd like to make a meat pie with this crust recipe - so I'll need both a top and bottom crust. How would you recommend assembling the meat pie?
Do I do the following???:
a) get the bottom pastry into the pie plate
b) chill 30 min
c) add the meat filling to the pastry lined pie plate
d) roll out the top pastry and cover the meat filling
e) chill 30 min
f) bake
Or would you assemble it all (bottom pastry + meat filling + top pastry) and then chill it all together for 30 min before baking?
Thank you!
Alanna Taylor-Tobin says
Mmm that sounds delicious! I think assembling it all together, then chilling the whole thing for 30 minutes before baking would work! Just make sure the meat filling is cool / cold before adding it to the pan.
What's in the filling? I want to try!
Tasha says
Thank you for your quick reply! I do a ground lamb filling with veggies (onions, garlic, celery, carrots, some small white sweet potato cubes, green onions) and herbs (basil, rosemary, thyme, oregano) and of course salt & pepper for seasoning. One of these days, I'll try a curry lamb filling...maybe even add some turmeric to the pastry dough??
Alanna Taylor-Tobin says
That all sounds amazing. Save me a piece please!
Tasha says
It worked!!! Family loved it and were eating up every little crust crumb on their plates! But I'm sorry...there's no pie left to send you! LOL! The final baked crust did crumble a bit when cut, but not nearly as much as other pie crust recipes I've tried. We're nut and dairy free, so I used tigernut flour instead of the almond & 1/2 lard and 1/2 Nutiva Shortening instead of butter. The only difficulty I had when working with the dough was it breaking along the fold lines when it was folded. But I just smushed the layers back together when it was rolled out and all was well. Thank you so much for sharing this recipe!
Alanna Taylor-Tobin says
Ah I'm so glad it worked! I don't begrudge the family eating all the pie - much ;) !
I'm so glad those substitutes worked well, and I can see how the dough would be a bit more crumbly with those subs. You could try using more tapioca and flax to help the dough adhere better if you make it again. So glad it was a hit!
Arielle says
Hello, would I be able to use this dough for empanadas?
Alanna Taylor-Tobin says
Oh yes, I think that would work beautifully and I've been wanting to try it myself! I know some empanada recipes use an egg in the dough, which I don't think would hurt to use in place of some of the liquid. In that case I would double the recipe and add in 1 egg in place of 1/4 cup of the water.
I developed this (gluteny) empanada recipe for a client in case it's helpful for the filling and process.
Please let me know what you try!
Sharon says
Absolutely amazing. This is the BEST paleo bakimg recipe I've found online, I've made the paleo apple pie and chicke pot pie with it. It's a dream to work with and the results - flaky and tender, just as pie crust shpuld be. Thank you so much for this recipe, It's going to be a staple in my house.
Alanna Taylor-Tobin says
Aw this makes me so happy! I'm so glad it was a hit. Really appreciate the note and rating!
Sy Ohene says
Just wanted to say thank you sooooo much for this recipe. I have tried many different grain-free pastry recipes and for the most part, they were not great. My husband told me to stop experimenting with grain-free pastry recipes because I would never have an alternative (I’m allergic to wheat, rice, rye, barley). I made a mince meat pot pie and it was delicious. Even my husband (who can have normal wheat pastry agrees. Thanks again. I plan on trying to make pasties to see if they will work. All the best. 💕💕
Alanna Taylor-Tobin says
Oh I'm so glad you and your husband both enjoyed this pastry recipe. Did you ever try it for pasties? That sounds absolutely delicious. Very hungry for dinner now!
Syerramia says
Hey,
I have finally made the pasties and they are amazing. My husband who has no allergies and is accustomed to eating all things gluten loves them. Really can’t thank you enough for this recipe.
Alanna Taylor-Tobin says
I'm so glad you both love the pie crust dough and that the pasties were a hit - those sound so good!!
Lynne says
First time making the Paleo version of your fabulous gluten-free crust. Worked like a charm even though I had to substitute hazelnut for almond flour. I also made it vegan by using Miyoko’s vegan butter. I always do two turns of the dough and usually the frisage. This recipe didn’t call for that step. Made a delicious nectarine galette! Flaky and crisp.
Alanna Taylor-Tobin says
Hi Lynne,
I'm so glad this recipe worked well with vegan butter (Miyoko's is THE BEST) and hazelnut flour (YUM!) I bet those flavors were HEAVEN with fresh nectarines.
I left out the fraisage step here just to simplify the recipe a bit, but I'm not surprised that it worked beautifully! I'll have to try that next time!
Cheers,
Alanna
Antonia says
Hi! Is this crust ideal for making christmas mince pies?
Alanna Taylor-Tobin says
Yes, if you're looking for a flaky, buttery, tender crust, this would work great for mince pies. Let me know if you try it!
Fiona says
I used this pastry for mince pies and will never use the wheat flour version again!
Also, I use this pastry to make quiches for my 88-year-old, severely underweight mother, who was diagnosed with an autoimmune disease two years ago (can‘t eat grains). She‘s quite picky and has difficulty putting on even the slightest bit of weight, but she absolutely loves this pastry! This pastry has kind of saved our lives (and my nerves), since she likes to have it for dinner every (!) night.
So thank you a thousand times, dear Alanna, for inventing and publishing this amazing recipe! Greetings from Berlin, Fiona
Alanna Taylor-Tobin says
Hi Fiona,
Oh my goodness, I totally choked up when I read your note. I'm so glad the pie crust is a hit with your mom; what you all are going through sounds really hard. It's so sweet of you to make her something you know she loves. Sending you both many good wishes for a delicious holiday season.
xo,
A
Adiya says
Hi! I made this recipe for my Apple and pumpkin pie and it was super delicious! But… the crust was really hard. We made the pies the day before we ate them and stored them in a warm, dry place. Do you have any idea why the crust was so brittle?
Alanna Taylor-Tobin says
Hi Adiya,
I'm so glad you liked the pies, though I'm sorry to hear about the crusts getting hard - that's no good! My crust isn't usually hard the following day; in fact, it usually softens as it absorbs some of the moisture from the pie filling. I'm more than happy to help troubleshoot and I appreciate the feedback!
Where did you store them? Did you cover them at all? How was the crust to work when you were making them? (Wondering if maybe the dough needed a bit more hydration?) Did you do the folds/turns? Did you make any changes to the recipe or use alternate ingredient suggestions? Did you use butter or a different fat?
Thanks for the extra info - we'll get to the bottom of this!
xo,
A
Adiya says
Thanks for helping! You might be onto something with it needing more hydration though, I don’t know. It was amazing to be able to work with gf dough that holds up. We made a great apple pie lattice. We covered it with a tea towel to store it. We did do the fold/turns two times. The only change was we didn’t refrigerate it again that last time after rolling it out. We used butter. I definitely don’t want to give up on this pie crust because it was awesome. Would love to figure out the issue. We did double the recipe so not sure that affected it.
Alanna Taylor-Tobin says
Hm, it sounds like you did everything just right with the dough. If it was easy to work, then the hydration was probably correct.
Clarifying question: which part of the crust was hard/brittle? Was it the outer fluted lip, or the top of the lattice and bottoms of both pies as well?
My best guess is that maybe covering with only a tea towel let some air in and dried out the exposed part of the crust. I usually store baked pies in a large plastic container, so maybe that helps? I will say that sometimes this crust isn't soft enough to eat with just a fork, so sometimes I either use a knife while eating a slice, or I'll pick it up with my hands (if the filling isn't too messy!)
One other potential variable is the different brands of flours can be ground differently. Although if the dough was easy to handle, this likely isn't the issue.
Let me know your thoughts!
Ashley says
Another winner! I have battled many a Paleo pie crust; this one is by far the best tasting with the flakiest texture and easiest. It was a huge hit with the galette I made my family at Thanksgiving, and not one of them is used to eating like me. Would this recipe work for a type of Christmas cookie with cookie cutters? Trying to figure something out for my kids to decorate this Christmas. Thank you!
Alanna Taylor-Tobin says
Hi Ashley,
I'm so glad the pie crust was a hit with the whole family and that it was easy to make and flaky - yay!! What kind of galette did you make with it?
Ooh I have just the thing for you and your family: I tested a paleo version of these GF sugar cookies (see the notes in the recipe card!) It's also made with cassava, tapioca, and almond flours but it's more like a sturdy shortbread cookie texture. And I also have a recipe for healthier icing made with coconut butter that can be colored naturally and used to ice the cookies.
Please let me know if you try them!
Happy baking,
Alanna
Ashley Godwin says
I made an apple galette!
Alanna Taylor-Tobin says
Aw nice!