A few kind souls have asked recently how I improved my food photography since my early days of blogging. I studied photography a bit in high school and college, but had never realized how much is involved in shooting food. It's surprisingly complicated! So, since there is no quick answer to that question, I wanted to share a handful of the resources, materials, and tools that I've found helpful over the past 5 years along with some fun (i.e. embarrassing) before and after shots.
A note about affiliate links in this post: some of these links will take you to Amazon where I may receive a small percentage of sales, at no extra cost to you. I actually prefer supporting local businesses, and buy all my photo equipment from Samy's in San Francisco. B&H is another excellent resource for photo equipment with prices competitive to Amazon (and a much nicer website with more trustworthy reviews from the pros).
1. A dSLR camera
One morning three years ago, I dropped my camera in breakfast. At the time, this seemed like a great tragedy, but it ended up being for the best. I'd been using an outdated point and shoot courtesy of Jay. The viewfinder was so small that shooting on anything but auto was impossible; I couldn't control anything. In an attempt to get the dramatic blur that I thought of as "professional-looking" I would get up as close as possible to the food. (I also didn't have any interesting props or backgrounds to merit pulling back from the shot – more on that later.)
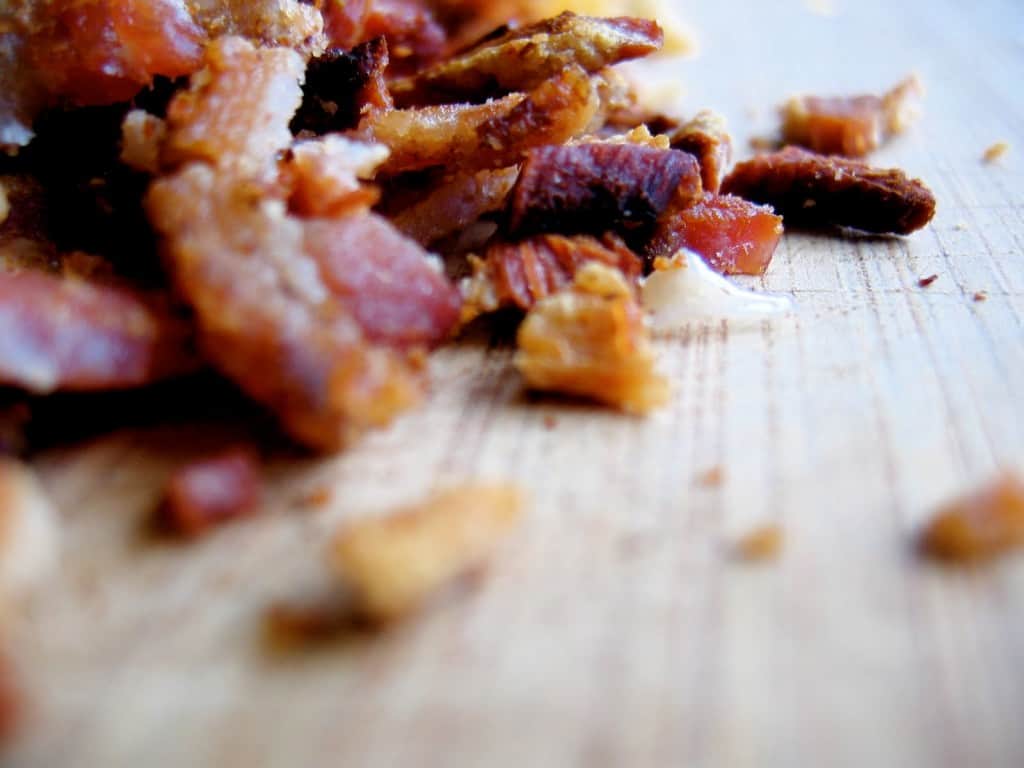 |
| OMG, what is that? Is it going to eat me?! Oh, it's bacon. |
I didn't know about white balancing back then, so my photos often had a (then) undesirable blue cast that I wasn't able to adjust adequately. (Now I've learned to love and work with that cool light, and how to balance color more effectively when shooting RAW in Lightroom - more on all of that later.)
 |
| This blue-hued light drove me nuts. Warming it up in iPhoto just made it look off. |
Choosing a camera was agonizing. I spent months buried in specs and reviews, asking every photographer I knew for advice. Finally my friend Pete Lee said, "I don't trust technology with my images. Get a dSLR." But which one? I eventually headed to a camera store and found it supremely helpful to be able to hold the various options. Canon's Rebel T2i, their second cheapest dSLR at the time, felt the most comfortable in my hands. It was small and easy to grip, and it didn't scare me the way the larger bodies did. I went for it. (The current model is the T5i.)
With this camera, I had more control over the images, and felt more comfortable pulling away from the shot to show more of the set-up. (Plus I began investing in some more interesting props: silver flatware, linens, and some small bowls – more on this later.)
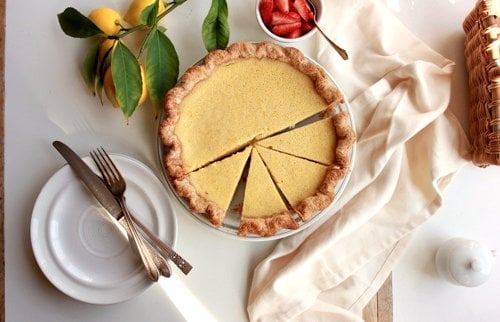 |
| One of my first dSLR shots: Meyer Lemon Buttermilk Pie |
2. Shooting in RAW format
Digital cameras can convert the information that their sensors capture into either RAW or JPEG format. JPEG files have the advantage of being smaller files (only by a factor of 2 or 3) but the way they slim down is by throwing away information. They also alter the images, giving them a boost in contrast and color, which can make everyday shots pop more from the get-go. The downside is that you lose some control over your image. If it's over- or under-exposed, or if it contains very dark shadows or bright highlights, the JPEG will throw away the information within the black or white areas. If you want to bring back that detail, you can't – it's gone for good.
 |
| Two-Persimmon Tea Cake and too-bright whites in 2010 |
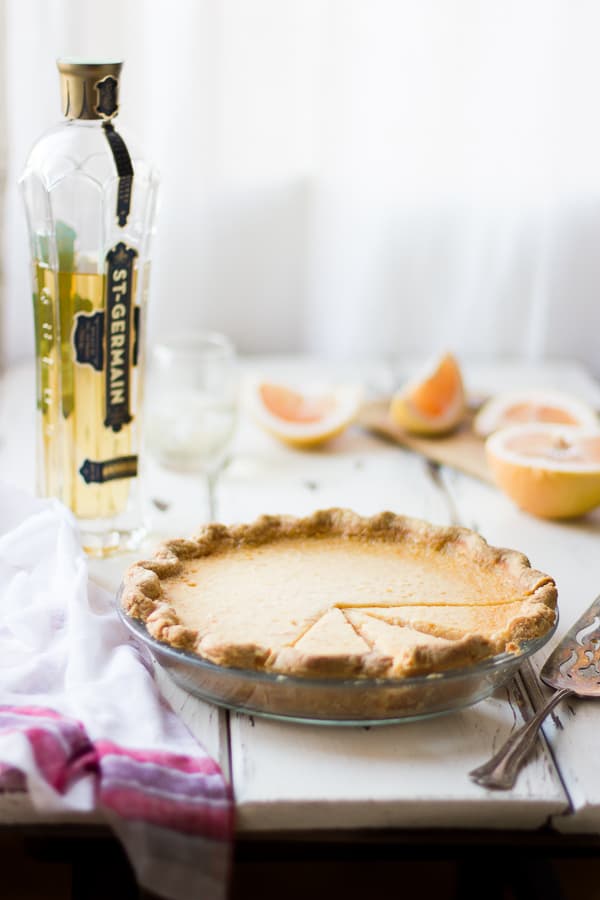 |
| A bright, RAW shot with detail brought back by decreasing the highlights in Lightroom, 2014 (and GF Grapefruit Custard Pie) |
But the biggest difference that I noticed when shooting RAW was that my images looked softer and more natural, with even tones and fewer glaring highlights. They looked more like the professional photographs I was trying to emulate.
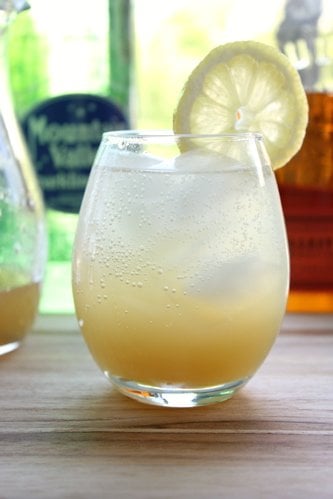 |
| JPEG image with harsh highlights in the background: Sparkling Whiskey Gingerade |
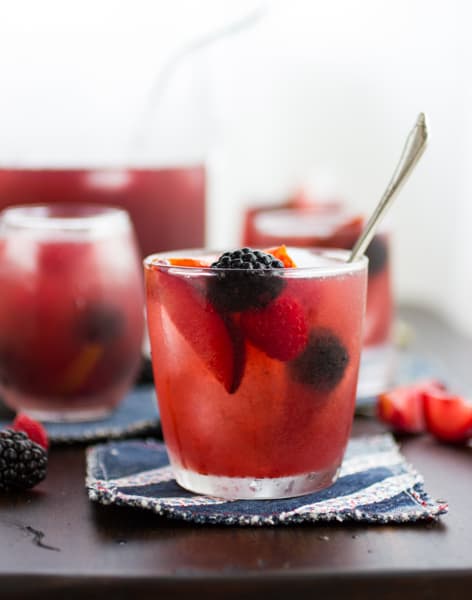 |
| Softer image shot in RAW format: Berry, Plum and Rose Sangría |
(That being said, one of the best photojournalists out there, Craig Lee of the Chronicle, shoots entirely in JPEG. He's a master of getting the image just right in the camera, even in difficult lighting situations. His latest book, San Francisco Chef's Table, overflows with these stunning images.)
3. Editing images in Lightroom
I had been using iPhoto for edits, and later Picasa. Both of these programs helped to brighten, sharpen, crop, and saturate images, but often left them looking fake.
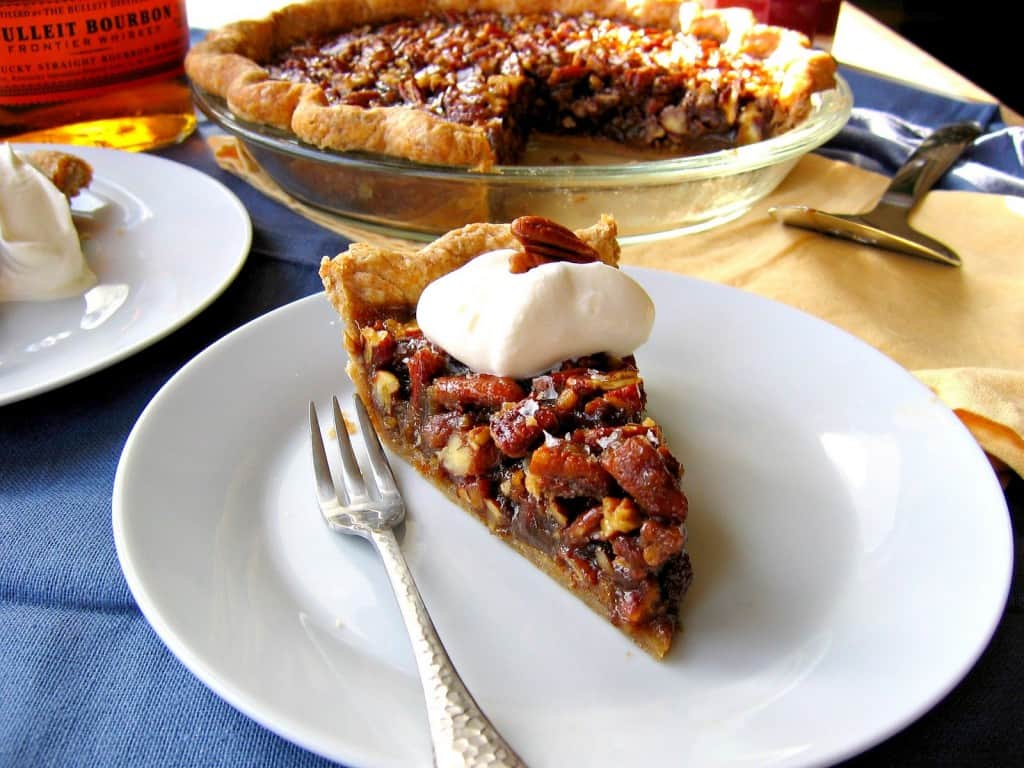 |
| A not-so-hot shot of a favorite pie: Maple Bourbon Pecan |
At the suggestion of my photographer friend Stephen Texeira, I invested in Adobe's Lightroom, which was $120 well spent. Lightroom is downright magical. It's easy to learn (thanks to Julieanne Kost's great tutorials) and it can make images look amazing. Lightroom's basic edits, such as vibrance, clarity, and exposure, look more subtle and natural than those functions in iPhoto and Picasa. Additionally, Lightroom has a host of functions that iPhoto didn't (though it may now, I haven't used it in a couple of years).
With Lightroom, I can now:
-process RAW images
-balance color on two axes: yellow/blue, and green/pink
-make lens profile corrections (undoing distortion caused by lenses, such as making the center of the image look closer than the corners)
-vignette images (darken the corners to bring the focus to the center of the image)
-create radial and graduated filters (to adjust the lighting and other factors in specific areas or sides of the image)
-remove small splatters, spills, and specks with the spot removal function
-paint adjustments on specific areas with the adjustment brush (I will often brush over the main focal point of an image and increase the exposure, clarity, and sharpness to make that part pop.)
-adjust a particular color on the axes of tone, saturation, and luminance (such as bringing out the greens or making the yellows pop)
-get rid of grain and make images easier on the eye by using the luminance smoothing function
The list goes on and on. Long story short, I LOVE Lightroom. Here's an example of two images, before and after editing:
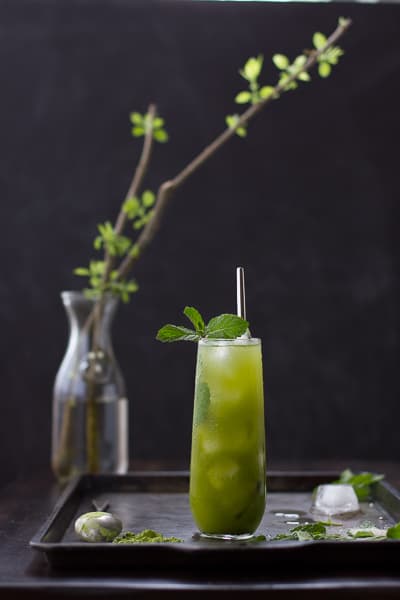 |
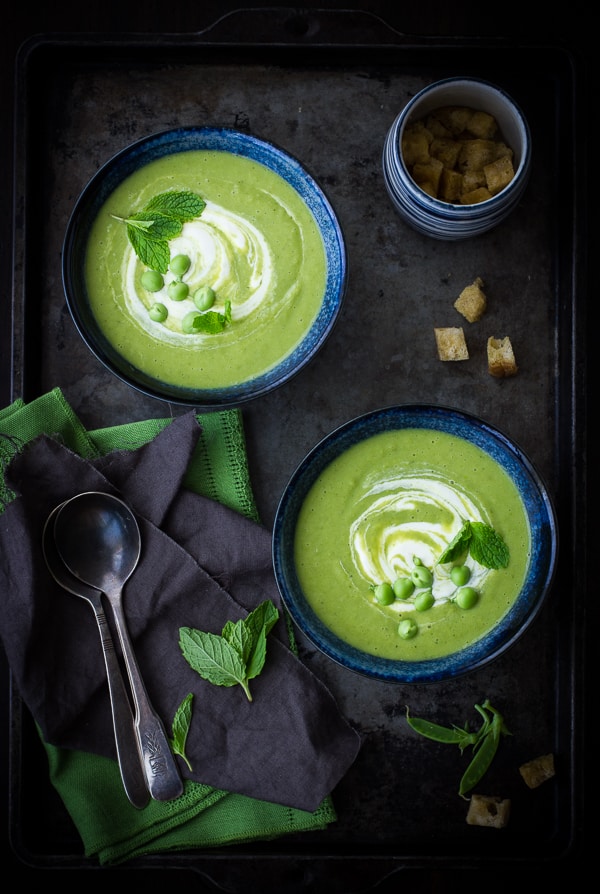
| Un-edited RAW file: the image looks flat, dull, and the white balance is off, making the image look too warm and obscuring the greens in the shot |
 |
| After editing in Lightroom: adjusted white balance, enhanced greens, added clarity, vibrance, and contrast, and painted over the two main objects with adjustment brush to increase clarity, exposure, and sharpness |
4. Good lenses
I'd heard from photographers all over that it's a good lens that makes a good image, not the camera, but I never really knew what that meant. One day I headed to the camera store and tested out Canon's lowest-end macro, the 50mm f/2.5, which costs around $300. It was a little bit like driving a Lexus after owning an old Volvo 240. It was solid and serious, smooth to operate, and made my kit lens, the one that came with the camera, seem like a plastic toy in comparison.
This macro lens can get up close and personal, as close as 2 inches from the subject, and it opens up to a fairly wide 2.5 aperture, which allows for sharp images with softly blurred backgrounds. (The f-stop or aperture refers to how wide the "eye" of the lens can open up. Just to be confusing, a smaller number means a wider opening. The kit lens could only open to 5.0 when zoomed in, which is much smaller than the 2.5. For more on aperture, see #11.) It's a prime or fixed lens, which means it can't zoom in or out, rather you have to move the camera closer or further from the subject to change the frame. But this enables the lens parts, including the glass which effects the detail in the image, to be higher quality at a lower price point. (Zoom lenses of the same quality tend to be 3 or 4 times more expensive since they need more parts to allow them to move.)
This is one of the first images I shot with Canon's 50mm f/2.5 macro lens:
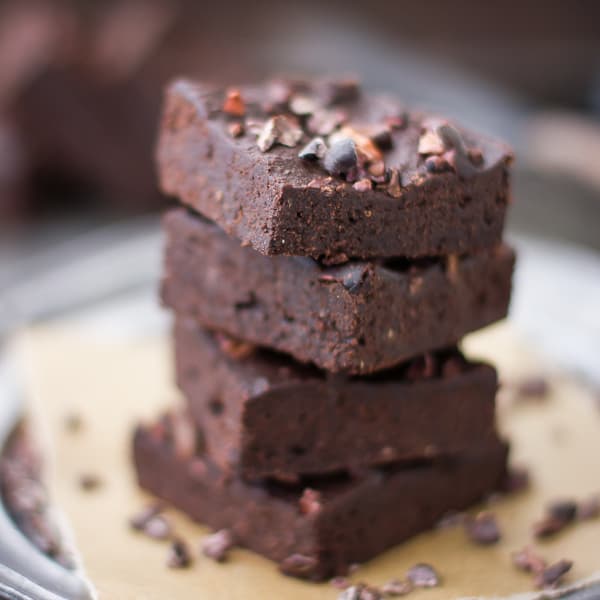
 |
| Gluten-Free Bourbon Pumpkin Cheesecake Brownies shot with Canon's 50mm f/2.5 macro lens for close detail and maximum bokeh (a.k.a. background blur) |
A year later, a photographer friend loaned me another lens, Canon's 50mm f/1.4, and it got me hooked. The lens made images look soft and dreamy, and the eye of the lens could open up really wide for extreme background blur. Here's one of the first images I shot with that lens:

This lens costs around $400. I had a bit of sticker shock at first, but quickly learned that you get what you pay for when it comes to lenses. The quality of glass is higher in pricier lenses. I won't pretend to understand the mechanics, but I can see a huge difference in the images I shoot with these lenses compared to the kit lens. The lenses also feel higher quality in one's hands and are a pleasure to work with.
This is now the lens that I use exclusively. I find it the easiest to manipulate, and I like the quality and detail that it captures. It's slightly less sharp than the macro, and I like the softness it lends to images. I'll use the macro if I need to get really close to a subject, but this doesn't happen that often anymore now that I'm pulling back from my set-up more.
Next on my list is a 28mm or 35mm which will pull away from the shot, getting more of the setup in the frame, and making top-down shots easier.
5. Books and tutorials on food photography
I've learned so much from these three books, and highly recommend them all:
Plate to Pixel by Helen DuJardin breaks down camera settings, lighting, and food styling in a simple and approachable way. Helene's photography is soft and natural, and she shows you how to take pictures in that style. I highly recommend this book as an accessible starting point for beginning or intermediate food photographers.
Food Photography: From Snapshots to Great Shots, by Nicole S. Young goes a bit more in depth into the technical aspects of food photography. Her style is different from Helene's, perhaps slightly more commercial, and I liked reading about some different techniques and explanations. This is a great second book for intermediate photographers.
Food Photography: Pro Secrets for Styling, Lighting, and Shooting by Lara Ferroni breaks down the basics. Additionally, she discusses the business of food photography including the different jobs of prop stylists, food stylists, photographers, and assistants. (I wish I had read this before taking a styling gig for a professional food photographer – I had no idea what I was supposed to be doing!) This is a great read for those interested in pursuing a carer in food photography.
And a great tutorial that helped me embrace that moody, blue light: Learning your Camera and How to Shoot Moody Images with Peter Georgakopoulos on Gourmand in the Kitchen
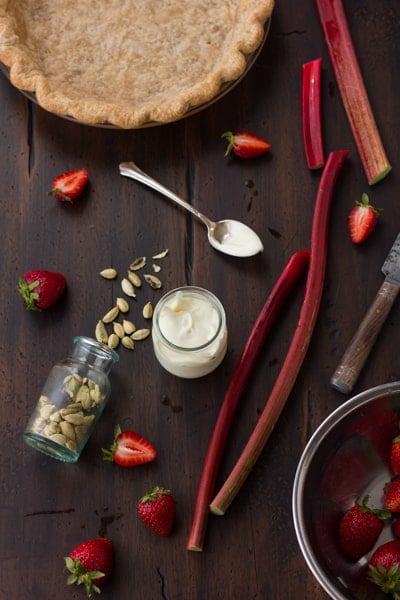
6. Getting Props (both literally and figuratively)
While praise is always encouraging, I'm (also!) always on the lookout for interesting kitchen props when I'm out and about. Friends and relatives have even been kind enough to lend me a thing or two when they notice me drooling over an old spoon or napkin. I'll even ask at cafes and restaurants if they'll sell me a glass or piece of silverware if it's one I particularly love. Yes, people think I'm crazy. And they're right.
My very favorite props that I own came from thrift stores, antique shops, and flea markets. These are genuinely old and somewhat one of a kind.
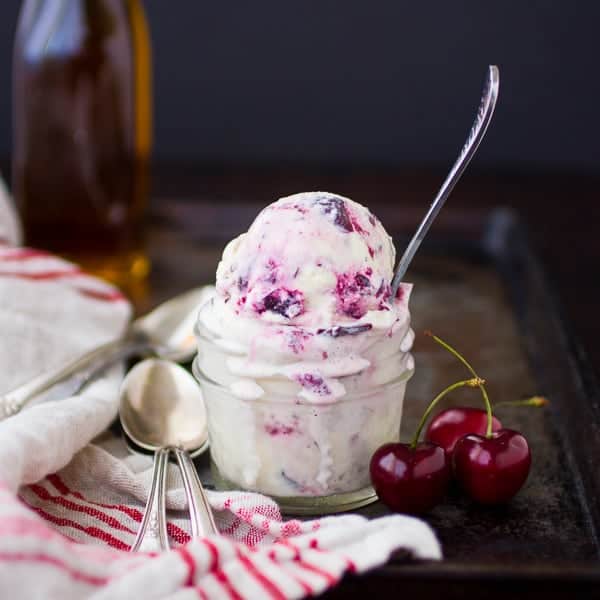
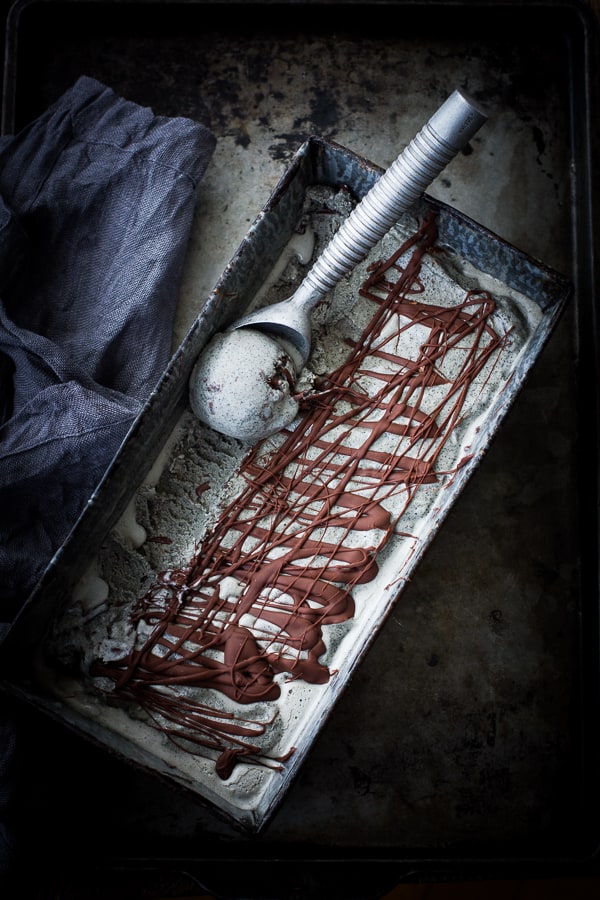 |
| Black Sesame + Milk Chocolate Ice Cream, and some favorite flea market finds |
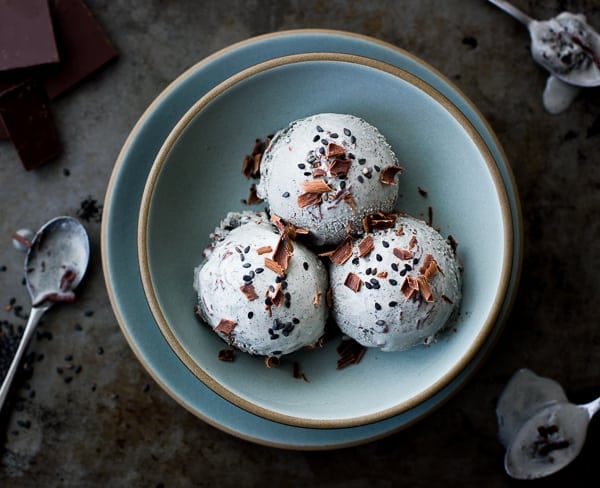
I like having a variety of plates, bowls, glasses, flatware, and napkins in different shapes, sizes, and colors to play with, and occasionally I'll buy something especially for a certain shot, like this bowl and plate splurge from Heath Ceramics for this ice cream shoot.
Other great resources for props are:
Crate and Barrel
Anthropologie
Etsy (especially handmade pottery, wooden bowls, cake stands, serving boards, and vintage items)
Here's a great post on finding food photography props by Naomi Robinson on Gourmande in the Kitchen.
7. Background check
Over the years, I've collected several different backgrounds to shoot on. They range in color and material, and I can choose which one I want to use depending on the mood, light, and color scheme I'm going for.
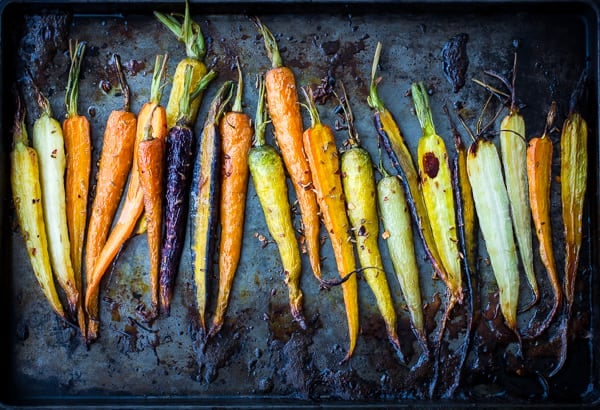
I found this nasty old pan in the back of the cupboard. Neither Jay nor I know where it came from, but it's my absolute favorite surface to shoot on. I like the texture it adds, and the cool, charcoal tone that can offset warm-hued foods and make them stand out. A friend once told me they thought it was some sort of exotic marble. Awesome!
I found this little coffee table at Pottery Barn, which I shot on for a while. I like the dark, distressed wood, but it's fairly small and I can't always get the angles I want.
Ah well, at least it makes someone happy.

I found this tutorial from Whipperberry on how to mimic a slate background by simply rubbing black foam board with chalk.
 |
| Faux slate background made with chalk and black foam board |
One day, Jay took me out to the woodpile at his parent's house. This may sound like the intro to a creepy, old-time murder ballad, but instead he uncovered some old wood boards from their house renovation. The wood was naturally weathered and stained. With the help of his mom's partner (Latvian waffle master Gunars), we screwed together some slatting to mimic table tops, each one about 3 by 4 feet. One we left bare:
Another I stained dark walnut, rubbed the edges with vaseline, painted over it in antique white satin furniture paint, then sanded off the vaselined bits to reveal dark wood underneath:

The third was the most fun. Inspired by this tutorial on how to make wood look old, and this one on how to make a faux vintage bread board, we torched the whole thing with a blowtorch, then used a rotating steel brush affixed to an electric drill to sand away the burnt bits and reveal the grain of the wood. We took a hammer to the wood to dent it in places, then I rubbed the whole thing with butcher block oil to seal it.

I also have one more background that doubles as a light diffuser:
8. White semi-sheer curtains
When I first started photographing food, I thought it would look best with lots of light, which meant direct light coming through the window.
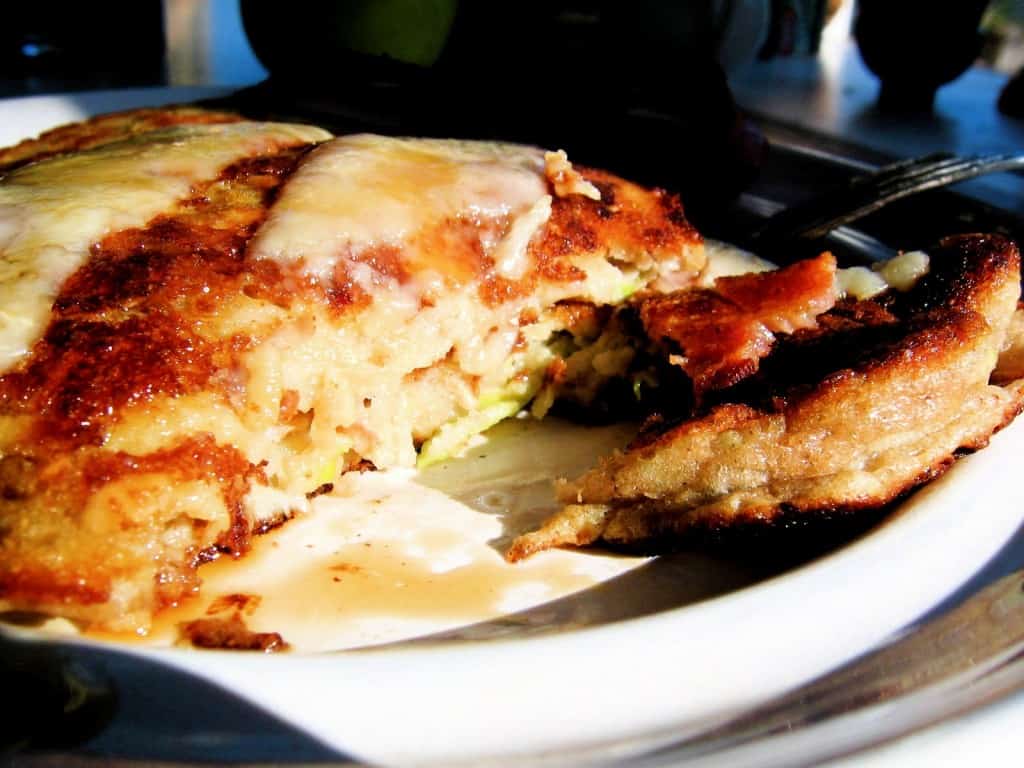 |
| Mmm, tasty! |
I quickly learned that this was not the case; food shot in direct light generally looks harsh, greasy, and flat (unless you are a pro going for an edgy look and know how to make it work). I switched to shooting in the indirect light also coming through my bare windows, which had a softer look. But I still had some harsh shadows and highlights:
Our ugly aluminum-cased windows had plastic mini blinds from the '80's, which did nothing to help with the light situation (in fact, they barely even went up and down anymore). When we finally invested in some white, linen curtains (from The Company Store), I finally started getting light that I was happy with. The curtains soften the light even further. Since I have a bay window, I get a lot of control over the light that comes through. I can part the curtains on the side or to the back of the set-up if I want stronger light, or pull them all the way closed for a very diffused look. They make a nice background when I want a shot back-lit. Plus, they look nice, and hide the ugly windows. An
all around win. Just say no to ugly '80's blinds.
 |
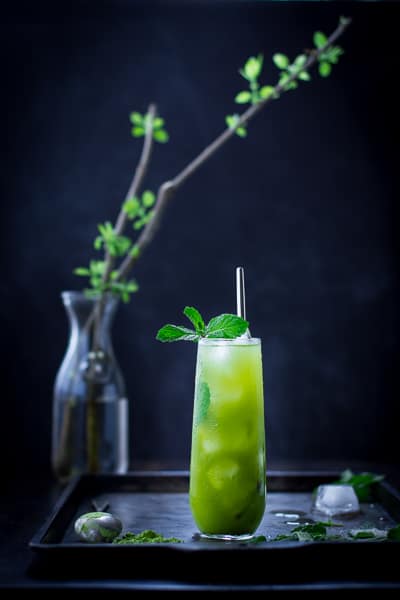
| This diffuse light is as delicate as a Ginger Lemongrass Sake Cocktail |
The lesson I learned is that food tends to look best, counter-intuitively, in fairly low light. This soft light can wrap around a subject, encasing it in a warm glow, evening out the lights and darks to make the image easy on the eye, enhancing the detail in the food so you can see what's going on. Low light means that it's harder to get sharp shots, but using a tripod solves this problem (more on this later). That isn't to say that harder light can't make beautiful food photos, but it's always nice to be able to choose.
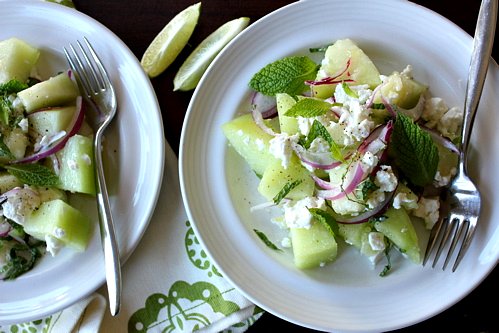
9. Playing with light
In addition to softening the light coming through the window, I like to try different directions. Most photos look best with side lighting, or light that comes from behind and to the side. Backlighting can catch the shine on liquids:
enhance texture:
and make drinks pop:

Sometimes I'll block the light coming through the window if I want deeper shadows for more moody shots:
Since I have a bay window, I get multi-directional light by default. But occasionally I'll use a white board to the opposite side of the food to bounce some light back onto it if I want to eliminate heavy shadows. Occasionally, I'll use an actual bounce card to add a highlight to a specific part of the shot if the available light isn't picking up that particular detail.
Remember that blue light I used to hate? After reading the Peter Georgakopoulos tutorial I mentioned above, I've learned to love it. I use darker props and backgrounds, I under-expose the shots, and I leave the camera on automatic white balance which lets the hue stay cool.
 |
| Moody Blues and Greens |
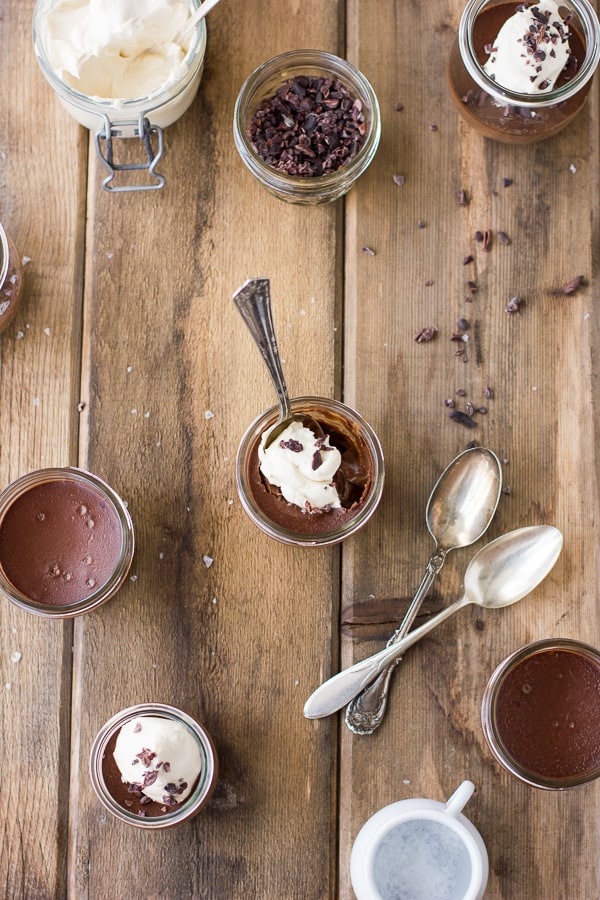
10. A tripod (and preferably, a good tripod)
I first got the cheapest, pan-head tripod I could find at my local photo store. I didn't know whether I would like shooting with one, so I figured I'd start with something low-end to test it out. And guess what? I LOVED using a tripod! First of all, my shots were tack-sharp. I hadn't realized how stressful it was to shoot free-hand; I would hold my breath and try not to move a muscle while I pressed the shutter release. Despite this, my shots were sometimes blurry. A tripod took away all of that stress.

Additionally, using a tripod got my camera up and out of the way of the messy food – I wasn't going to drop it in breakfast again. I could also set up a shot, then leave the camera to move things around in the frame, and return to the same frame again with ease.
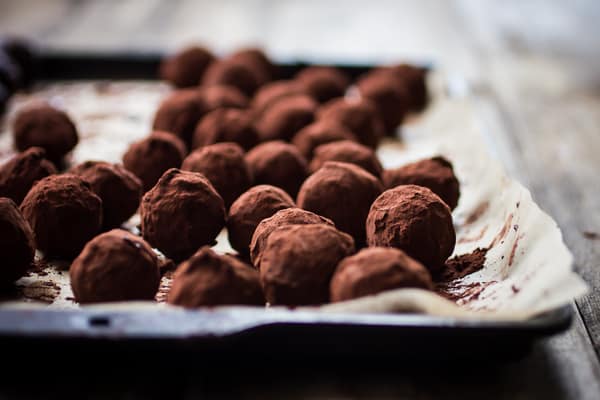
 |
| Thanks to my trusty tripod, these Bergamot Truffles are sharp despite being shot in almost total darkness |
Then my photographer friend Shelley loaned me a good tripod – Manfrotto legs with a grip-action ball head. These legs were so much sturdier and the head was easier to move around and get different angles. Then, thanks to Erin of Naturally Ella, I learned that Manfrotto makes some groovy legs with an articulating arm. This means that the top arm of the tripod folds down to a 90º angle making it easy to get top-down shots. My mind was blown. I needed to give Shelley's back to her, so I found those legs at my local Samy's. (They don't seem to be available online anymore, unfortunately.)
Another tripod bonus was being able to take action shots of my own hands using the 10 second auto-shoot option – no more holding the camera with one hand, or begging Jay to come take a picture of me.
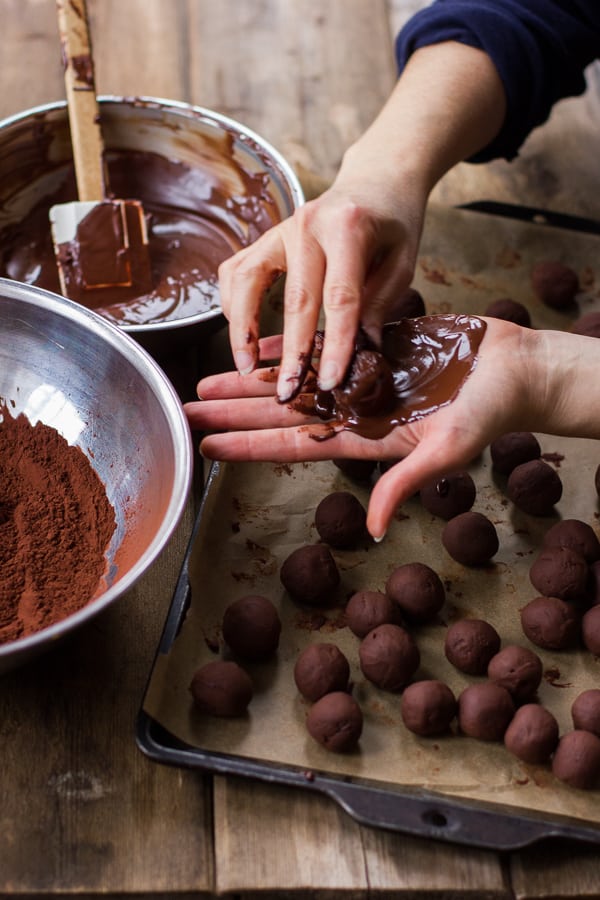 |
| Hand selfie and Bergamot Truffles |
Which leads me to:
11. Accepting the Holy Trinity in my heart: Aperture, Shutter Speed, and ISO
When I first switched to a dSLR, I shot entirely in aperture priority mode, which means setting the aperture (how wide the "eye" of the lens opens up to let in light) and letting the camera figure out which ISO and shutter speeds to use to properly expose the image. At first, I kept it on the widest setting (1.4 or 2.5, depending which lens I was using), which gave me maximum background blur with just a sliver of the image in focus.
 |
| Ultra-wide f/1.4 aperture for maximum blur |
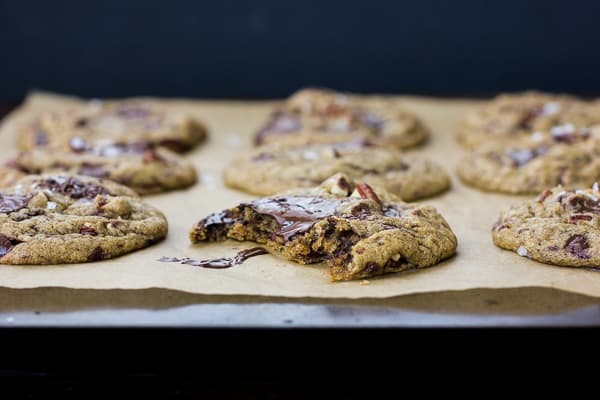
After a while, though, I noticed that, while some shots looked nice this way, others just looked out of focus and difficult to view. Lately I've been scaling back my aperture to a smaller 3.5 for straight ahead shots and 5.0 for top-down shots, and am liking the versatility it gives me.
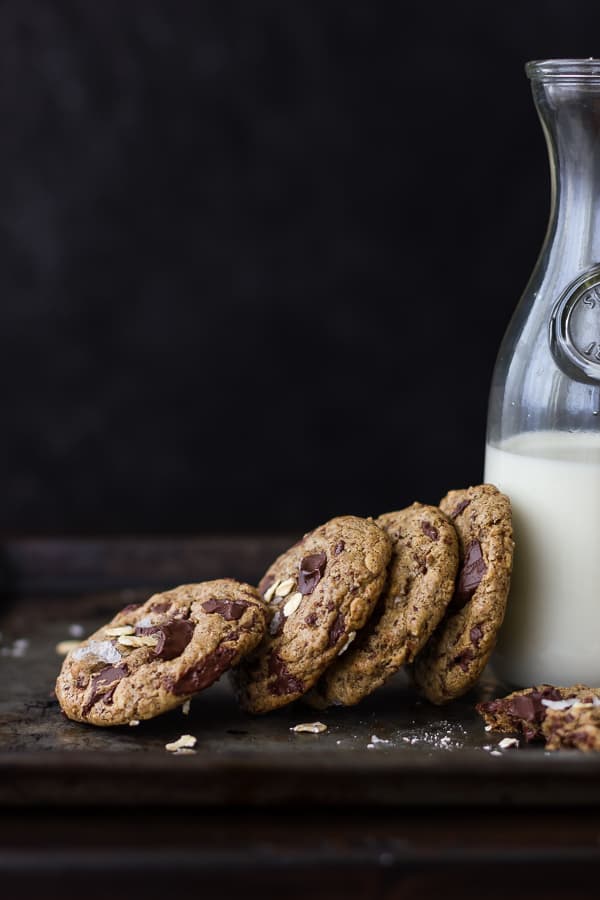
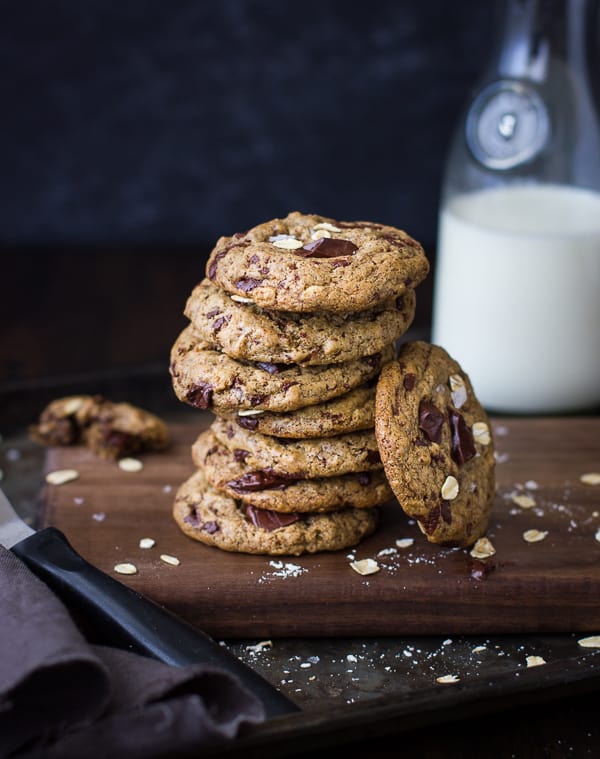 |
| Sharper cookies with a smaller (f/3.5) aperture |
Shooting in aperture priority helped me begin to understand how the other two settings, ISO and shutter speed, worked with aperture to expose the image properly.
Shutter speed refers to how long the eye of the camera stays open. I still don't understand the mechanics of ISO, but it too influences how much light enters the camera, and that I can explain. When I use a tripod with average light, I usually keep my ISO at a low 200, or 100 if the light is brighter than usual. This creates smooth images, though it means that the shutter speed has to compensate by staying open longer – not a problem with a still image and a tripod. If I shoot free-hand in low light, or if I want to freeze the action in an image, I'll bump up the ISO to a high 1600 so that the shutter speed can be faster and give a sharp image with frozen action. The high ISO creates a grainier image, but that's fixable in Lightroom using the luminance smoothing function.
 |
| A wide aperture, high ISO and fast shutter speed freeze the action |
After shooting in aperture mode for a time, I eventually got annoyed when my camera would try to help me
out by adjusting the exposure. Now I shoot in full manual because I like being a control freak when it comes to my camera.
12. Time, practice, and a dedicated personal assistant
Two years ago, I found myself in dire need of leaving my pastry chef job. I was looking for another job, the most promising of which paid little more than minimum wage, was a 45 minute commute each way, and necessitated working every weekend for the forseeable future. And this was after having completed pastry school and worked in the industry for nearly a decade. That is the harsh reality of working in a kitchen in San Francisco. It was all rather depressing. Jay said, "Just take a few months off to focus on your blog and photography." What a nice guy, right? This afforded me more time for goofing off working really hard at my art. Instead of trying to squeeze in a shoot before or after work, I could plan my day around when I liked the light best in our apartment.
I take hundreds of shots of each finished dish that goes up on this site. I know the pros get this done much faster than I can, but it takes me that long to get something I'm happy with; or not, and I'll do a re-shoot. I've learned to leave a good 1-2 hours to shoot the final shots of a dish (yes, I'm really that slow).
Luckily, I have a very helpful personal assistant:
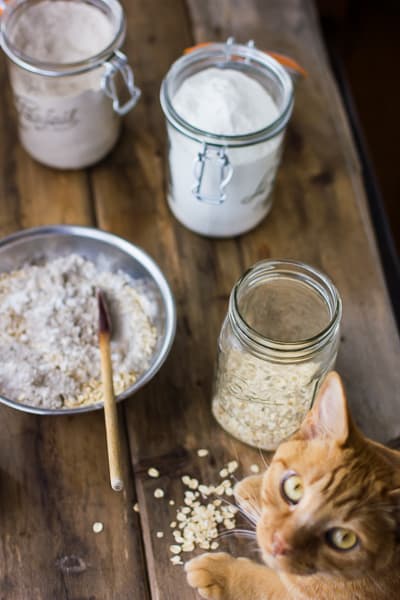
I'm sure I'll look back at these photos in a year or two and cringe, but I'm glad for everything I've learned so far and look forward to continuing the process. For now, all of my favorite images are gathered in my ever-evolving portfolio.
Now, if only I could figure out how to take good pictures on my iPhone...
Got any favorite tips, tricks, or resources for getting great food photos? I want to hear about it in the comments!
Check Out
- California Food Photography Workshop: Sebastopol {recap}
- California Food Photography Workshop
- Upcoming Food Photography and Food Styling Workshops
Thanks for reading! For more Bojon Gourmet in your life, follow me on Facebook, Twitter, Bloglovin', Pinterest, or Instagram, or subscribe to receive posts via email.


rika@vm says
Love this post! You are an amazing photographer!
Alanna says
Aw! Thank you, Rika!
Shanna Mallon says
Where was this article five years ago when I needed it, haha! Great roundup of tips. I'm still learning many of them, but I can see from your work that they're true.
Alanna says
Totally - where was it when *I* needed it 5 years ago? Thanks for reading, and for the kind words, Shanna.
June says
Great tips! I've never heard of RAW format but I will have to try it somehow. And OMG are those mini eggplants? So adorable! I need those now. :)
Alanna says
Thanks, June! I think you'll like shooting RAW. And those eggplants were such a treat! They're called Fairytale eggplant, and we found them at an amazing farm stand outside of Santa Cruz last summer.
Ana Kamin says
Best 12 tips ever! Thank you so much for sharing this!
Alanna says
Thank you, my friend!!
Kati says
Great post. I will definitely come back to read it again and try out our tips and check on the helpful links you provided.
Kati from black.white.vivid.
Alanna says
Thanks, Kati!
Jennifer @ Delicious Everyday says
It's so interesting to read tips from different bloggers on their photography setups and styles, particularly those I admire, such as you, as your photographs are simply stunning. You're lucky to have a big bay window. All the windows in my house are quite dark, but as you know you learn to live with what you've got :) I especially love the tips on backgrounds. I have a nasty old pan too, which I have only recently started using in my photos, but I just love it.
Alanna says
Wow, your photos are so beautifully lit, I would never have guessed about your dark windows! How do you do it?? (BTW, I'm dying over your dukkah chickpea crackers right now.) Thanks for the note. :)
Laura (Tutti Dolci) says
I always love reading about food photography tips (and just finished a 3-day CreativeLive session with Todd Porter & Diane Cu). Your work is gorgeous and I love your handmade backgrounds!
Alanna says
Yeah! I had planned to watch that, but then I wrote this post instead. I'm really bummed to have missed the live streaming. I'm sure it was epic! Thanks so much for the kind words - the feeling is mutual!
Valentina Duracinsky says
wow this is incredibly helpful! Thank you so much.
Valentina
Alanna says
I'm so glad to hear it! Thanks for reading and for the kind note. :)
arn says
Great post,really insightful . Been following for a while primarily because of the photography. Any tips for shooting glass/ liquids and avoid reflections, I still struggle with that.
Alanna says
Hi Arn,
Ugh, me too! Backlighing helps, as the light is behind the subject so you don't see the reflection. Also, lots of condensation on the glass if it's a drink. Shooting on a dark, matte surface will help eliminate a reflection of the surface on the glass, and shooting in low light helps, with curtains blocking the windows to prevent a reflection there. And there are dulling sprays you can buy, but you may not want to eat food that has been near it. You can try changing the direction you're shooting from, or changing the position of the light source. I looked for tutorials on YouTube, and those are all the tips I found. :)
Hope that helps. Thanks for the kind words!
Katie | Healthy Seasonal Recipes says
I nearly popped out of my seat when I saw the title of this post in my Bloglovin feed. So glad you wrote this and I can't wait to share it. I still don't use the graduated filters in Lightroom nor the luminance function. I will have to play with that. But one thing you didn't mention is if you shoot tethered. I assume yes???
Alanna says
Aw, thanks, Katie! I tried to shooting tethered once, but something went wrong and I haven't tried it since. I really ought to, though! It might cut down on how many hundred photos I need to take. ;) Thanks for the reminder!
Kezia says
Thank you so much for writing this post! I hugely admire your photography and was secretly hoping you'd share some tips. I often find photography very frustrating because the image I take tends to look so different from how I imagined or wanted it to. I'll definitely keep these tips in mind as I continue to practice!
Alanna says
Aw! Thanks, Kezia! Images I shoot rarely, if ever, turn out the way I envision them, either, to be perfectly honest. But knowing more about lighting, camera settings, etc. has helped me get a little closer. I think even the pros struggle with that sometimes. Thanks again for reading, and for the kind words. :)
Cheri Savory Spoon says
Thank you for taking the time to share these tips. Getting the right picture for me is the hardest part of blogging. Your pictures are always so nice. Thanks for sharing!
Alanna says
Thanks, Cheri! It's hard for me, too!
AmandaPaa says
You should have named this "12 things that make me a kick ass food photographer" - but I know you're too humble :) Such great tips that I'm going to try and incorporate. I have lightroom and have been playing around with it, but find it not very intuitive so I think some of your links will help. Have an awesome day and thanks so much for sharing your wisdom!
Alanna says
You are so sweet!!! Thanks, friend. :) Definitely check out Juliana Kost's videos - I found them really easy to understand. The hardest thing for me was figuring out how to put images together in collections or folders, since I was used to iPhoto's categorization system and Lightroom's was different. I finally had a photographer friend show me how - that was so frustrating for me. As for the editing tools, it's mostly just been practicing and seeing what I like. If you lived closer, I would happily give you a tutorial! Feel free to email me if you have any specific questions. :)
Allie says
Ayeee! I'm so happy you wrote up this post (I was one of the individuals a month or two ago who thought it would be a great idea) :) I think this is one of the best photo-tip posts I've read and I will refer to it I'm sure. I'm about to have 1.5 months of *nothing* to do in between my current job ending and when I begin grad school, so I'm really looking forward to taking that time to really improve my photography & styling. This post is full of inspiration!
So thank you, thank you, thank you! :)
Alanna says
Aw! You're very welcome, and thank *you* for encouraging me to write the post! I really enjoyed sharing my progress and looking back. Have so much fun with your 1.5 months of Bojon. :)
Deb says
Such a great post! Can't thank you enough for sharing your food photography journey and dazzling photos!
Alanna says
Aw! Thank you, Deb!!
Alanna says
What perfect timing for this post! I was just about to make some white-painted wood boards for my own photo backgrounds and I had been wondering how you'd made yours! Thanks for another terrific post -- this was so helpful!
Alanna says
Oh that's fabulous - I hope it's helpful! Have fun with your DIY self. :)
Shinee D says
Alanna, you're so talented! Your hard work shines through your beautiful photos. One thing I know is that we always evolve and improve with practice and you're living proof of that.
I just spent 3 days watching Story on the Plate food photography workshop with White on Rice Couple, aka Todd Porter and Diane Cu, on Creative Live. It was an amazing course. I believe they are re-broadcasting the course for free again today. If you get a chance, check it out. It was absolutely inspiring!
Link: https://www.creativelive.com/courses/story-plate-food-photography-styling-todd-porter-and-diane-cu?utm_source=creativeLIVE&utm_medium=email&utm_campaign=Course_Reminder_Rebroadcast
Alanna says
What a kind thing to say - thank you, Shinee.
I wanted to watch that so badly, but I wrote this post instead (ironically). But I caught some of the rebroadcast last night and it was so fabulous! Kind of in love with both of those guys.
Barbara Davidge says
That was such a wonderful post, your photography talent is amazing. Your blog is simply lovely, I enjoy it so much. All the best!
Alanna says
Aw! Thanks so much for the kind words, Barbara!
Valerie Gamine says
Absolutely brilliant! I have been snapping photos for my blog since 2009 and I'm still learning (and constantly flustered!). :D
I'm almost ashamed to say this but I still use a p & s camera and a free online photo editor...I feel like a teenager who still uses training wheels. My fear is that if I do have a fabulous camera and an editing program will bells & whistles, I'll have no more "excuses" left as to why my blog's tires are spinning. However, this post makes me want to run out and splurge on a DSLR! I never read instruction manuals so it's refreshing to read something I can actually understand and put to use (someday!). xo
p.s. I take a gazillion photos too. It's ridiculous; I never know when to say when. ;)
Alanna says
Ok, your comment just completely floored me! Your food photos are absolutely stunning. I think your styling and photography are flawless, some of the best out there. I'm shocked to hear that you feel flustered, and really impressed by the amazing quality of shots you get with a p & s. It just goes to show, it's all about the light and styling. Your blog is amazing, and I'm surprised to hear that you feel its tires are spinning! I feel like I see your photos all over the place.
I'm tempted to say don't change a thing, since what you're doing is working so well. But I bet you'd have fun geeking out on a dSLR and lenses, too. You can always rent equipment to try it out first! And you can use a dSLR just like a p & s - that's what I did when I started out.
Dorcas Nung says
Thanks for such a helpful post says the newbie blogger. Hoping my photos can be as beautiful as yours one day. Your blog is amazing!
Alanna says
Thanks for the kind words! I'm sure yours will be. :)
dana says
You're a rockstar! Great tips. Always love your photos - they constantly push and challenge me to improve!
Alanna says
Thanks, Dana - you sweetheart. <3
Blanca says
Great article! Thanks for sharing.
Alanna says
You're welcome! :)
Denise | Sweet Peas & Saffron says
Great post! I am learning my way around Lightroom...LOVE it so much, and I didn't know you could paint objects, I will have to learn this feature! I also love shooting with a tripod, it can be a pain to move around but the photos I end up with are so much better! Thanks for all the tips!
Alanna says
Yeah! That brush feature is so much fun to play with. Thanks for the note, Denise - your photos and recipes are gorgeous!
Salvation Sisters says
Thank you!
Alanna says
:)
london bakes says
I absolutely love love love your photography so this is super useful and inspiring. Thank you for sharing some of your secrets!
Alanna says
Thanks, lady - I feel the same way about yours!
Abby says
Wow, your photos are gorgeous. Thank you for sharing!
Alanna says
Thanks, Abby!
Dad says
I didn't dream, Alanna, that the wonderful photos accompanying your food blogs had required so much work. I am amazed and impressed with the thoroughness, care, sensitivity, creativity and ingenuity with which you have developed your photographic skills. And your sharing this developing process in such a clear, understandable fashion is just as impressive. I am totally moved and proud of you. You make my primitive and cursory photographic attempts pitiable! But that's okay. Children, ideally, should surpass their parents. You could certainly write a book on food photography, but this article, in itself, would be helpful to people exploring close-up photography of any kind, even flowers.
Alanna says
THANK YOU for incredibly kind and supportive words, Dad!
Nicole @WonkyW says
I enjoy drooling over all of your gorgeous photos! Thanks for sharing your tips and tricks. I will definitely be giving them a try!
Alanna says
Aw, thanks, Nicole!
Dessert for Two says
Alanna, I swallowed this post whole. I was so eager to learn your secrets and tips. You are my #1 photography idol! Thanks so much for sharing all of this info. I especially liked when you said the chocolate bourbon pie looked fake, because I think you just hit the nail on the head with my photos. Thanks so much for the insight!
Alanna says
What?! Your photos are so pro - they definitely don't look fake! But thank you very much for the kind words, and for reading. I'm so glad you found this post helpful.
Dawn Balzarano says
The "nifty fifty" is a great lens, isn't it? FYI for your readers who can't (or don't want to) shell out several hundred dollars, there's another option: Canon makes a 50mm f/1.8 that is a BARGAIN at around $100. Of course, it's not quite as nice as the 50mm lenses you mentioned, but it works very well, and again… it's only a hundred bucks! Thanks for sharing your tips. :)
Alanna says
Hi Dawn! Yes, that's the lens I was going to get until my friend got me hooked on the 1.4. I asked another photographer friend to advise me, and he said the 1.4 was the best value in terms of quality. But thank you for sharing about the 1.8 with my readers! That would certainly be a great lens for any food photographer to have.
Elizabeth - SugarHero.com says
This was such a great post, Alanna. I think my trajectory has been much like yours, in that I've moved from point and shoot to self-taught with the DSLR, with many mistakes along the way...although I also think my early photography examples are way more embarrassing! I LOVE reading other people's tips. Your photographs are so beautiful, and I have loved reading your blog since I discovered it last year. You've also inspired me to finally try shooting RAW. I've been JPEG/Photoshop since I started, but I recently picked up Lightroom and I think this is the push I needed to give RAW/Lightroom a try. Thank you!
Alanna says
Yay! I'm so glad you found this helpful. Let me know how you like shooting in RAW. It took me a little getting used to at first, but now I love it!
Danguole says
Your photography is so, so stunning--and this was inspirational! I'm so lazy about shooting RAW--sometimes I do it, sometimes I don't, but you're absolutely right, it's worth taking the time to convert.
Also, I'd be thrilled if I could get a shot like the "before" photo of the matcha drink, nevermind the edited one! I think it was one of the first photos I saw from you, and I was completely amazed.
Alanna says
Well every photo I see of yours completely amazes me! You are so awesome! Whatever you're doing, it's working, RAW or no. Thank you for the kind words, Danguole. I hope we get to sit down over a cocktail (or five) some day soon. :)
Carol at Wild Goose Tea says
I am a photographing newbie. Even though I am not officially a food blogger, I do match tea with different foods. I do take some pictures, which have been terrible. Very very interesting, informative and well written. Thank you for taking the time to do that.
Alanna says
Thanks for reading, Carol! I can't believe how much effort it can take to get a good shot of food sometimes, but c'est la vie. The photos on your site are great, though! Now I'm craving tea. :)
[email protected] says
This is crazy helpful, and just the organized kickstart I need to start implementing some of the points you outline. Thank you, thank you for writing this.
Alanna says
You're so welcome, and thank you for the kind note! Your photos are beautiful and I'm glad to have found your site!
Erika K says
Wow, what a GREAT post!!! I've read a lot of posts about improving your food photography and I really love yours because the way you talk about it is so approachable. When I read the section about ISO/aperture/shutter speed, something clicked! I still get them all confused a lot of the time but now I feel like I have a slightly better grasp on it, especially ISO. Question: have you ever used Photoshop for photo editing? I will soon be coming to a point where I'll have to decide whether to continue with Photoshop or switch to Lightroom. I'm torn because I always thought Photoshop was more powerful, but a lot of really fabulous bloggers use Lightroom and it seems more well-suited for editing food photos!
Anyway, so, so grateful that you took the time to outline all this and share these super helpful tips! You're awesome!!
(PS. Loved the shout out to Uncle Craig! :) I can't believe he just shoots jpg!!)
Alanna says
Hi Erika! Yeah, Uncle Craig - JPEG master!
So I actually did a little workshop with another blogger yesterday, Ana of Fluxi On Tour. She showed me a bit of photoshop, and I showed her a bit of Lightroom. (I only used PS once in high school to take a scratch out of a film photo, but have been wanting to learn to use it.) My personal takeaway, and this is what my photographer friend said who recommended LR in the first place, was that PS is good for big edits, like removing an unwanted object (which is not possible in LR) but that LR is much quicker and easier to use for organizing and editing photos. I highly recommend Julieanne Kost's videos on YouTube, esp. "Create Stunning Images in LR 4" and "LR 4: Adding Special Effects". (It's the same as LR 5, 5 just has a few more features.)
Thanks for reading, and for the kind words! ISO and all that made my brain hurt for a long time, but I'm glad I finally understand how they all work together better. :)
Erika K says
Oh cool!!! I'm off to watch her videos now. That's really helpful to know because I sometimes find myself clone-stamping things out of my pics, but it sounds like LR will force me to be more intentional about my composition :) Thanks Alanna!!
Alanna says
Nice! I've wished I had clone stamping at my fingertips many times throughout my editing. :p
Isadora Lassance says
Alanna! As a huge admirer of your amazing photography skills, I am beyond excited that you wrote this post!!!! When I first started with my blog and food photography, I figured either I was good at it or I wasn't and if I wasn't, there was nothing that was going to make me better. Thank goodness that wasn't true! Helene's book is my food photography bible and I go to it for pretty much everything, it has taught me so much and when I first discovered your blog, you photos immediately made me think of hers. Thank you so much for taking the time to write this post!! I will be referencing it a lot! :)
Alanna says
Well that is the nicest compliment I have ever had in my life - thank you!!! I'm so glad you're finding Helene's book and this post helpful. Your photos are beautiful and I want to cook everything on your site right now.
Caroline says
Alanna, you have no idea how I am cherishing this post! I've loved your photography from the day I found you and your Cherry Marzipan Scones! :) I struggle so much with getting what I want from my camera. There is just SO much I don't know! I've pinned this and know I'll be returning over and over again as a resource. Thanks so much for sharing all that you've learned with us. <3
Alanna says
Thanks so much for the sweet words, Caroline! I think your photography is beautiful and I'm surprised to hear you say that about your camera knowledge (though I feel that way sometimes, too). Your shots look totally pro to me! In any case, I'm glad you're finding my ramblings useful. :)
Elsye says
Alanna, thanks for sharing your photograhpy journey... really awesome !! I loved your photos, they're stunning !... I'll learn your tips and tricks, Thank you so much !
Alanna says
Thanks, Elsye! Good lord your photos are gorgeous!
Ance says
Hi, I am a huge fan of your blog, and it always makes me want to lick my laptop's screen, because of its gorgeous pictures! I love your style, and I have always wanted to develop mine, but it just never happens because I don't have the skills yet, to do so. I have pictures on my mind, how I would like to see my food, but it always comes out.. wrong! :D Not bad at all, I might say, but not what I am aiming for.. Your post definitely will help me, and I am considering to invest in new camera.
Can you please specify, which combo do you use for those carrot pics, icecream, cookies and green soup bowls? Is it T2i + 50mm/1.4? This is type of style I am looking for, it is just gorgeous!
You are awesome! xx
Alanna says
Hi Ance - I think your photos are great! Thank you so much for the kind words. I still have that happen all the time, where the picture looks different than I intend it to. Sometimes I'm happy with the outcome; other times, not so much!
Yes you've got it exactly right with the camera/lens combo. I used the macro lens for the opening ice cream pic, and the 1.4 for the black sesame shot. (Of course the lighting and props have a lot to do with the style, but that lens picks it up beautifully!)
meg says
If we had to do a blog post on what has improved our food photography the most, many of these things would be on the list. Lightroom is amazing. We love and use it every day. Getting a decent camera and a couple good lenses and a good tripod were also crucial. We don't have much of a budget for props, unfortunately, so I feel like our photos could use some rounding out with details and accents, but we're light years ahead of where we used to be (still not on your level though!). Great post--your photos are stunning!
Alanna says
Hi Meg, Thank you so much for reading and for the kind words! Your site is gorgeous and I want to make all of your recipes, starting with that elderflower panna cotta. Your photos and writing are beautiful and I'm loving the props. Looking forward to spending more time with your site. Thanks again for stopping by!
Kelly says
This article is AMAZING! Thank you so much for sharing all your tips and tricks!
Alanna says
Aw, thanks, Kelly! It was my pleasure.
Liz says
Can't wait to sit down somewhere quiet, with a coffee in hand, and read this and all the links all the way through! I needed some good inspiration to improve my photography! Thanks! :)
Alanna says
Thanks, Liz! I'm glad you're finding the post helpful. :)
Lan | MoreStomach says
i loved seeing your progression, and what process you've made! i feel as though i've outgrown my dslr but there is still so much i could be learning from it, if that makes sense. and have LR4 in my possession but i fall back on picMonkey. all this is super informative, thank you for sharing.
Alanna says
Hi Lan! Thanks for reading, and for the note. I just discovered your site last night and I'm loving the photos and recipes! I like picmonkey, too, for collages - that's cool that you use it for edits. Whatever you're doing is working beautifully.
Kate says
Hey Alanna! This post is so great. I've been thinking about trading in my 7-year-old Nikon for a Canon. I'm not sure which 50mm lens to get. I know Andrew Scrivani prefers the f2.5, but a lot of bloggers are shooting with the f1.4 or f1.2. Can you tell me more about why you prefer the f1.4? Is it just that you can open the aperture up more, or do you notice a difference in photo quality when you're shooting at, say, f4? I should really just try them both out, I suppose.
Alanna says
Hi Kate! Thanks so much for reading and for the note! That's a really good question. I almost always shoot with my 1.4 now that I've got it. I usually don't take the aperture down past 2.5, but I like having the option to do so, such as when shooting freehand in low light. I like the way it handles better - the focus ring has more friction, and the lens feels a little bit bigger, heavier, and more like a serious tool. The price is almost twice that of the 2.5. I imagine the glass is higher quality, as it seems to give more depth and detail to the images.
The pros of the 2.5 are that it is a macro so you can get in super close (2" away from the subject vs. 9" on the 1.4). The focus is tack sharp (it is actually visually easier to focus with this lens). It gets very good detail as well.
You can also rent both lenses and see which you like better. (Or see if Canon will give you one in exchange for a sponsored post!)
So my summary would be:
Get the 2.5 if you want to be able to take more close-in, macro shots, especially if you have a tripod and low light situations won't be an issue.
Get the 1.4 if you plan to shoot out and about where there may be lower light, or if the light in your studio is low and you want to shoot freehand. This is also a great portrait lens. (Oh, and the 1.2 is the even better model of the 1.4 but around 3x the price. Get that if you can afford it! :))
I hope that helps. I wish you lived closer - I would gladly let you play around with my lenses!
Kate says
Alanna, thank you so much for your thorough reply! I really appreciate it! Now I'm leaning toward the 1.2 (I know I'll use it forever, for everything, so it's worth it to me). I might also get a macro down the road. Maybe the f2.5 will end up in my camera bag, too. We'll see!
Alanna says
Of course! I don't think you'll have any regrets with the 1.2... I'm envious!
Geraldine | Green Valley Kitchen says
Alanna, this is a wonderful post - so informative. Your photography is so gorgeous - and it's wonderful of you to share all your thoughts, tips, advice on photography. Thank you so much! I'm going to be referring back to this post quite often.
Alanna says
Thank you so much for the kind words, Geraldine! You're very welcome. :)
Alyssa says
Excellent article, thanks for sharing!
Alanna says
You're so welcome!
michelle says
Thank you so much for this, I can't begin to tell you how helpful this is for me. I am new to blogging and reading blogs, and have no idea what I am doing. Your photos are gorgeous, and inspiring
Alanna says
Thanks so much, Michelle - I'm glad you're finding my ramblings helpful. :)
Anonymous says
I rarely make comment..but this is so great..thank you
Alanna says
Thanks so much for reading - I'm glad you enjoyed the post!
Julia@ Vikalinka says
Alanna, I've been an admirer of your photography for a while but just now ran across this post. I've read quite a bit on the subject but yours is by far the most informative and goes beyond the basics. I can definitively identify with your journey in terms of making similar mistakes and learning new tricks. One of the biggest revelation for me was discovering that a lot of light is not necessary the best thing. I used to shoot in my conservatory with light coming from every angle including the ceiling! I cringe now when I look at them! Thank you for being such an inspiration. I love the way you cook and your photography makes me smile-a true art, even when it takes you 1-2 to shoot. :-) It's worth it! I literally poured over your site for hours yesterday thinking that I have SO much to learn but reading about your progress gives me hope. (I put all the books you recommended on my Amazon wish list!)
Alanna says
Hi Julia, thank you so much for the kind words! I'm glad if you find this post and the books helpful. Your photos are beautiful, though, so whatever you're doing, keep doing it! I'm definitely still learning, too. I did a shoot the other day that I thought was turning out well, and then when I took a closer look, I hated everything! I showed them to Jay to see if was tripping, but he was like, "Yeah, you should start over." Oh well!
Lovenow says
This is the ultimate in food porn. You are a food porn goddess!
Alanna says
Ha! Thank you!
Allyson Meyler says
This post is incredibly inspiring to me, as a novice food photographer. Thanks for sharing, I hope that one day I will be able to create shots as beautiful as yours!
Alanna says
Hi Allyson, Thank you so much for the kind words! I'm so glad you found this post helpful. :)