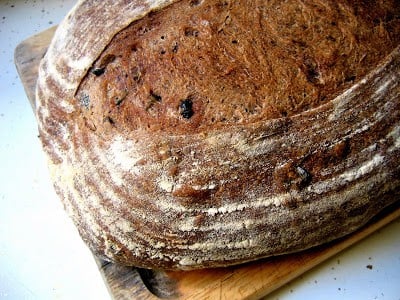
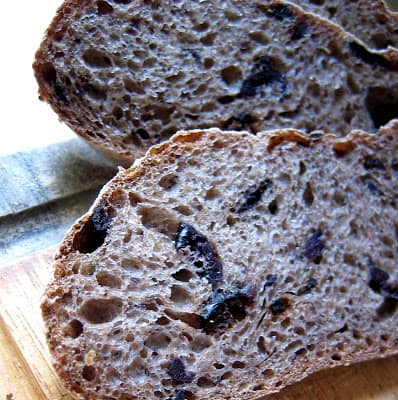
I've adapted Nancy's recipe to use more starter, tweaking the other ingredients accordingly, and I even go so far as to audaciously double the olives. I love this bread slathered with eggplant caponata and topped with a crumble of goat cheese. The oils in the bread keep it moist longer than you'd expect, up to a week even, which makes it ideal for camping trips. But stick it in the fridge if the weather is very humid, like this past week; mine started sprouting little specks of mold, and had to be relegated to the crouton pile. There are worse fates, though, like living in L.A, for instance.
Four more sourdough recipes:
*Bojon appétit! For more Bojon Gourmet in your life, follow along on Instagram, Facebook, or Pinterest, purchase my gluten-free cookbook Alternative Baker, or subscribe to receive new posts via email. And if you make this two-olive sourdough loaf recipe, I’d love to know. Leave a comment and rating below, and tag your Instagram snaps @The_Bojon_Gourmet and #bojongourmet.*
Two-olive Sourdough
Print Recipe Pin RecipeIngredients
- 12 oz. liquid sourdough starter, active, bubbly and ready to go (about 1 1/2 cups stirred down, or 3+ cups at full froth)
- 8 oz. room temperature or lukewarm water (1 cup)
- 1 oz. wheat germ (1/4 cup)
- 5 oz. whole wheat bread flour (1 cup)
- 8 - 10 oz. white bread flour (1 2/3 - 2 cups)
- 1 - 2 tablespoons fresh thyme leaves, chopped (or 1 - 2 teaspoons dried)
- 1 1/2 teaspoons sea salt
- 1/2 cup pitted oil cured olives, whole
- 1/2 cup pitted kalamata olives, whole
Instructions
- Weigh the starter, water, germ, and both flours into the bowl of a stand mixer fitted with the dough hook. (Add the smaller amount of bread flour.) Knead on medium-low speed (2) for 5 minutes. Cover and let autolyse 20 minutes.
- Sprinkle on the salt, and knead the dough on medium speed (4) for another 5 minutes. It should be sticky, but not wet, and should pull away from the sides of the bowl as it is kneaded. Add more flour by the tablespoon if necessary. Add the thyme and olives, and knead on medium low (1-2) for another 5 minutes until thoroughly combined. Turn the dough out onto a lightly floured surface and knead a few minutes by hand until the texture feels right, adding as little flour as possible to keep the dough from sticking to your hands and the surface. The dough should feel smooth, springy and elastic; wet enough to be pliable, but not overly sticky.
- Place the dough in a large, lightly oiled ceramic bowl or a large plastic container at least twice the size of the dough. Cover the vessel tightly with plastic wrap or the lid, and allow it to rise until doubled, three to four hours. (You can also let the dough rise in the fridge or a cool place overnight. Let the dough come to room temperature before shaping it, and be sure that it has doubled in bulk to properly develop the glutens.)
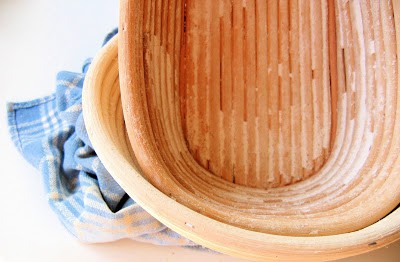
- Gently turn the dough out onto a lightly floured surface, pressing out the air bubbles. Shape into a boule by tucking the edges under itself, then gently rotating the dough on the surface to form a taught outer layer of dough. Here's a quick video of how to shape a boule. To shape into an oval, rock the boule on the counter with your palms until is elongates slightly. If you have a rising basket, sift a light layer of flour onto the inside, and place the boule in it upside-down, pinching the seam shut. (If you don't have a rising basket, place the boule directly on a peel or board dusted with cornmeal or flour.) Place the whole deal in a large plastic bag, such as a trash can liner. Inflate the bag and close it with a twist tie or clip. Let the bread rise a second time until doubled, about 1 1/2 - 2 hours. When the bread is ready to bake, it will hold an indentation of your finger when you press it lightly, rather than springing back.
- While the bread is rising, about an hour before you're ready to bake, remove all but the bottom rack of your oven. Place a baking stone on the rack (or a heavy duty baking sheet), and place a metal pan that you don't care about sacrificing (it will get rusty) on the floor of the oven. Crank the oven up to 500º.
- When the bread has doubled, gently turn it out onto a wooden peel dusted with flour or cornmeal. Holding a lame or sharp knife at a 45º angle to the loaf, draw the blade, about 1" deep, across the top of the loaf, beginning and ending 2" from the bottoms of the boule. Fill a 1 cup measure with ice cubes. Quickly slip the boule off the peel and onto the stone, and toss the cubes into the hot pan on the floor of the oven. Bake 20 minutes, then turn the oven down to 450º and bake another 20 minutes or so, until the bread is a deep, burnished golden-brown. An instant read thermometer inserted into the middle should read 210º.
- Let cool completely on a wire rack, one to two hours, before enjoying. The best way to store this type of bread is in a paper bag at room temperature for a couple days. After that, I put the whole thing, paper bag and all, into a plastic bag and continue to store at room temp.
Notes
Nutrition
Makes one large loaf, about 2 pounds
note: I like to use a stand mixer for this bread as kneading in the olives by hand can be quite messy.
See my recipe for a basic boule for more info on starters and instructions for mixing the bread by hand.
1 - 2 tablespoons fresh thyme leaves, chopped (or 1 - 2 teaspoons dried)
1/2 cup pitted oil cured olives, whole
1/2 cup pitted kalamata olives, whole




Jay Doane says
Suhnap! Take that, LA!
Samjas says
Wow! I loved the sound of this tasty recipe but I was a little hesitant that it was beyond my experience. I felt compelled and challenged and the results were worthwhile. It was an awesome bread topped with homemade tapenade.
Alanna says
Hi Samjas, I'm so glad you gave this recipe a go, and that it turned out! Homemade tapenade sounds like the perfect accompaniment.
Susan says
Do the olives break apart during mixing? Getting a whole olive in a bite of bread may be a bit overpowering.
Alanna says
Some of them stay whole and some break down a bit. But feel free to give them a rough chop if you prefer!
Ari says
I’m over in Oakland, and getting bored during quarantine. I’m friends with the owner of semifreddis, and he encouraged me to try my hand at making my own starter and trying to make a Kalmata loaf. With the 1997 Joy Of Cooking, and this recipe, I’m officially trying it! It’s currently on the first rise, I’ll tag a picture when it”s done. Thanks for the detailed recipe!
Alanna says
I can't wait to see! Happy baking and hang in there. <3
Amy says
Have you ever left white whole wheat flour out? I find it m makes for a heavy bread which we do not enjoy. I would most likely just replace with regular white bread flour.