This whole-grain gluten-free pizza crust recipe gets extra flavor from whole grain flour and chia seed. It's easy to stir together (no kneading required) and turns out shatteringly crisp crusts every time.
Pizza dough has got to be the holy grail of gluten-free cuisine. Recipes are hard to find, and the majority turn out dense, chewy crusts, while others rely on nutritionally vapid starches and gums.
For the past year, I've been working on this recipe for a dough that's made from whole-grain flours, bakes up crisp and crunchy, and ousts gums in favor of healthy and cute-sounding chia seed. It's been rough "disposing" of all those pizzas, but I think I finally nailed it. I'm super excited to share it here today.
The right blend of flours (er... seven of them...) along with proper hydration (not too wet and not too dry) create a pliant dough that's easy to work with. A few techniques and tools result in a crispy crust that's full of flavor all on its own, forming a sturdy, flavorful base when par baked and topped with melty cheese and the toppings of your choice. The texture is a bit denser than a traditional crust, more akin to a whole-wheat dough, which I like. This dough and I have become well-acquainted over the past year, and I've shared some of its qualities and quirks, tips and tricks below.

Ingredients
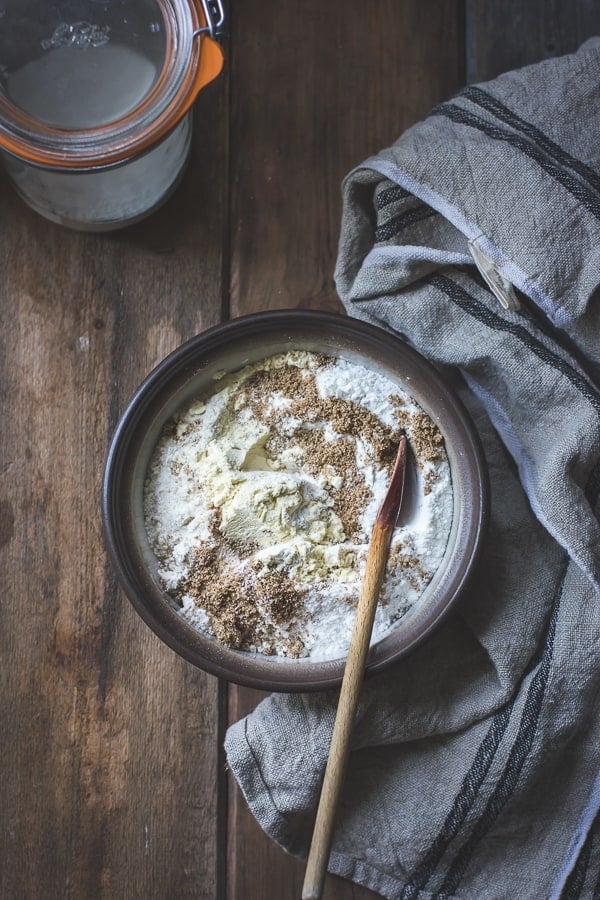
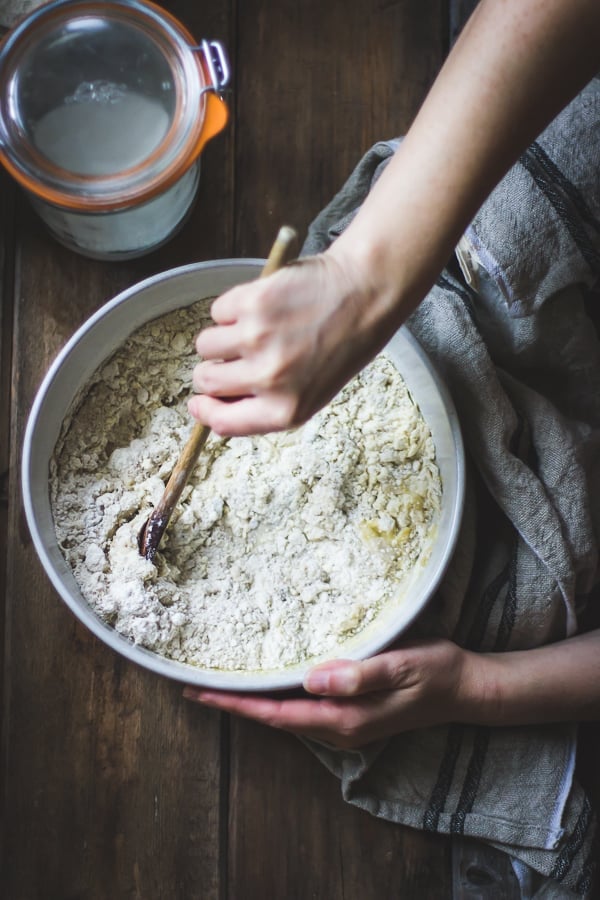
It's true that this dough uses a bunch of different grains; seven, to be precise. I've found each one necessary to create its light, crisp texture. Once you've gathered the ingredients, this dough is easier to make than wheat-based dough; no mixer or kneading required.Here's a list of the flours I use and the purpose each one serves, and potential substitutions if applicable.
Oat flour lends a warm, earthy flavor similar to whole wheat. Bits of bran and germ create a light crisp texture. Make sure to use gluten-free oat flour (you can grind your own from GF old-fashioned rolled oats). Sorghum and brown rice flours make adequate substitutes (but oat is my favorite).
Millet flour has a butter yellow color and soft, creamy texture. However, too much millet flour can give doughs a bitter flavor. You could likely trade this for a gluten-free all-purpose blend, and I'm curious to try using chickpea flour here.
Brown rice flour adds bulk and a mild taste. I think you could likely trade in white rice flour or sorghum flour if you preferred.
Sweet white rice flour (also called glutinous rice or Mochiko) is finely ground and smoother than regular white or brown rice flour. Made from sticky rice, it has a naturally sticky, starchy texture that stands in well for all-purpose flour.
Tapioca starch/flour (same thing) adds stretchiness to the dough making it more pliable and adding a bit of chew.
Cornstarch is essential for crispiness and browning. If you can't tolerate corn, you can substitute tapioca or potato starch, but the texture might not be as lovely.
Chia seed replaces xanthan gum, making the dough sticky and stretchy. It can be replaced with flaxseed or 1 teaspoon xanthan gum.
Gluten-free pizza doughs tend to be either wet enough to need spreading with a spatula, or dry enough to roll but prone to cracking around the edges. This one is somewhere in the middle – firm enough to press into a round but soft enough bake up light and crisp.
Care and handling
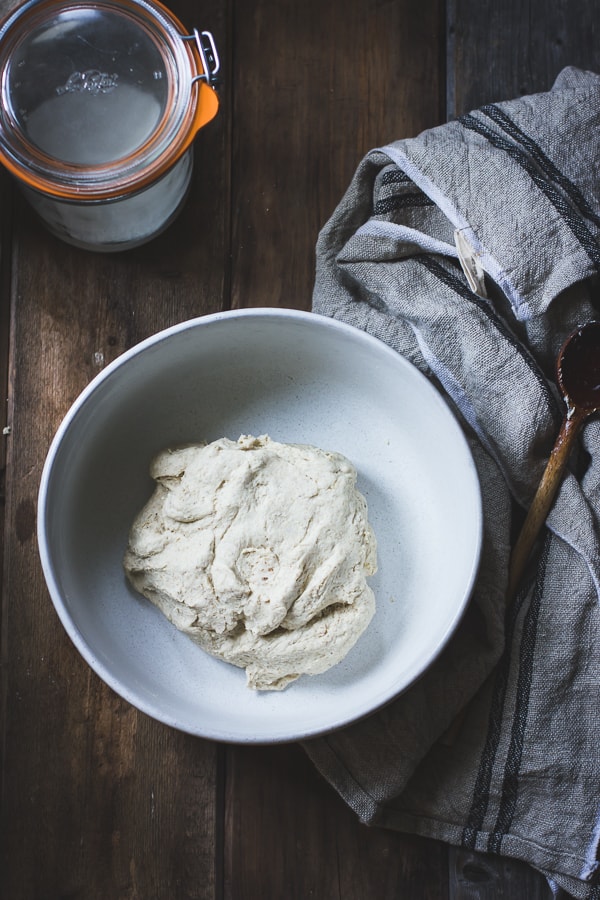
Keep it wet: This dough should be the consistency of a sticky cookie dough, firm enough to pull away from the sides of the bowl as you stir, but still soft to the touch. If it's too soft, add a tablespoon or two of brown rice flour; too firm, add a sprinkling of water.
Keep it dry: Once risen, this dough despises excess moisture. DO NOT skip the par baking step or you will end up with a gummy top no matter how long you keep baking it and you will be very sad. A quick, three-minute bake is all it takes to dry out the dough.
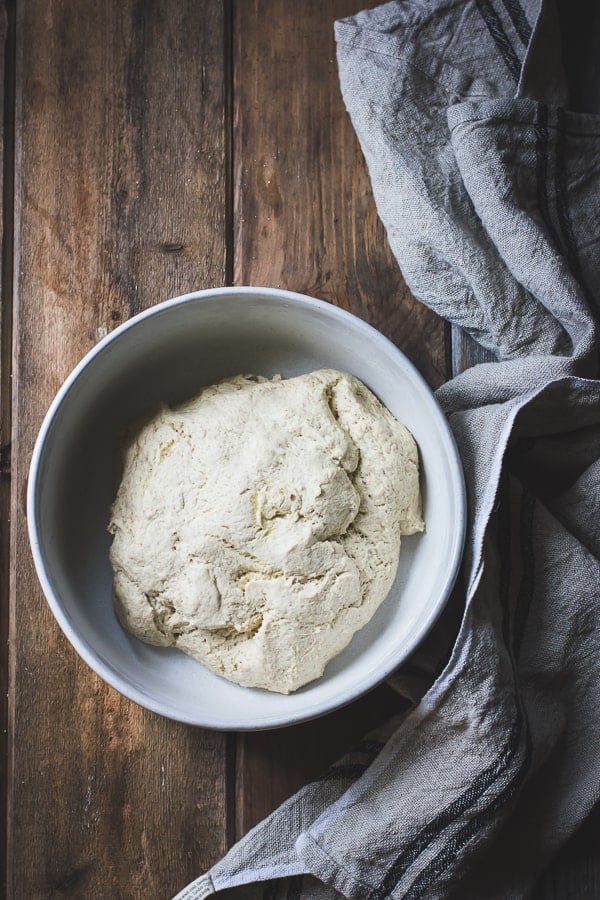
Give it time: Once patted out, the dough benefits from a brief rise which will aerate the dough, making it light and crisp.
But not too much: The initial dough can rise and be punched down a few times, but don't let it hang out for more than a few hours prior to baking lest it over-ferment. Similarly, the dough doesn't seem to like being refrigerated, turning out tough crusts when I chilled it for a day. If not making pizza right away, you can par bake both crusts and store them at room temperature for a day or two.
And here are a few favorite tools and materials that help turn out awesome crust, but aren't strictly necessary.
A pizza stone: Placed on the bottom rack of the oven and pre-heated for at least 30 minutes, a baking stone radiates heat and helps crisp up the bottom of the crust, similar to a pizza oven. You can use an inverted, heavy-duty baking sheet instead.
A pizza peel: This wooden paddle makes transferring floppy pizza dough from counter to stone easy as pizza pie.
Parchment paper: Sheets of this heat-resistant paper make the dough a breeze to move around, and they keep things neat and tidy. You can find rolls of parchment paper at most grocers, usually near the wax paper and aluminum foil. If you don't have any parchment paper, you can try shaping and baking the pizza dough directly on a well-oiled, rimmed baking sheet.
Tongs: Use a pair of tongs to grab the super hot pizza crust and pizza from the oven and drag it onto the pizza peel; it's the best way.
A pizza wheel: Makes pizza cutting easy and neat, but you can use a large, sharp chef's knife in a pinch.
Oven thermometer: I never bake without one since my oven is wonky (and many of them are). You need a hot oven to get a crisp crust, so you want to make sure it's truly cranked up to 500ºF.
Treat this dough with love and it will reward you with a crust that is light and crisp, full of warm, earthy flavors and good-for-you grains. I'll be sharing my favorite fall toppings tomorrow.
If you give this dough a try, let me know in the comments, or take a picture and tag me on Instagram (the_bojon_gourmet).
More Pizza Recipes:
- Tomato + Pesto Socca Pizza
- Roasted Eggplant Pizza with Ricotta Salata + Olives
- Sourdough Pizza with Chanterelles + Chèvre
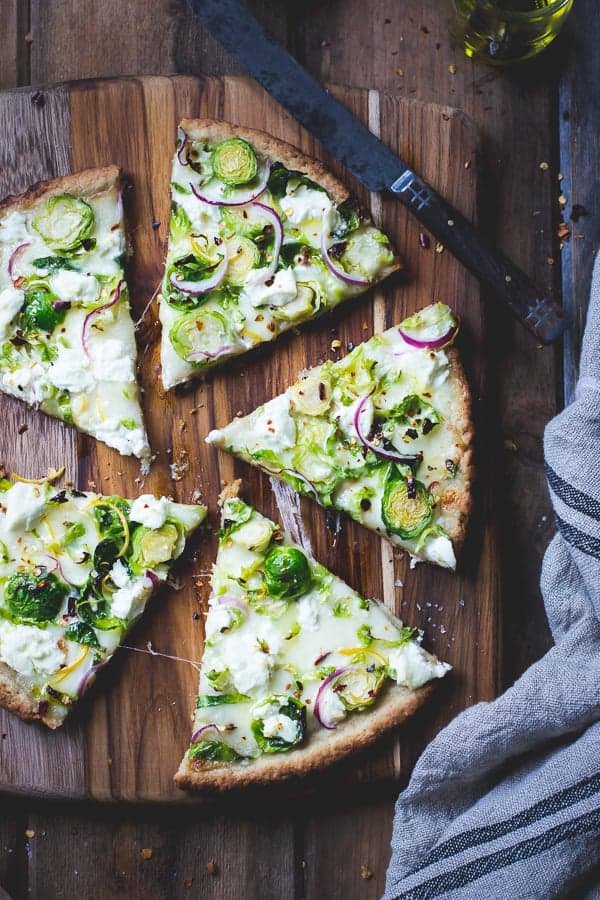
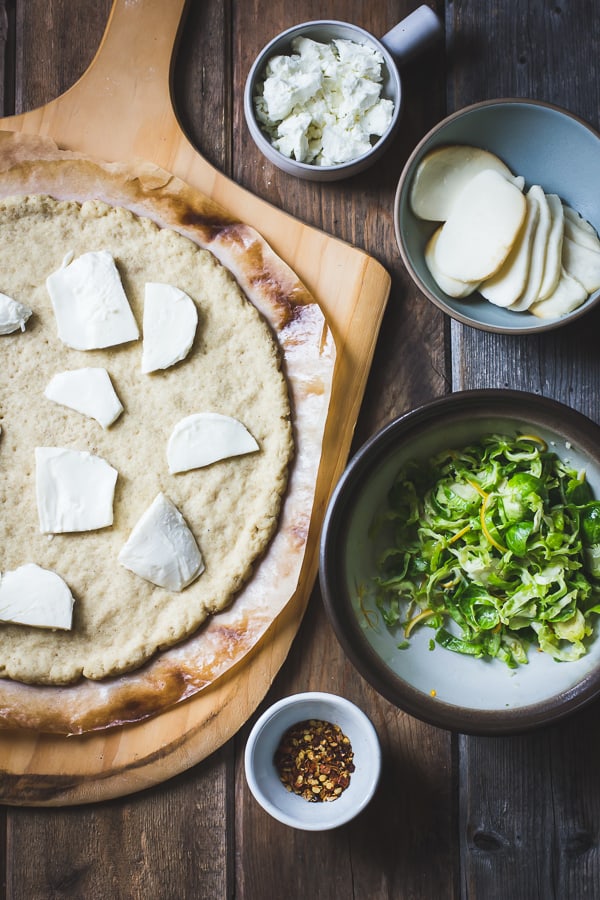
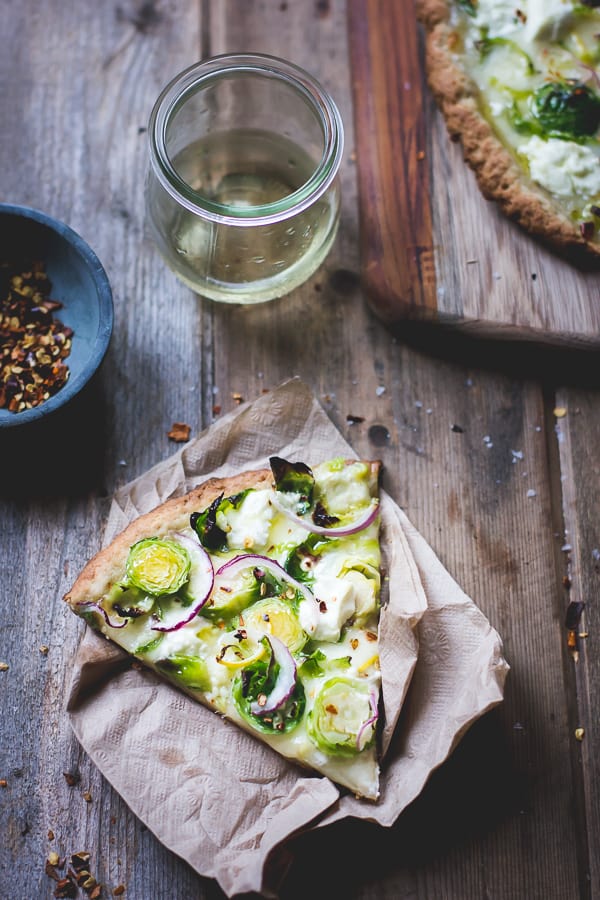
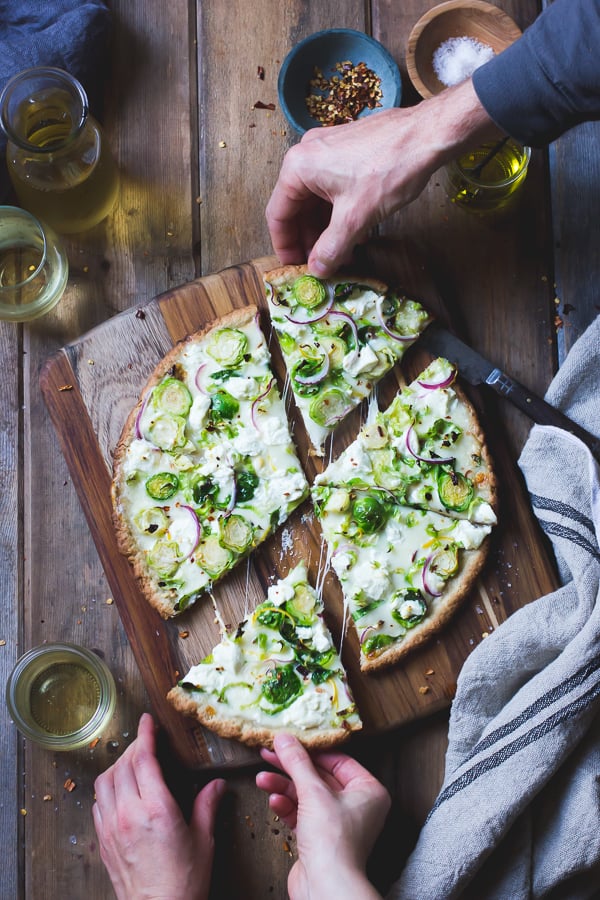
- Smoky Brussels Sprout Pizza with Lemon + Chile
*Bojon appétit! For more Bojon Gourmet in your life, follow along on Instagram, Facebook, or Pinterest, purchase my gluten-free cookbook Alternative Baker, or subscribe to receive new posts via email. And if you make this gluten-free pizza dough recipe, I’d love to know. Leave a comment and rating below, and tag your Instagram snaps @The_Bojon_Gourmet and #bojongourmet.*
Thin and Crisp Gluten-Free Pizza Dough {Whole-Grain + Gum-Free}
Print Recipe Pin RecipeIngredients
For the dough:
- 1 cup warm water (more as needed) (8 ounces / 225 grams)
- 2 teaspoons granulated sugar
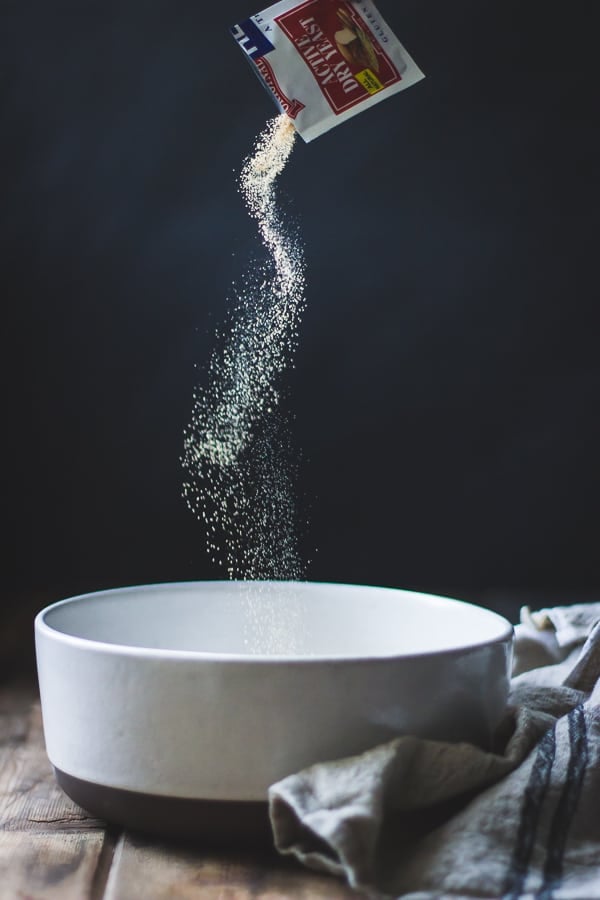
- 1 packet active dry yeast (.24 ounce / 7 grams)
- 3/4 cup GF oat flour (2.75 ounces / 80 grams)
- 1/2 cup sweet white rice flour (mochiko) (2.75 ounces / 80 grams)
- 1/2 cup millet flour (or white rice flour) (2.25 ounces / 60 grams)
- 6 tablespoons brown rice flour (or 6 tablespoons [1.25 ounces/35 g] sorghum flour(more as needed) (2 ounces / 55 grams)
- 1/4 cup cornstarch (1 ounce / 30 grams)
- 2 T tapioca flour (.5 ounce / 15 grams)
- 3 T ground chia seed (or 1 teaspoon xanthan gum) (.5 ounce / 15 grams)
- 1 teaspoon fine sea salt
- 2 tablespoons olive oil, plus more as needed (1 ounce / 30 grams)
Instructions
Make the dough:
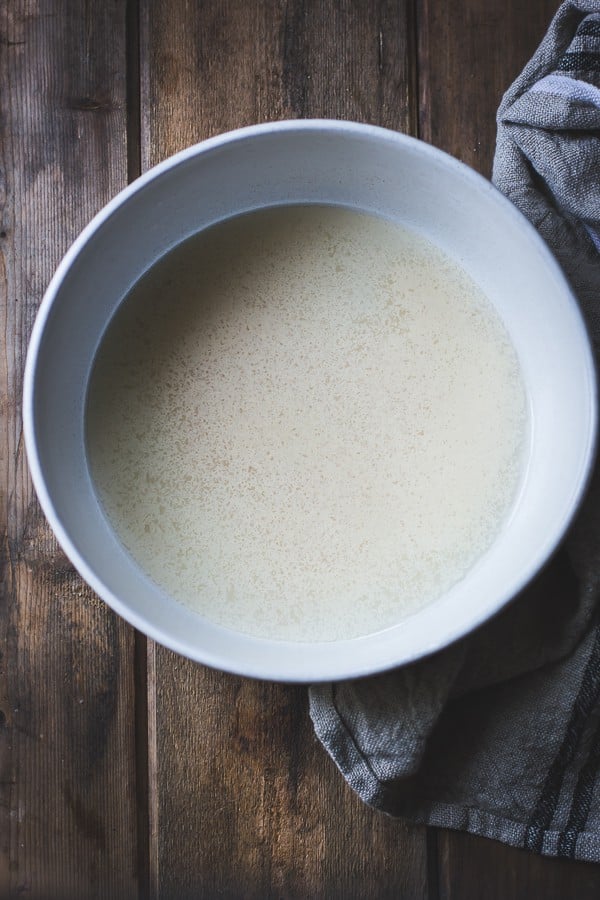
- Place the warm water and sugar in a large bowl. Sprinkle the yeast over the top and let it sit 10 minutes to dissolve. Meanwhile, in a separate bowl, whisk together the oat, sweet rice, millet, and brown rice flours with the cornstarch, tapioca flour, chia seed, and salt. When the yeast has dissolved, dump in the flour mixture and the olive oil, and stir vigorously until the dough is smooth and comes away from the sides of the bowl, adding a tablespoon or two more brown rice flour if the dough is too wet, or a tablespoon of two more water if it is too dry. Cover the bowl with a large plate or plastic wrap and let the dough rise in a warm place until nearly doubled in size, about 45 minutes. (If you're not ready to bake yet, just press the air out of the dough and let it sit until you're ready.)
- Meanwhile, position a rack in the lower third of the oven, place a baking stone on the rack if you've got one, and preheat to 500ºF for at least 30 minutes to get the stone really hot.
Shape the crusts:
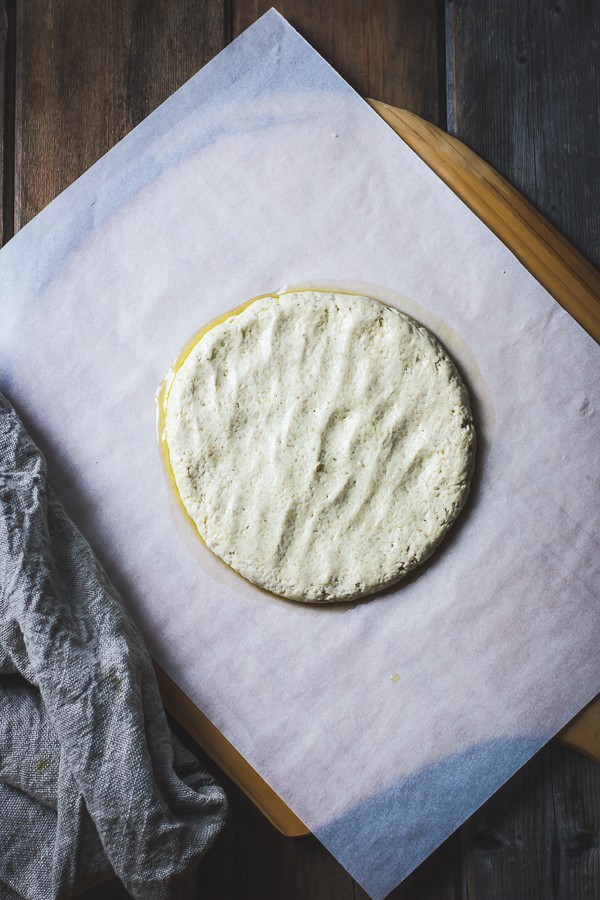
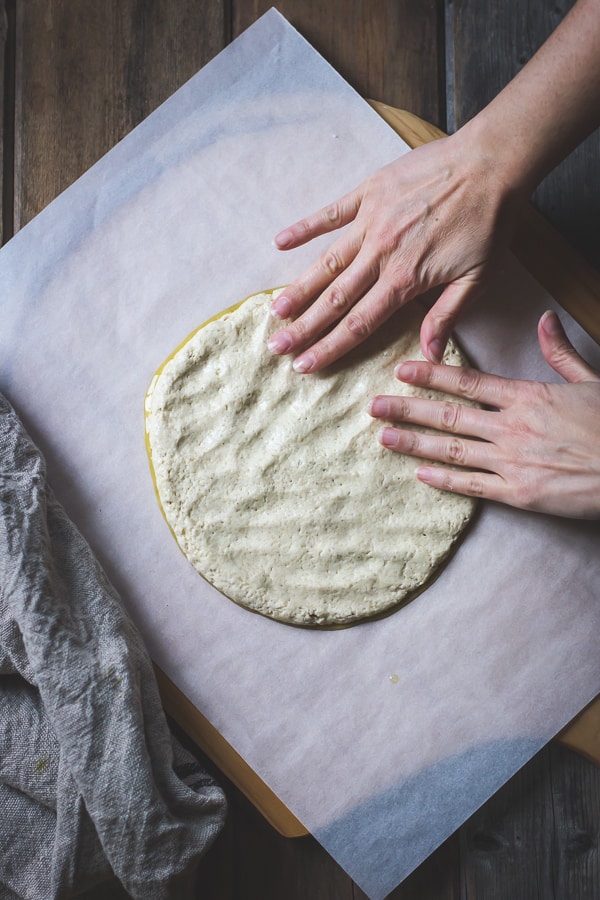
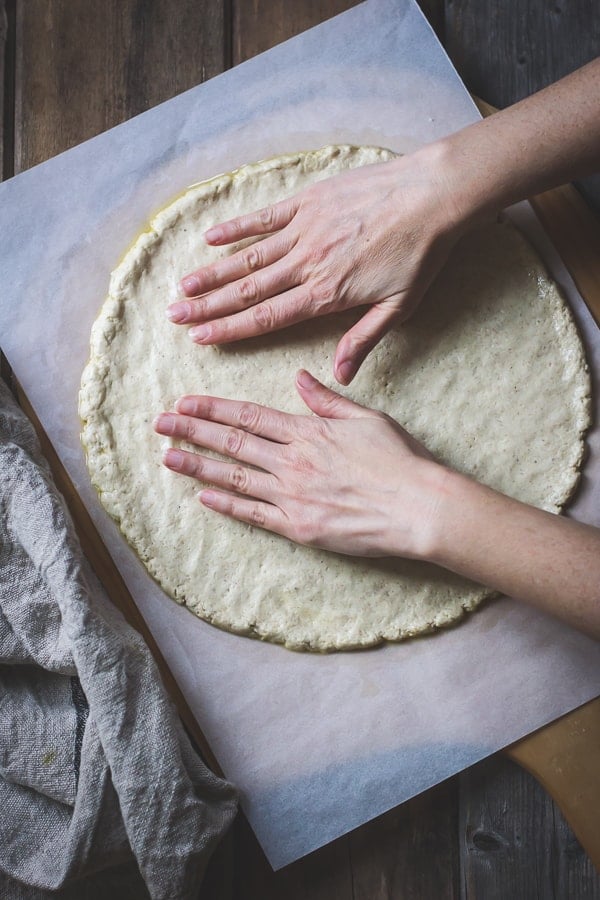
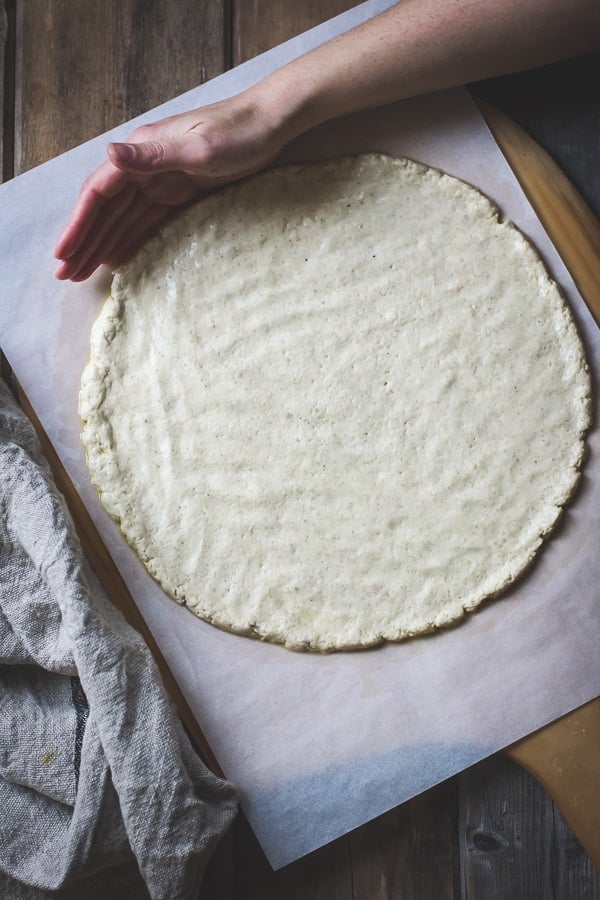
- Drizzle two sheets of parchment paper with half a tablespoon olive oil each. Divide the dough in half and form each half into rough balls. Place each ball in the center of the oiled parchment, drizzle the tops with another half tablespoon each of olive oil, and begin pressing one dough ball into a 10-11" round using the pads of your fingers. Use a cupping motion with your hands to smooth the edges and form a slight lip around the edge of the dough. Repeat with the second round of dough.
- Rub the tops of the crusts with a little more oil and let rise until slightly puffed and spongy, 10-20 minutes.
Par bake the dough:
- Trim the edges of the parchment so that they are 1" wider than the crust. Slide the first crust, parchment and all, onto the pizza peel and slip it, still on its parchment, onto the hot baking stone in the oven. Par bake the crust until the top is dry but still pale, 3 minutes. Use tongs to grasp the parchment and pull the whole thing back onto the pizza peel, then transfer to your work surface. Repeat the parbaking with the second crust.
- The crust is now ready to top and bake. The final bake usually takes around 5 minutes, sometimes a little more, until the crust is golden on the bottom and edges.
Store the crust:
- If not using right away, let cool completely, then wrap airtight and store at room temperature for up to 1 day, refrigerated for up to a few days, or frozen for up to a month or two. Bring back to room temperature before topping and baking.
Notes
-This is the flour combination I like best, but feel free to try others; I've given suggestions for substitutions above.
-The dough should be firm enough to form a ball while stirring but still feel soft and sticky to the touch.
-Once patted out, let the crust rise for 15 minutes or until it feels spongy to the touch.
-Do be sure to parbake this crust prior to topping it, and avoid overly wet ingredients. (Drain fresh mozzarella or tomatoes on paper towels, use a thick marinara, etc.)
-If you have extra dough, don't chill it to use later; parbake it instead.
-If you're in the market for grilled gluten-free pizza, see this post for instructions. Things you'll need:
baking stone (or an inverted heavy-duty baking sheet)
parchment paper
pizza peel (or rimless baking sheet/large cutting board)
tongs
pizza wheel (or large, sharp chef's knife) (If you don't have those things, you can try forming the crusts directly onto oiled baking sheets and baking them right on there). Nutritional values are based on one of four servings.
Nutrition
Thin and Crisp Gluten-Free Pizza Dough {Whole-Grain + Gum-Free}
Makes 2 (10") thin-crust pizzas, about two servings per pizza
See the post above for more details about this recipe. Here are a few highlights:
-This is the flour combination I like best, but feel free to try others; I've given suggestions for substitutions above.
-The dough should be firm enough to form a ball while stirring but still feel soft and sticky to the touch.
-Once patted out, let the crust rise for 15 minutes or until it feels spongy to the touch.
-Do be sure to parbake this crust prior to topping it, and avoid overly wet ingredients. (Drain fresh mozzarella or tomatoes on paper towels, use a thick marinara, etc.)
-If you have extra dough, don't chill it to use later; parbake it instead.
-If you're in the market for grilled gluten-free pizza, see this post for instructions.
Things you'll need:
baking stone (or an inverted heavy-duty baking sheet)
parchment paper
pizza peel (or rimless baking sheet/large cutting board)
tongs
pizza wheel (or large, sharp chef's knife)
(If you don't have those things, you can try forming the crusts directly onto oiled baking sheets and baking them right on there.)
For the dough:
1 cup (8 ounces / 225 grams) warm water (more as needed)
2 teaspoons granulated sugar
1 packet (.24 ounce / 7 grams) active dry yeast
3/4 cup (2.75 ounces / 80 grams) GF oat flour
1/2 cup (2.75 ounces / 80 grams) sweet white rice flour (mochiko)
1/2 cup (2.25 ounces / 60 grams) millet flour (or white rice flour)
6 tablespoons (2 ounces / 55 grams) brown rice flour (or 6 tablespoons [1.25 ounces/35 g] sorghum flour) (more as needed)
1/4 cup (1 ounce / 30 grams) cornstarch
2 T (.5 ounce / 15 grams) tapioca flour
3 T (.5 ounce / 15 grams) ground chia seed (or 1 teaspoon xanthan gum)
1 teaspoon fine sea salt
2 tablespoons (1 ounce / 30 grams) olive oil, plus more as needed
Make the dough:
Place the warm water and sugar in a large bowl. Sprinkle the yeast over the top and let it sit 10 minutes to dissolve. Meanwhile, in a separate bowl, whisk together the oat, sweet rice, millet, and brown rice flours with the cornstarch, tapioca flour, chia seed, and salt. When the yeast has dissolved, dump in the flour mixture and the olive oil, and stir vigorously until the dough is smooth and comes away from the sides of the bowl, adding a tablespoon or two more brown rice flour if the dough is too wet, or a tablespoon of two more water if it is too dry. Cover the bowl with a large plate or plastic wrap and let the dough rise in a warm place until nearly doubled in size, about 45 minutes. (If you're not ready to bake yet, just press the air out of the dough and let it sit until you're ready.)
Meanwhile, position a rack in the lower third of the oven, place a baking stone on the rack if you've got one, and preheat to 500ºF for at least 30 minutes to get the stone really hot.
Shape the crusts:
Drizzle two sheets of parchment paper with half a tablespoon olive oil each. Divide the dough in half and form each half into rough balls. Place each ball in the center of the oiled parchment, drizzle the tops with another half tablespoon each of olive oil, and begin pressing one dough ball into a 10-11" round using the pads of your fingers. Use a cupping motion with your hands to smooth the edges and form a slight lip around the edge of the dough. Repeat with the second round of dough.
Rub the tops of the crusts with a little more oil and let rise until slightly puffed and spongy, 10-20 minutes.
Par bake the dough:
Trim the edges of the parchment so that they are 1" wider than the crust. Slide the first crust, parchment and all, onto the pizza peel and slip it, still on its parchment, onto the hot baking stone in the oven. Par bake the crust until the top is dry but still pale, 3 minutes. Use tongs to grasp the parchment and pull the whole thing back onto the pizza peel, then transfer to your work surface. Repeat the parbaking with the second crust.
The crust is now ready to top and bake. The final bake usually takes around 5 minutes, sometimes a little more, until the crust is golden on the bottom and edges.
Store the crust:
If not using right away, let cool completely, then wrap airtight and store at room temperature for up to 1 day, refrigerated for up to a few days, or frozen for up to a month or two. Bring back to room temperature before topping and baking.


Laura (Tutti Dolci) says
I've been on a grilled pizza kick lately - this dough is a great GF option. Thin and crispy is the best! :)
Alanna says
I would LOVE to know how this dough works grilled!
london bakes says
This crust!! It looks perfect and everything that I want from a pizza crust, gluten-y or non-gluten-y!
Alanna says
Aw, thank you Kathryn! :)
Sarah @ Snixy Kitchen says
I can attest to the crispy deliciousness of this pizza dough. Having sampled two versions along the way and this final one, I can say with confidence that if you opened a pizza shop on this crust, I'd eat there weekly. Thank you so much for sharing the recipe so now I can eat it all the time at home! (PS. I love that new bowl. One day you'll wake up and all your pretty bowls will be MISSING. Dun dun dun).
Alanna says
Haha! You should be the one to worry with your Heath collection. No one's jealous.
I may have fallen asleep last night dreaming of homemade sausage pizza... January project??
Elle says
And what make is that bowl, btw? It really IS gorgeous - is it Heath?
Alanna says
Thanks! It's actually from CB2. :)
Tori Cooper says
This looks amazing! Thanks for all of the helpful tips.
Alanna says
Thanks Tori!
Becky Winkler says
Is that goat cheese and Brussels sprouts?? You're killing me.
Alanna says
:D
Ksenia @ At the Immigrant's Table says
The dough and featured topping here look absolutely amazing (and the raving endorsement from a fellow taste taster must count for something!). I really appreciate that you've taken the time to explain the role of each flour, and why it's essential - or what it can be substituted for. It really makes GF baking a bit more approachable! Also, have you ever tried baking with psyllum husk? I never have, but I hear what it does is similar to starches - and maybe chia seeds?
Alanna says
Thanks so much for the kind note Ksenia! I've been baking a GF bread that uses psyllium and it is the bomb. I'm also curious how psyllium would work in this crust... hmmmm!!
Katie Fiore says
Yay! Finally a GF recipe without all the gross fillers. Thank you!
Alanna says
Haha, thanks Katie!
Laura (Blogging Over Thyme) says
Your photography is ridiculously stunning! Seriously. It blows me away.
Alanna says
Aw! You're one to talk.
Christine says
I love making gf pizza with chia seeds - they help so much! Your version looks awesome!
Alanna says
Oh, cool! Now stalking your site for pizza crust recipes...
Valerie Gamine says
I've made a gazillion pie crusts yet I'm uncharastically timid when it comes to pizza crusts (the yeast, mayhaps?). This recipe actually looks fun! I love to get my hands, literally, into the food I prepare. Plus it's healthy-ish, so I'm okay with inhaling more than a few trial slices. :-)
Alanna says
Pizza crust is way easier than pie dough, so no need to fear it! Just use fresh yeast and it won't let you down. I wish we lived closer and could have a pizza party. Someday I hope. :)
Lindsey Johnson says
Gasp! It's just so gorgeous! Totally making this for Friday pizza night with my family. Cannot.wait.
Alanna says
That would just make my day and I'd love to hear what you think of it. I've been in awe of your beautiful pizzas and hope to try those crazy awesome crusts, too.
Cathleen says
Your photos are so gorgeous, I can't even stand it. I am always looking for the perfect pizza dough, and I think this might be it!
Alanna says
D'awww! Thank you Cathleen. :D
Vanessa says
How thrilled was I to see this in my Inbox today! I've tried several GF crusts and they've been awful, so I can't wait to try this one! Thank you, thank you for your intrepid GF experimentation! You made our day!
Alanna says
Yay! Please let me know if you give this one a go - I'm dying to know how the recipe will translate in someone else's kitchen.
Karishma says
Yum, that pizza dough looks amazing! I can really appreciate how much time you've spent perfecting the recipe - I'm sure it's delicious!
Alanna says
Thanks Karishma!
Kimberly/TheLittlePlantation says
The crust looks amazing. I will try this over Christmas. Yum, I can't wait. Thanks for sharing this fab recipe. K
Alanna says
Yay! Thank you! Let me know how you like it. :)
Hendrickson says
This sounds so amazing and I have been dying to find a GF and other allergy free pizza crust. My dilemma is I am also allergic to yeast. Please tell me there is a substitute for the yeast that I can use??? I want to make this tomorrow if possible! :) one can hope!
Alanna says
I don't know any substitutes for yeast. You could try a baking powder based biscuit dough. Or you could make a socca pizza if you can do beans (search this site). Good luck!
Susan says
What substitution would you suggest for the GF oat flour (due to oat allergy)?
Alanna says
I would try sorghum or brown rice, or a GF AP blend.
kristie {birch and wild} says
Oh, this looks amazing!
Alanna says
Thanks!
Liz says
This is definitely the best GF crust I've read. Thank you for your hard work in development. I have several friends that are GF and I am happy to both pass it on, and have a crust to make for them when it's homemade pizza night.
Alanna says
Sweet! Thanks, Liz.
Vanessa says
If we could kiss you all the way from New York City we would! This recipe is the bomb! I've tried a couple GF crusts before this one and they were too soft and sweet. Also tried a couple pizzerias in the city offering GF crusts and ... ditto. I always feel sick after, like I have a rock in my stomach. Tonight I feel great! We made four personal pizzas and my two kids (4 and 9) formed their own crusts. All turned out perfectly! I love that there are no gums and I've been trying more GF bread recipes that use chia. Seems to work like a charm! Since my husband and I are vegan, we topped ours with leftover homemade tomato sauce, mushrooms, fresh garlic, dollops of fresh pesto and when they came out, small dollops of homemade cashew cheese (which tastes *just* like goat cheese in our foggy vegan minds). Then we drizzled on some white truffle oil and our heads exploded. Thank you, thank you! It was so nice to succeed at pizza at home, and GF no less! Please share the GF breads you've been baking. I have one that's very good and vegan, but does use a lot of starches and xanthan gum. Would love to know what you're using, especially after having tasted this crust!
Alanna says
I totally feel you about the post-gf-pizza-crust-rock-in-stomach - I've been there! I'm so glad you like this one - thank you for the great feedback!! Your toppings sound SO good. I love cashew cheese! I've been making Josey Baker's Adventure Bread (recipe on davidlebovitz.com) which is GF, vegan, and super healthy, no gums or starches. I'm hoping to post a variation that I've been making soon, so thanks for the encouragement. :)
Claudia says
This is hands down THE best pizza crust recipe in all the world, gluten free or not. Every time I make one of your recipes I am reminded just why you are one of my most favorite bloggers. Thank you for yet again rocking my socks off.
Alanna says
Whoa, that is high praise! Thank you for the incredibly sweet words Claudia! <3
Daria Wrubel says
This crust (and the brussels sprouts and three cheese toppings) were a big hit as our Christmas appetizer, but now I'm ready for more Alanna-approved topping suggestions. Any more on the way?
Alanna says
Aw, thanks for giving the recipe a go Daria! I have some other pizza recipes on this site that you might like (just search for "pizza" and they'll come up). I often turn to the Cheeseboard cookbook for inspiration! xoxo
Dori says
Your pictures are so great. Congratulations from Spain.
Alanna says
Aw, thanks!!
Claudia says
We are still obsessed with this recipe, it pretty much makes an appearance on our dinner table at least once a week. Anyway, recently we have been using the gram measurements, but I noticed that the grams for the 1/2 cup of sweet white rice flour is the same as the 3/4 cup of oat flour. I have been adjusting the gram amount to match the amount of the millet flour instead, and usually end up having to add another tablespoon of brown rice flour in the end as the dough comes out a tad too wet. Are the gram measurements as listed in the recipe accurate?
Alanna says
Hi Claudia! Oh, I'm so glad you're enjoying this recipe - that makes me so happy! I just re-weighed my sweet rice flour and I got roughly the same result (75 g this time). Sweet rice flour tends to be heavier than both millet and oat, hence a smaller amount will weigh the same as more oat. But this recipe isn't set in stone, so whatever you're doing, keep doing it as it seems to be working! :) Thanks so much for the great feedback and question.
Sparky says
Can you or do you make a large batch of all dry ingredients (proportionally correct), store in an airtight container for convenience? This sounds amazing, have already printed out and will make this weekend.
Alanna says
I love that idea! I don't see why that wouldn't work. Please let me know how you do it and I'll add it into the recipe - genius!!
Xam says
I recommend a printable option like most bloggers/sites supply. I have only been able to try one of your recipes because I cant keep running back and fourth to my office to look at my desktop. The day I waited for my husband so I can use his tablet I ended up with a terrible dish because in the midst of scrolling and un-sleeping the ipad, I skipped a step.
Your photos look great, so does your website and the recipes look amazing! It should be more user friendly so readers want to try them. Just a thought :-)
EWray says
I have tried the dough several times and it has never let me down !!
But everytime I bring up the recipe the same thought comes to mind ...
WHAT ARE THE TOPPINGS ON THE PIZZA IN THE PICTURE!? 😃
It looks so light and healthy for a pizza and I would absolutely love to try the whole recipe !
If possible please let me know how to finish that pizza once my favorite dough is done! ...
THANKS
Alanna says
Yaaayyyy! That's my brussels sprout pizza and the recipe is here: https://bojongourmet.com/2014/12/gluten-free-brussels-sprout-pizza-lemon-chile/. I'll update this post with a list of pizza recipes - thanks for the nudge! ;)
Jenn @ Peas and Crayons says
I cannot WAIT to make this! I have to find the flours first but once they're in my pantry it's on like donkey kong! <3
Alanna says
Haha, awesome! LMK how you like it. :)
Caterina says
Holly molly is this crust ever delicious! I generally leave the plain portion of the pizza crust uneaten cause I'm all about the toppings but this was so flavourful and crisp I ate every bit of that crust. YUM!!!! Easy to make too!
Jenny says
This looks beautiful! I've been looking for a gluten-free crust that actually has nutritional value, and I love the blend of flours used!
Jim says
Thank you thank you thank you for finally explaining the reasons for the different flours! I've been searching for the "whys" instead of just throwing different combinations together and wondering what the reasoning behind it is. I'm excited to explore the rest of your site and start trying new recipes... and start understanding how it all works together.
Amanda | What's Cooking says
I made this tonight and I almost shed a tear of joy to finally find a gluten free, vegan baked good that mot only didn't fail me, it was phenomenal! I've had success with some gf waffles and pancakes, but anything beyond that has been a sadface. Thank you ,thank you for trying and trying so you could share this. I actually subbed almond flour for the sweet rice (because I thought I had everything and realized I didn't have that) and it worked out well! I always find it funny when someone comments on an old recipe of mine because cooking is such an evolution, but this I think will become a gold standard for me. This was amazing. xo
Joanna says
Hi, I'm really excited to try this recipe! Do you think I could make this with a dough hook in a standing mixer? Thanks so much!
Alanna says
Hi Joanna, You could probably use the dough hook or paddle; the dough doesn't get kneaded though, just stirred until it comes together, so it's just as easy to use a bowl and spoon! ;)
Joanna says
Thank you Alanna - It did come together amazingly easily and my whole family loved it!! I'm thrilled to have it in the rotation.
Alanna says
Yay! So glad you all liked it. :D
Didina Gnagnide Angorinie says
Can I parbake some crusts and then freeze them? Has anyone ever tried? Or would they turn hard? I have always used this trick with gf pizzas to have some crusts ready just in case but my previous recipe used a gf sourdough, which probably helped.
Alanna says
I think that would probably work - what a smart idea! Let me know if you give it a try!
Kate says
This crust is by far the best GF crust I've tried. So light and crisp with great flavor! This is definitely going to become a staple recipe.
Alanna says
I'm so glad you liked it! I've made it zillions of times myself. Thanks for the kind note, I really appreciate it!
Crystal says
Really pleased with this recipe! Last time I made pizza I used a recipe titled "best pizza crust ever" and it was horrible, the dough was tough as nails, I could barely work with it, it didn't require any rising time which made no sense, it cracked when it baked, I could barely cut it with a pizza roller, and you nearly broke a tooth off trying to chew it. Funny how this recipe, which doesn't boast being the best but rather boasts nutrition, is sooo much better than that other one! Thank you for creating a recipe that is the best gluten free pizza crust recipe and is also healthy and filled with whole grains. I was able to work with it easily, it smelled amazing, rose great, turned out crisp on the bottom just like a regular pizza crust, but was totally chewable and delicious! Everyone loved it, thank you thank you!!
Alanna says
Aw I'm so glad you love the recipe!! That's so disappointing about the other one that you tried, especially after the author hyped it up so much. Thank you so much for giving this one a go and for taking the time to write such a kind review, I really appreciate it! Here's to many more delicious GF pizzas in your future!
Sara says
This was fantastic! I didn’t have brown rice flour so subbed extra sweet rice. Also did not have a baking stone or pizza peel. We doubled the recipe and cooked two large pizzas directly on sheet pans. It required a longer cook time (about 20 minutes) but still turned out beautifully even with the modifications. This will be my go to GF pizza recipe in the future! Thanks for another amazing recipe.
Alanna Taylor-Tobin says
I'm so glad the pizzas were a hit and that the recipe worked well baked directly on a sheet pan. Thanks so much for the sweet note and rating!