This gluten-free graham cracker crust is so simple to make with just 4 ingredients, and it can be vegan and refined sugar-free too. I've also shared the best gluten-free graham cracker brands for making graham cracker crust, plus a recipe for homemade gluten-free graham crackers if you're feeling adventurous.
Use this tender, buttery, flavorful crust for all your favorite pie and tart recipes, such as this gluten-free chocolate pie, or use it to make gluten-free small-batch cheesecake.
Ever since I shared my favorite gluten-free graham cracker recipe a few years back (and blueberry cheesecake popsicles that used them) I've been wanting to turn them into a gluten-free graham cracker crust for pie recipes. Problem was, a batch makes exactly the right amount of graham crackers for a crust, and I could never resist nibbling a few (or... a lot). Before I knew it, the batch would be gone and I was still crustless.
Finally I smartened up and made a double batch; half for munching with tea, or nut butter, or tahini chocolate pudding. I'm so glad I did. Most graham cracker crusts can be meh, but when made with these tasty AF gluten-free graham crackers, the result is a deeply flavorful, crunchy, salty-sweet, cinnamon-kissed crust.
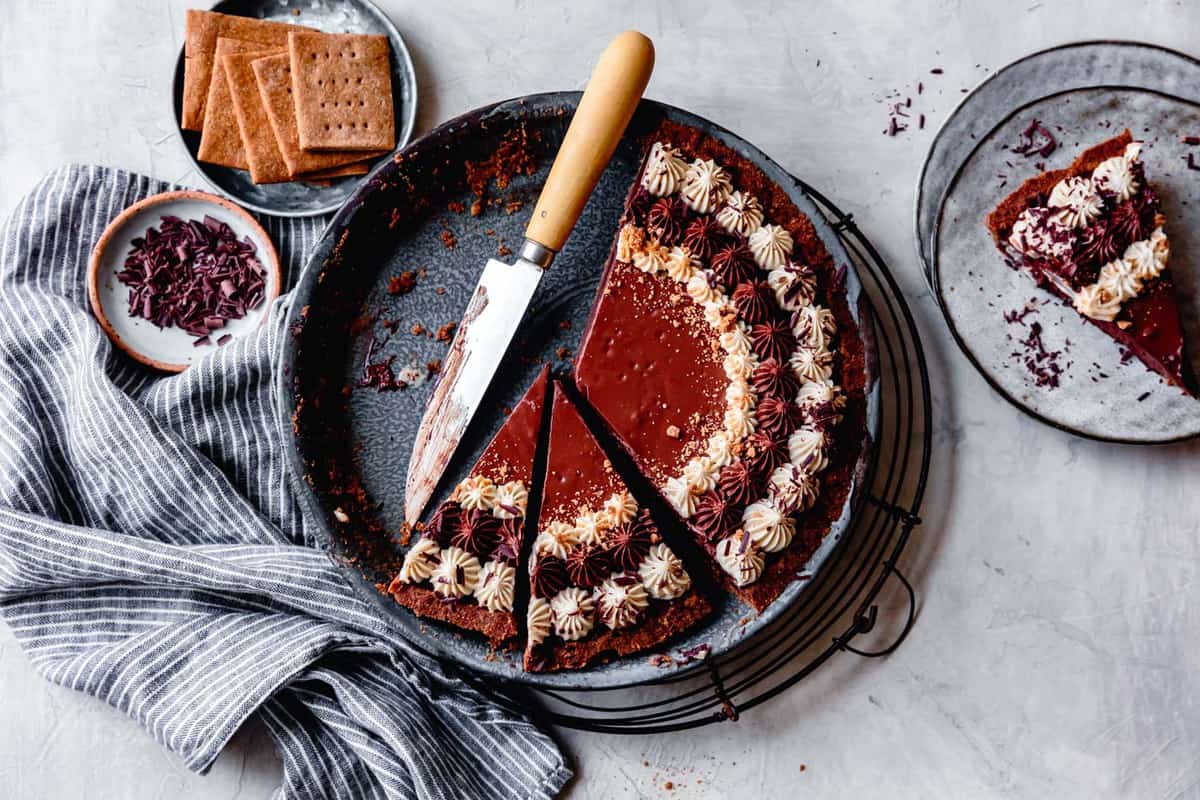
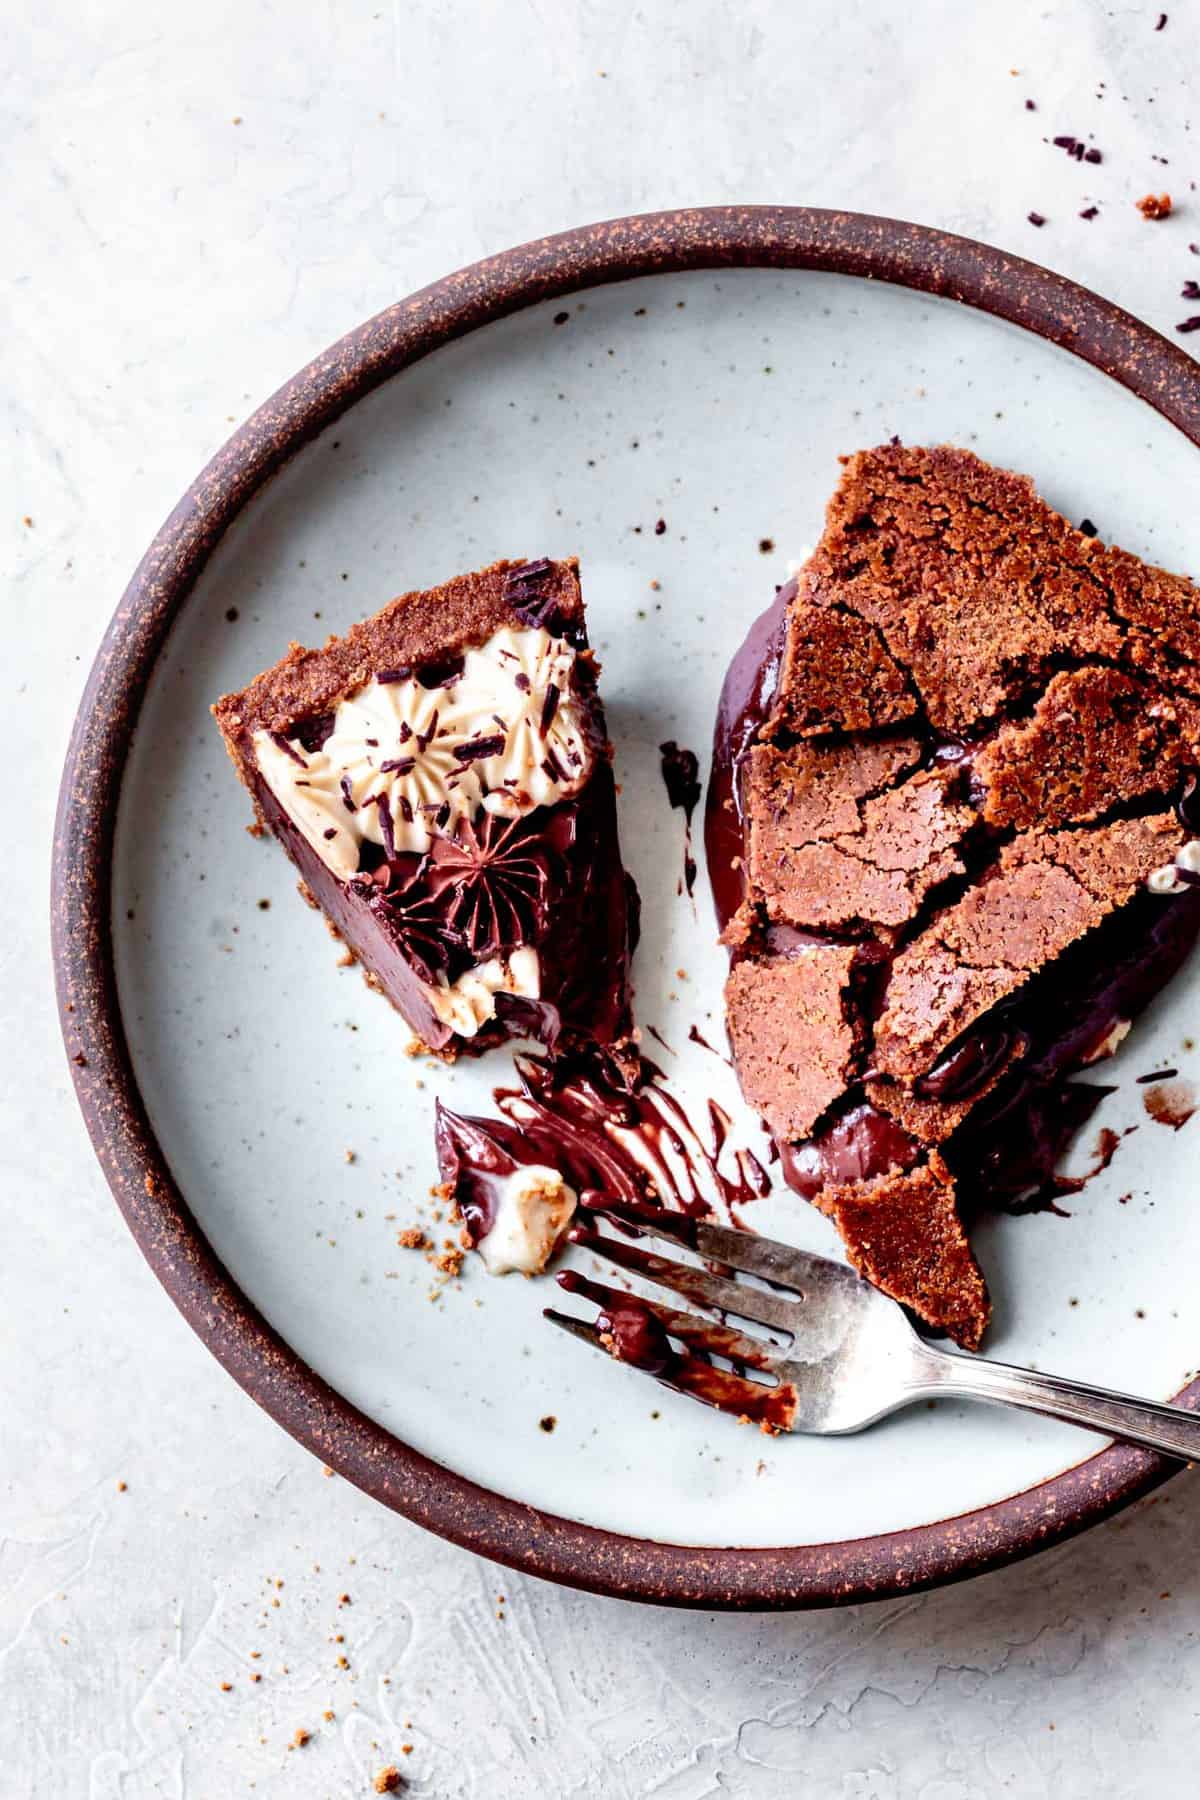
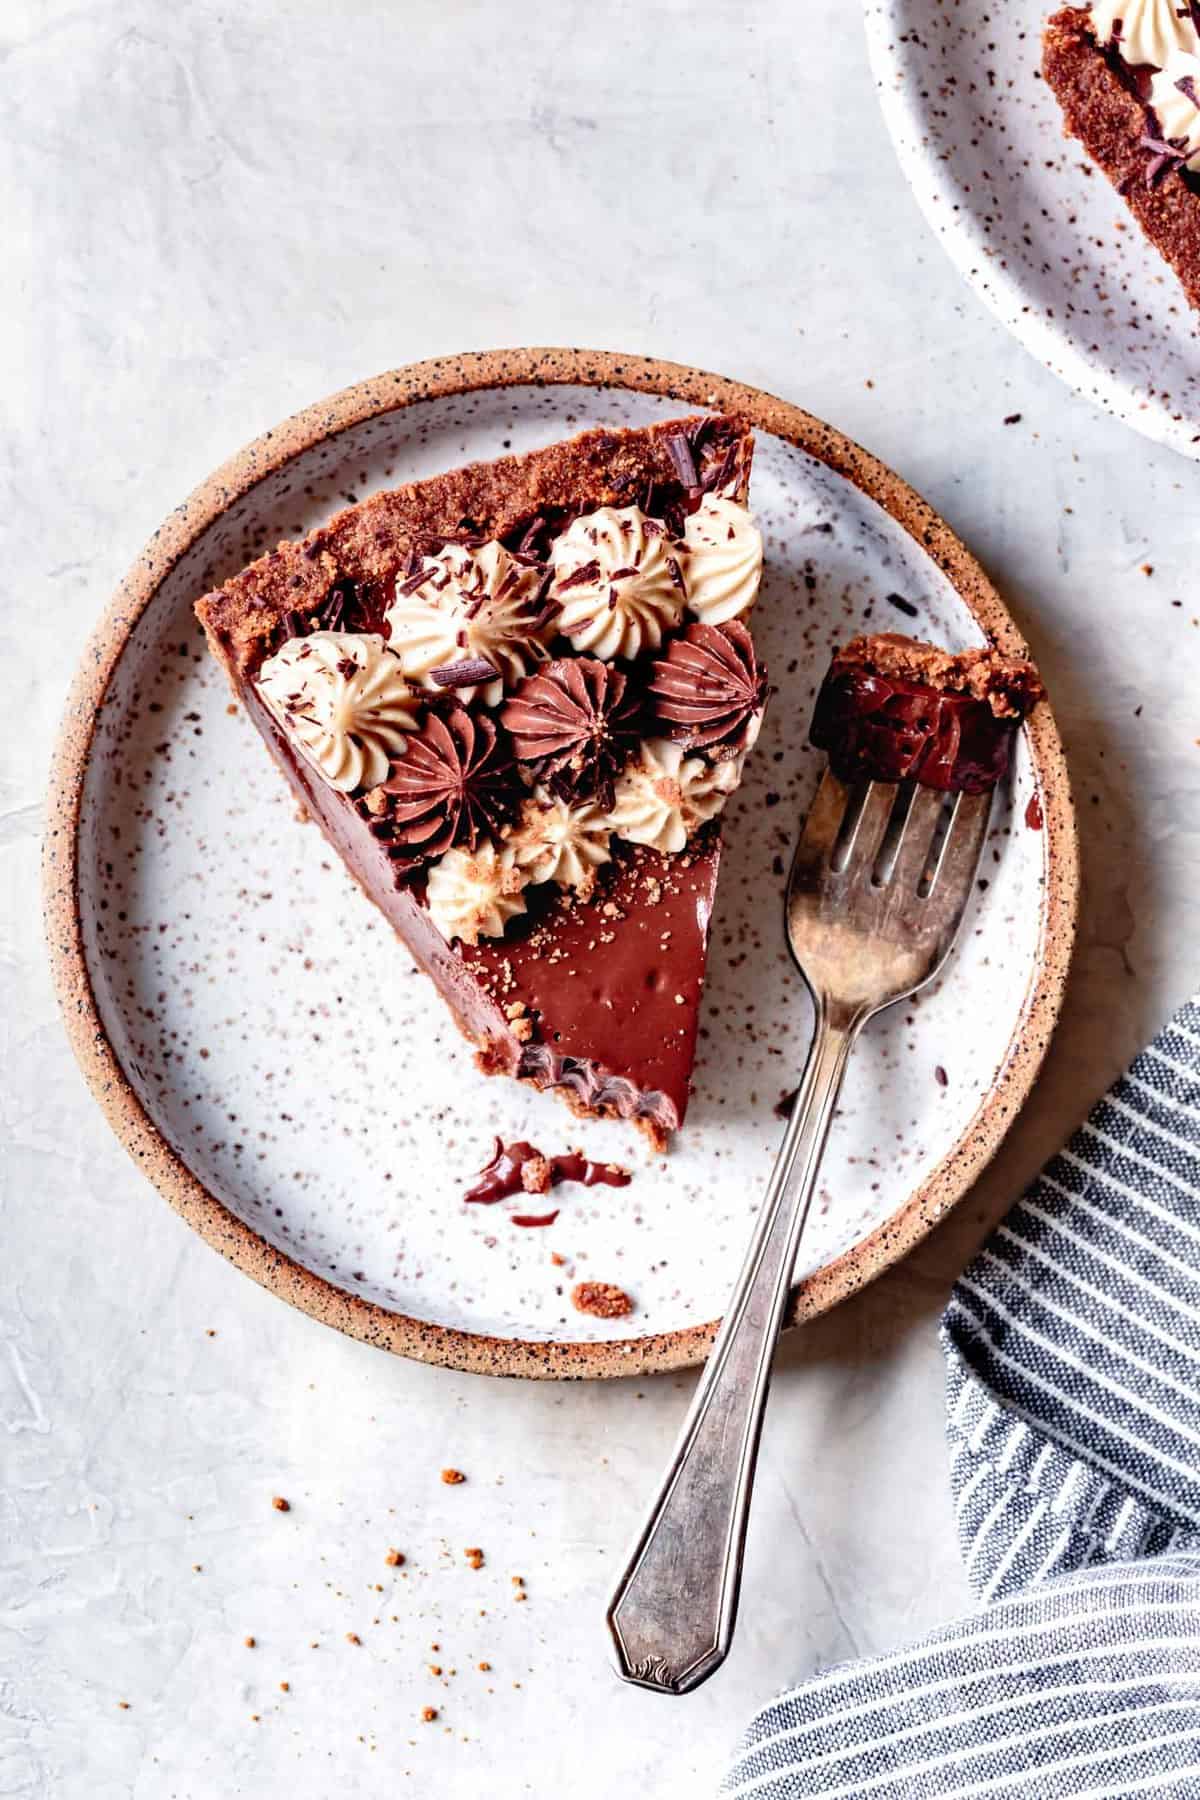
Here, I used paleo chocolate pudding and paleo cream cheese frosting to create a vegan chocolate pie kissed with maple, vanilla, and peanut butter. Despite all that goodness inside, Jay said, "the crust is *actually* my favorite part!"
High praise indeed!
Ingredients and Substitution Suggestions
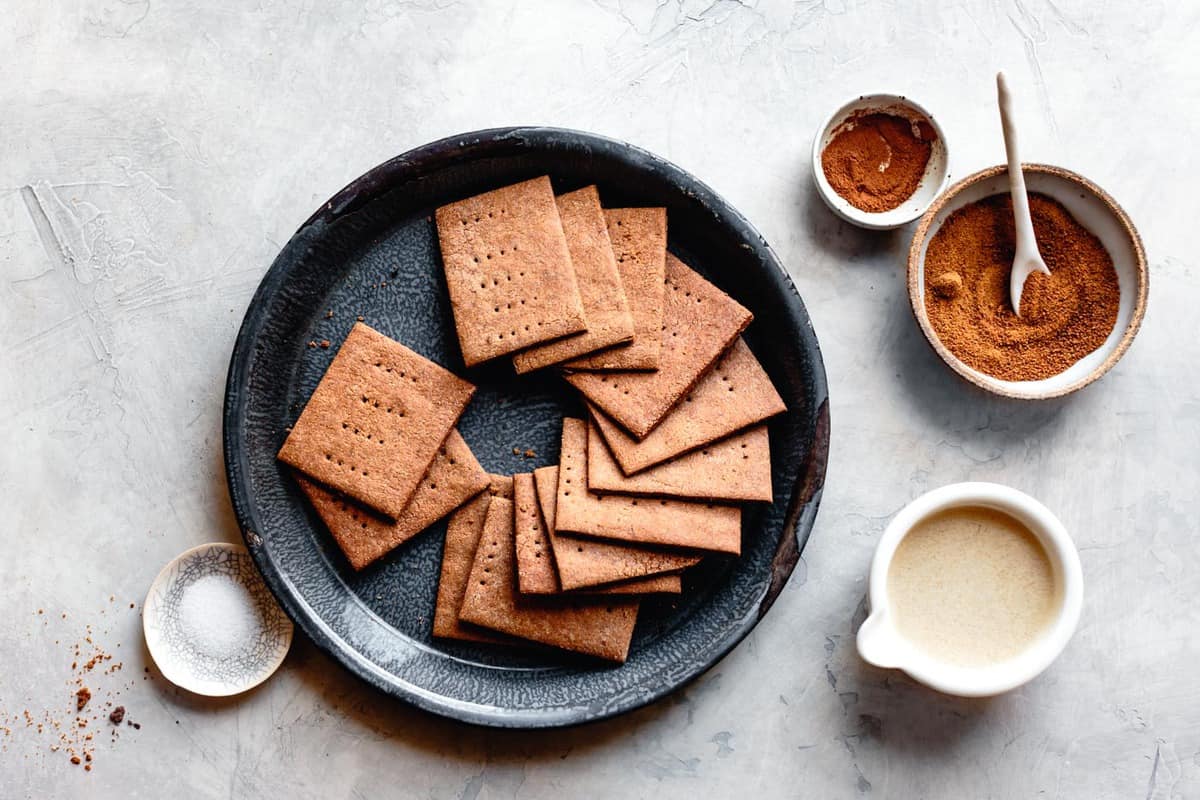
- This recipe is all about the graham crackers, so be sure to use ones you love the taste of. I've listed some of my favorite brands below. Here I used my gluten-free graham cracker recipe because I love the flavors and friendly ingredients list. One batch makes the perfect amount of gluten-free graham cracker crumbs for crust, but I recommend doubling the recipe in case you need to snack on some first. (Spoiler: you will.)
- Melted butter brings the crust together. Use vegan butter if you like to make the crust dairy-free. Here I used Miyoko's vegan butter.
- A little sugar adds a bit of extra sweetness and richness. I used coconut sugar here to keep the crust refined sugar-free, but any sugar will work.
- A little cinnamon adds extra flavor and salt sharpens the flavors. Feel free to add any other flavors you like: vanilla, nutmeg, cardamom, and ginger would all be nice!
What are the best gluten-free graham crackers for making crust?
Here are my top picks for storebought gluten-free graham crackers and how they stack up to my homemade GF graham crackers:
- My favorite gluten-free graham cracker recipe(vegan & refined sugar-free options): Tender and crisp, with rich flavor from teff and oat flours, honey, vanilla, and cinnamon. Friendly to a variety of restricted diets.
- Made with teff, oat, and sweet rice flours, corn starch, brown or coconut sugar, honey or maple syrup, cinnamon, baking powder, baking soda, salt, butter (dairy or non-dairy), vanilla. See the post for more substitution suggestions in case you don't have the suggested flours!
- Nairn's Gluten-Free Oat Grahams (vegan): These have a delicate, crisp texture full of oat flavor. Love the minimal ingredient list.
- Made with gluten-free oats, palm oil, sugar, golden syrup, tapioca starch, baking soda, and salt.
- Schär Honeygrahams (dairy-free): Despite the unusual ingredient list, these taste remarkably similar to classic graham crackers; crisp, airy, and not-too-sweet.
- Made with corn starch, brown sugar, corn flour, palm fat, soy flour, soy bran, honey, modified tapioca starch, ammonium bicarbonate, baking soda, salt, caramelized sugar.
- Pamela's Honey Grahams: Crispy and classic with whole grain flavor and warm notes of molasses and honey.
- Made with butter, brown sugar, brown rice flour, sorghum flour, white rice flour, tapioca starch, oat bran, molasses, honey, GF natural flavors, baking soda, salt, baking powder, xanthan gum, cinnamon.
- Kinnickinnick S'moreables Graham Style Crackers (vegan): Not my favorite, texture-wise, but these are easy to find, allergy-friendly, and will do the trick.
- Made with pea starch, palm oil shortening, brown rice flour, potato starch, brown sugar, sweet rice flour, tapioca starch, water, cane sugar, rice bran, molasses, tapioca syrup, salt, sodium bicarbonate, pea protein, natural flavor, pea fiber, sunflower lecithin, inulin, mono calcium phosphate, cellulose, guar gum
Generally speaking, is graham cracker crust gluten-free?
Usually the answer is no, unless specified otherwise. Conventional graham crackers are made with wheat flour. In fact graham flour is a type of wheat flour that's full of hearty wheat germ and wheat bran.
In this case, if you use gluten-free graham crackers, the crust will be gluten-free! Do take care to source certified gluten-free ingredients: gluten-free graham crackers if using store-bought, gluten-free flours and ingredients if making your own.
How to Make a Gluten-Free Graham Cracker Pie Crust
Once you have your graham crackers baked or bought, you're almost there!
Make-Ahead
Wrap and freeze an unbaked crust for up to a month or two. When you're ready for pie, bake the crust as directed, increasing the bake time by 5 minutes as needed.
No-Bake Graham Cracker Crust
No oven? No problem! Just chill the unbaked crust for an hour or two. This will firm up the butter and allow the starches to absorb moisture. The crust may be more delicate when cut, but it should do the trick!
What to make with graham cracker crust?
Fill this crunchy GF crust with any of your favorite pie fillings. Here are some of mine:
- vegan key lime pie
- pumpkin pie
- sweet potato pie
- banana cream pie
- vegan chocolate pie
- classic cheesecake
How do you like to fill this gluten-free graham cracker crust? Let me know in the comments below!
*Bojon appétit! For more Bojon Gourmet in your life, follow along on Instagram, Facebook, or Pinterest, purchase my gluten-free cookbook Alternative Baker, or subscribe to receive new posts via email. And if you make this gluten-free graham cracker crust recipe, I’d love to know. Leave a comment and rating below, and tag your Instagram snaps @The_Bojon_Gourmet and #bojongourmet.*
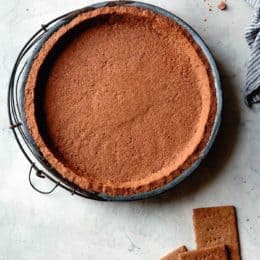
Crunchy 4-Ingredient Gluten-Free Graham Cracker Crust
Print Recipe Pin RecipeIngredients
- 6 ½ ounces (185 g) graham crackers, vegan if desired (store-bought or 1 batch of my homemade gluten-free graham crackers) (1 ½ cups ground)
- 5 tablespoons (70 g) melted butter (vegan if you like, more or less as needed depending on dryness of graham crackers)
- 1 tablespoon (8 g) sugar (coconut sugar, brown sugar, or granulated sugar)
- ½ teaspoon ground cinnamon (optional)
- ¼ teaspoon salt, if using unsalted butter
Instructions
- Position a rack in the center of the oven and preheat to 350ºF.
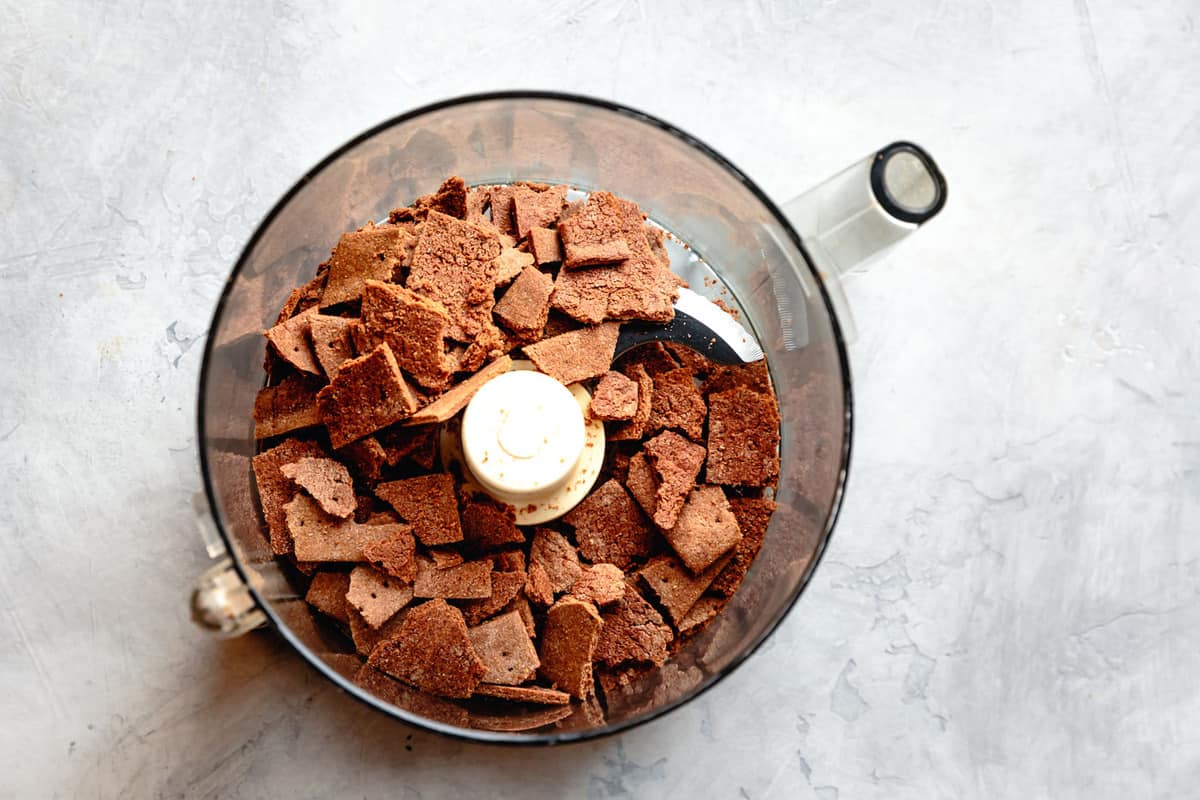
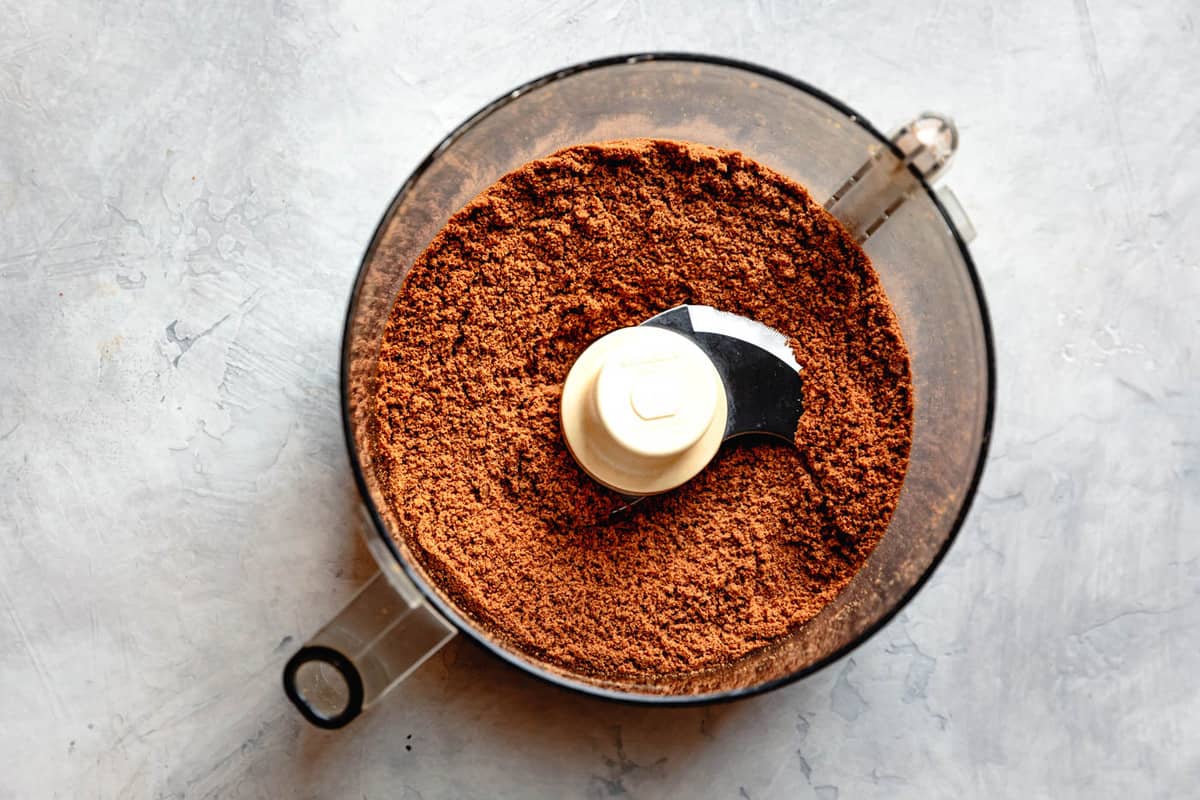
- Break up the graham crackers, place them in the bowl of a food processor, and pulse until ground. If there are any large pieces, use your fingers to break them up. You should have about 1 ½ cups of ground graham cracker crumbs.
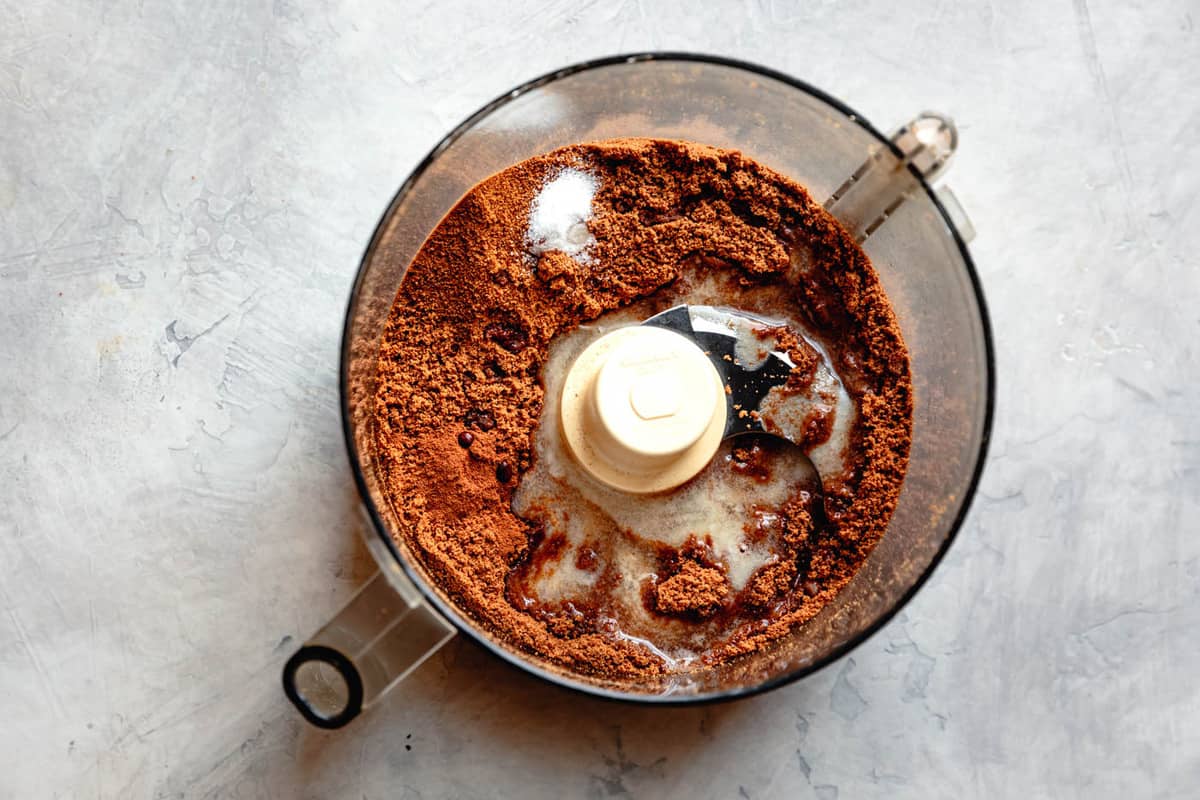
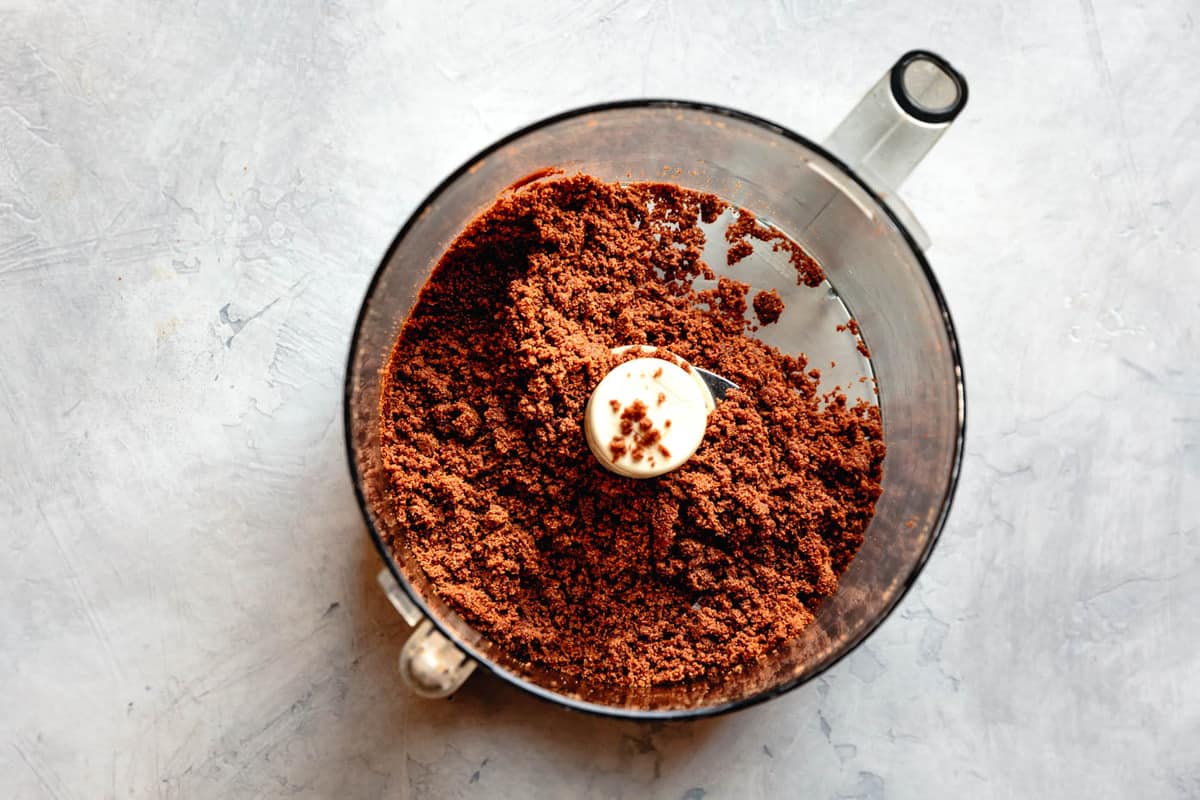
- Add 4 tablespoons of the melted butter and all of the sugar, cinnamon (if using), and salt. Pulse to combine.
- Give the dough a squeeze; it should easily hold together. If it feels dry, pulse in another tablespoon or two of melted butter until it holds together well. The amount needed can vary greatly depending on how absorbent your grahams are. My homemade graham crackers needed 5 tablespoons of melted butter.
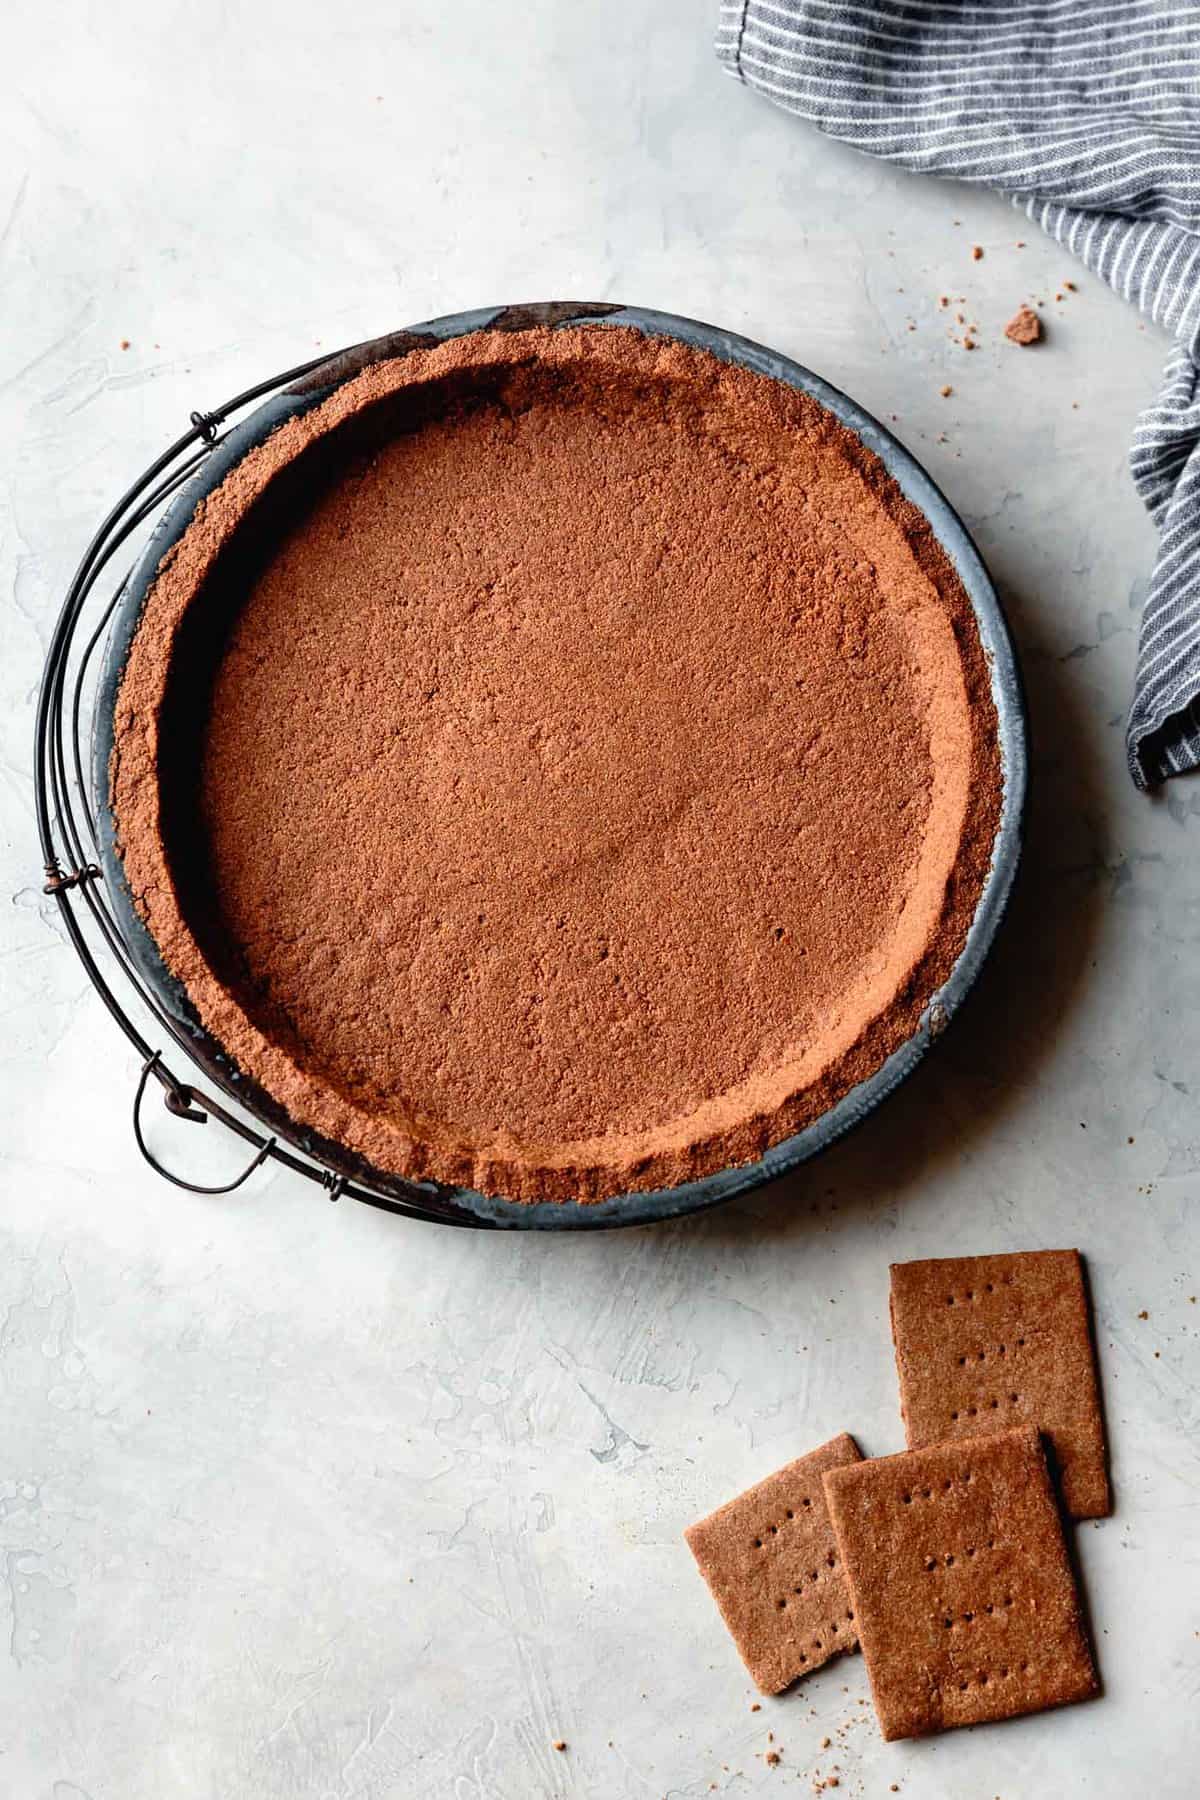
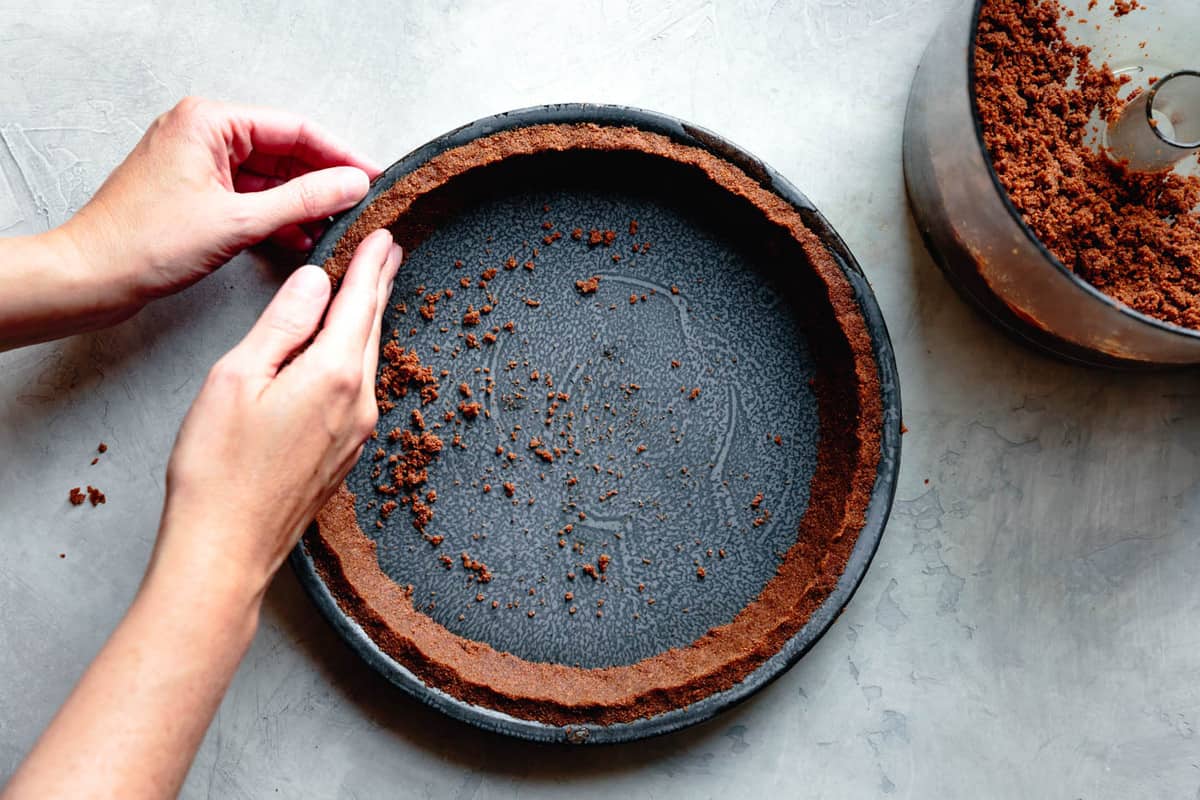
- Dump half of the crumb mixture into an ungreased 9-inch pie plate, tart pan, or springform pan. Use your fingers to press the crumbs into the sides of the pan, taking care to make the crust even and flush with the rim. I don’t recommend making a decorative rim as this may make the pie difficult to remove from the pan.
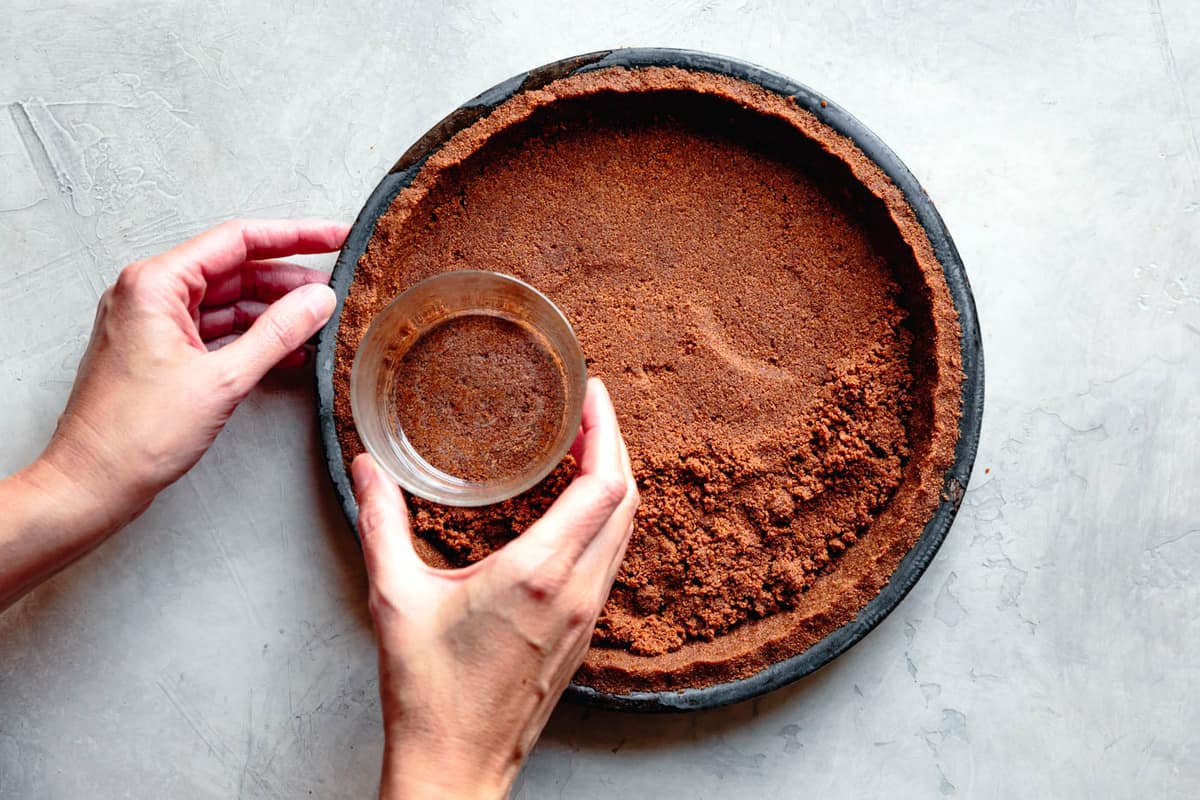
- Add the remaining crumbs to the bottom of the pan and press them into an even layer, keeping the edges square. Using a flat-bottomed glass will make this easier and tidier.
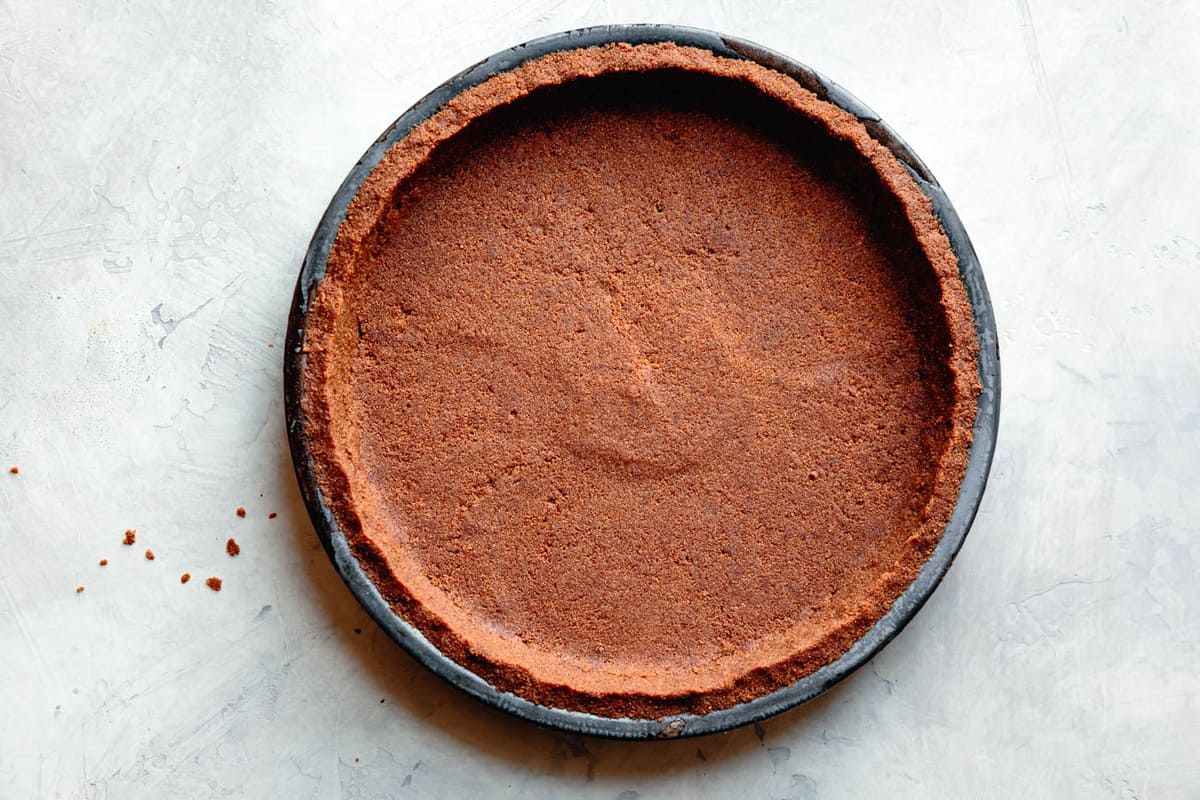
- Place the pie plate on a rimmed baking sheet and bake the crust until the edges are beginning to brown and the crust is fragrant, 12-18 minutes. It may puff or bubble slightly.
- Remove the crust from the oven and use the back of a large spoon or a flat-bottomed, heatproof glass to press the crust down. This will help it hold together better when cut.
- Proceed with your pie recipe!


Leave a comment and rating